Are you having trouble finding your recordings on the voice memos app on your iPhone? Then, you may want to transfer these voice memos to the Files app on your iPhone. When you transfer your valuable voice memos to the Files app on your iPhone, it becomes a breeze to organize and access them whenever you need.
Voice memos are incredibly useful for recording important thoughts, ideas, interviews, and more on your iPhone. However, as these memos accumulate, it can become challenging to keep them organized and easily accessible. Fortunately, the Files app on iPhones provides a powerful solution to efficiently manage your files, including voice memos.
The Files app is a pre-installed file management tool on iOS devices, starting from iOS 11 and later versions, including the latest iPhone models. It allows you to store, organize, and access various types of files conveniently. By transferring your voice memos to the Files app, you can create folders, categorize them, and even share them with others with just a few taps.
Read: How To Stop Sharing Photos With Devices Using Your Apple ID
Transfer Voice Memo to Files App On iPhone
You can transfer a single voice memo or multiple voice memos to the files app at a go. Let’s start by discussing how to transfer a single voice memo to the Files app on your iPhone.
First off, you need to open the Voice Memos app on your iPhone. If you’re not sure where it is, you can use the Search feature by swiping down on the Home screen and typing Voice Memos in the search bar. Once you’ve found the app, open it to access your voice memos.
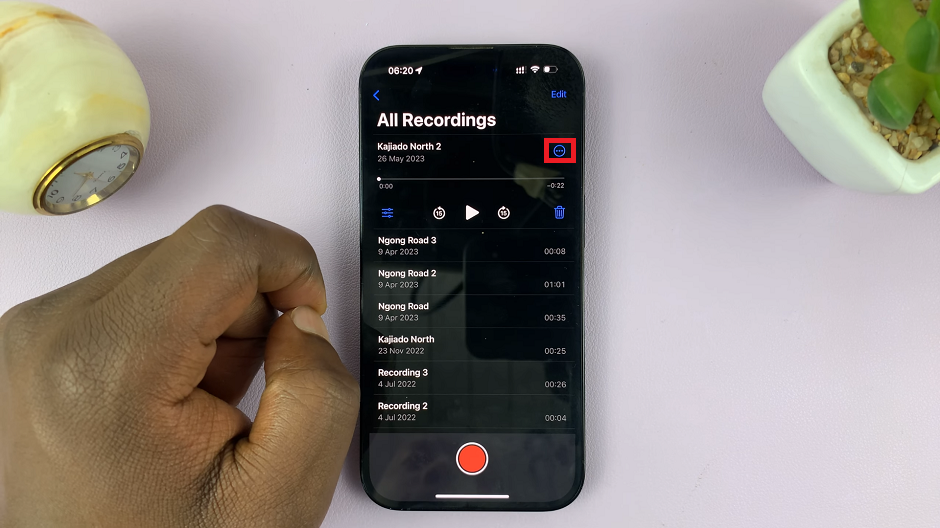
Next, tap on All Recordings and browse through your voice memos and choose the one you want to transfer to the Files app.
Again, tap on the voice memo and then tap on the three dots that appear at the top of the voice memo. This will give you a menu with a couple of options.
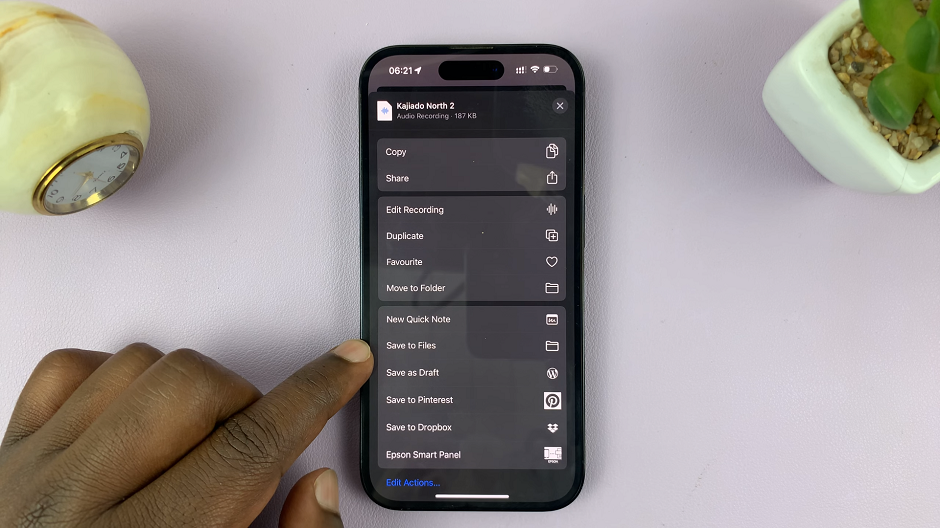
From the list of available options, scroll until you find Save to Files and tap on it. This action will prompt your Files app to open, allowing you to specify the destination folder for your voice memo.
In the Files app, choose the destination folder where you want to save your voice memo. If you want to create a new folder, tap New Folder and give it a relevant name before proceeding. In addition, you can also type in a new name for the voice memo.
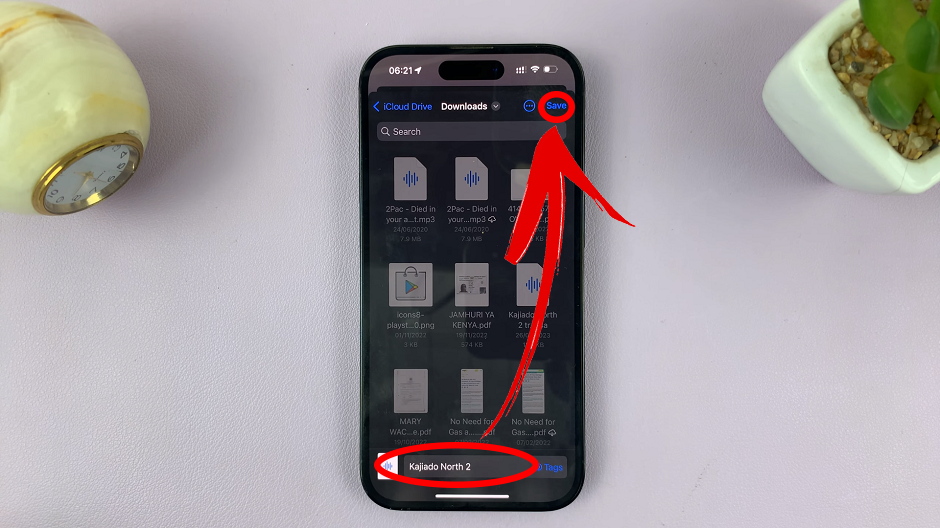
Finally, tap Save to complete the transfer. Your voice memo will now be stored in the chosen folder within the Files app, making it easier to find and organize them.
Transfer Multiple Voice Memos
If you want to move multiple voice memos, the process differs slightly.
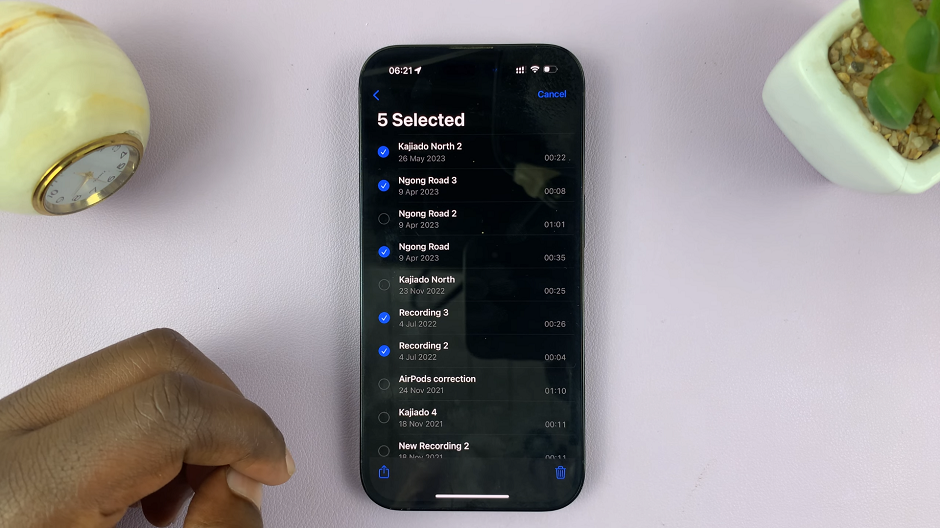
Again, you need to open the Voice Memos app on your iPhone to access your memos. Tap on All Recordings once again to see all your voice memos.
Next, simply tap on Edit in the top right corner and choose the memos you wish to transfer, using the radial buttons next to each one.
Once you’ve selected multiple voice memos you want to transfer, tap the Share icon, represented by a square with an upward-pointing arrow. The Share icon is usually located at the bottom left corner of the screen.
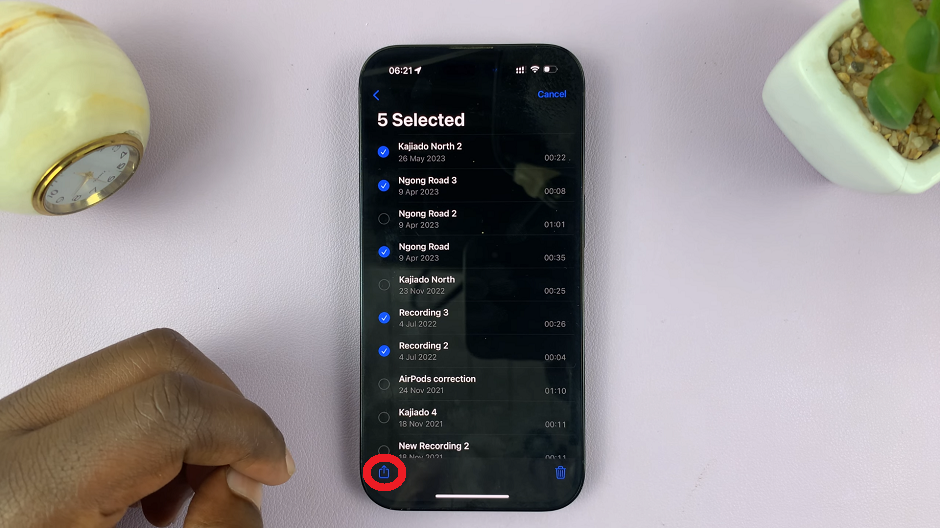
This will also give you a menu with a couple of options to choose from. From the list of available options, scroll until you find Save to Files and tap on it. This action will prompt your Files app to open, allowing you to specify the destination folder for your voice memo.
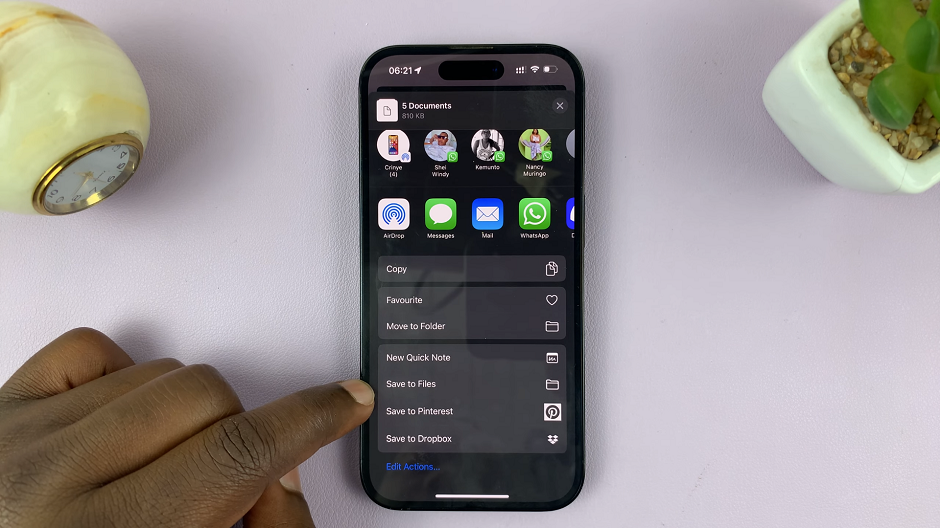
In the Files app, choose the destination folder where you want to save your voice memo. If you want to create a new folder, tap New Folder and give it a relevant name before proceeding. In addition, you can also type in a new name for the voice memo.
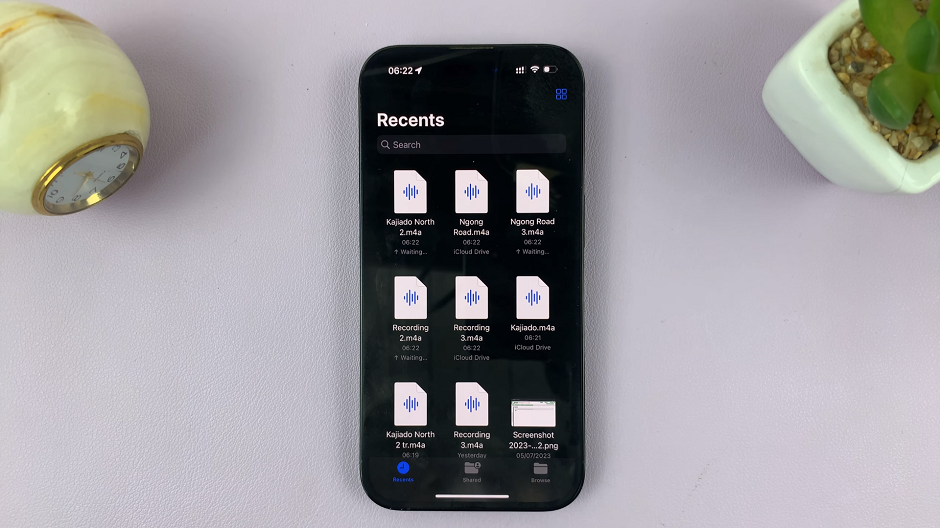
Finally, tap Save to complete the transfer. Your voice memo will now be stored in the chosen folder within the Files app.
Organize Your Voice Memos
Once you have transferred your voice memos to the Files app, you can create additional folders, sort them by date or topic, and arrange them for easy access. To create a new folder, simply tap New Folder within the Files app and provide a suitable name.
Access and Share Your Voice Memos
Now that your voice memos are organized in the Files app, you can access them anytime, even when you’re offline. Moreover, sharing them with others is straightforward – simply locate the voice memo you want to share, tap the Share icon, and choose your preferred sharing method, such as AirDrop, Messages, or email.
Say goodbye to scattered voice memos and embrace the power of the Files app to keep your digital life neat and well-organized. So, why wait? Start transferring your voice memos to the Files app today, and experience the convenience it brings to your daily life!
Also Watch: How To See Apple Watch Voice Memos On iPhone

