Today, you can easily export any HD quality movies to either your phone or desktop or even a service like Facebook or Vimeo.
As long as you start with a high quality video, three HD resolutions are available from which you can choose the resolution you want.
Today’s article I will highlight how to export a video from imovie in details.
In MacOS
This method is suitable in exporting a HD video to a folder that is on your Mac. Once the file is saved into your desired folder in your Mac, you can easily view or share it to any website like YouTube or Facebook.
To start your how to export a video from imovie process, Open your iMovies. Once it opens, in the Libraries pane, choose the video file that you want to export.
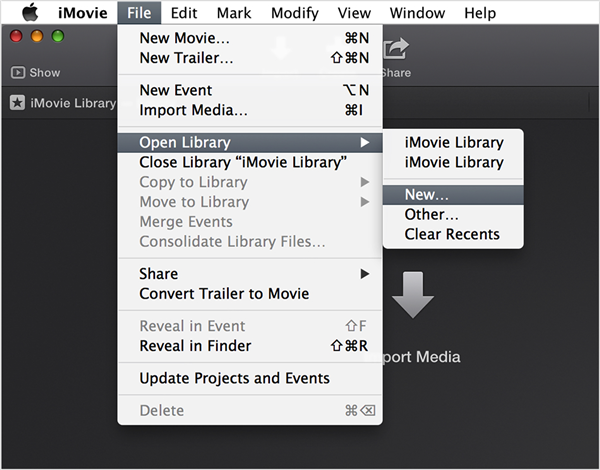
At the top-menu, click File then Share. In the Share menu, select File again, to complete the how to export a video from imovie process. In case you want to export it to a website like YouTube directly, select YouTube.
Exporting To A Website
In the new YouTube Publish your project to YouTube window, type the name of your video in the Title textbox.
You will also be required to enter your tags in the Tags textbox to help locating your video in the website easier.
In case you are exporting it to a website directly, you will be required to enter the category in the Category text field. You can also have the privacy settings changed by clicking Viewable to or Privacy menu.
Finally, before uploading your image into the website or the application, you will be prompted to sign in. Enter your credentials and click Next to start the upload. Once it is complete, a message saying Share Successful will appear.
Exporting To A File
At the top-menu, click File then Share. In the Share menu, select File again.
If you are exporting to a file, you will be required to pick your desired resolution from the available three resolutions. The first resolution is 720p (1080 *720). This is suitable for videos that upload quickly and do not require a lot of storage space.
We have the 1080p resolution (1920*1080). This is suitable for videos that are bigger and takes a long time to upload. The last resolution is 4K (4096*2160). It is suitable for videos that are larger than those with both 720p and 1080p resolutions. It takes a lengthy time to upload.
If you are exporting to a file, click Quality to set your video quality. To get a preview of how each setting affects the file size, click an option to see the file size beneath the preview. In case you want the best file without making your file large, choose High. In case you want to use ProRes which is Professional Quality meaning the file size is very large, choose Best.
If you are exporting to a file, under the Compress menu, choose your compression rate.
In-case you are worried about the file size, choose Faster. The quality will not be good but will be better than SD (standard).
If you prefer the clearest audio and video and not the file size, choose Best Quality.
Once you are through with editing the settings, Click Next. In the new how to export a video from imovie window, enter the name of the video then choose the destination storage folder in the next text field.
Click Save once you are through entering your details to complete the how to export a video from imovie process. After a few minutes, you will find your HD video in the folder that you choose. You can now easily share it to any website you wish.
Using iOS
Open iMovie application. Once your project window opens, if you there is a project you were working on, on the top-left corner tap Done.
At the to-menu, tap Videos. Choose the video you wish to share. At the bottom of the screen, tap Share. The Share icon resembles a square with an arrow pointing up, to complete how to export a video from imovie process.
You can choose either choose a website or application to which you want to export your video to or save it in a folder in your phone.
Exporting To A Website
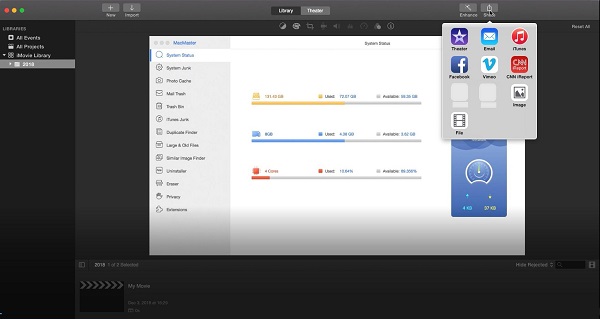
To export it to a website, click Share then choose the icon of the website you want to share in.
In the new YouTube Publish your project to YouTube window, type the name of your video in the Title textbox.
You will also be required to enter your tags in the Tags textbox to help locating your video in the website easier.
In case you are exporting it to a website directly, you will be required to enter the category in the Category text field. You can also have the privacy settings changed by clicking Viewable to or Privacy menu.
Finally, before uploading your image into the website or the application, you will be prompted to sign in. Enter your credentials and click Next to start the upload. Once it is complete, a message saying Share Successful will appear.
Exporting To A File
At the top-menu, click File then Share. In the Share menu, select File again.
If you are exporting to a file, you will be required to pick your desired resolution from the available three resolutions. The first resolution is 720p (1080 *720). This is suitable for videos that upload quickly and do not require a lot of storage space.
We have the 1080p resolution (1920*1080). This is suitable for videos that are bigger and takes a long time to upload. The last resolution is 4K (4096*2160). It is suitable for videos that are larger than those with both 720p and 1080p resolutions. It takes a lengthy time to upload.
If you are exporting to a file, click Quality to set your video quality. To get a preview of how each setting affects the file size, click an option to see the file size beneath the preview. In case you want the best file without making your file large, choose High. In case you want to use ProRes which is Professional Quality meaning the file size is very large, choose Best.
If you are exporting to a file, under the Compress menu, choose your compression rate.
In case you are worried about the file size, choose Faster. The quality will not be good but will be better than SD (standard).
If you prefer the clearest audio and video and not the file size, choose Best Quality.
Once you are through with editing the settings, Click Next. In the new Save As window, enter the name of the video then choose the destination storage folder in the next text field.
Click Save once you are through entering your details. After a few minutes, you will find your HD video in the folder that you choose. You can now easily share it to any website you wish completing the how to export a video from imovie process.
Also read: Best Video Editor On Android / Best Apps For Android Video Editing

