The Google Pixel Tablet offers a versatile and convenient way to consume media, browse the web, and work on the go. One of its noteworthy features is the auto-rotate screen functionality, which adjusts the screen orientation based on how you hold the device.
This can be incredibly useful when switching between portrait and landscape modes, but there might be situations where you want to have more control over the screen orientation.
In this guide, we’ll walk you through the steps to turn the auto-rotate screen feature on and off on your Google Pixel Tablet.
Watch: How To Connect Xbox Controller To Google Pixel Tablet
To Turn On/Off Auto-Rotate On Google Pixel Tablet
Quick Settings Shortcut
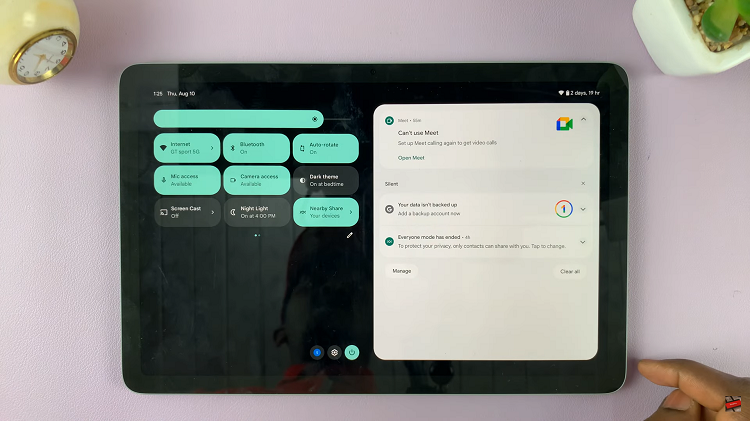
Firstly, unlock your Google Pixel tablet and swipe down from the top of the screen to reveal the notification panel. From here, you can access the complete Quick Settings menu.
Then, look for the icon that represents the auto-rotate screen. The icon might be labeled as “Auto Rotate.” Now, tap the auto-rotate icon to turn the feature on. Once enabled, the icon should change color or appearance, indicating that auto-rotate is active.

Now, if the feature is currently enabled, the icon should have an active appearance. Simply tap the icon to turn off auto-rotate.
From Settings
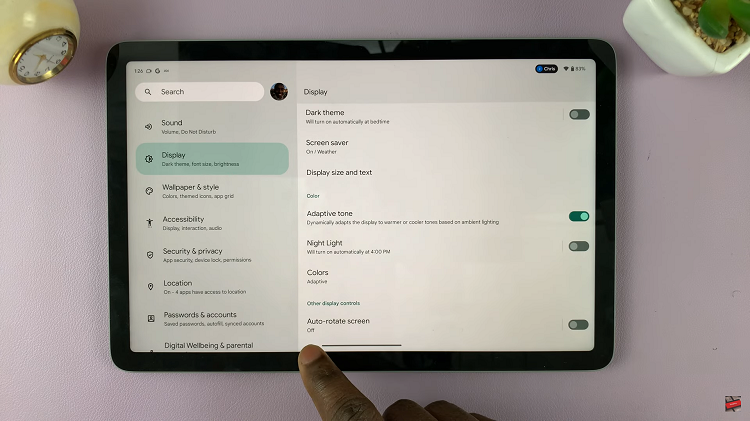
Open the “Settings” app on your Google Pixel Tablet. Next, scroll down the menu and select “Display” or “Display & Sound,” depending on your device’s software version.
Now, scroll down and look for the “Auto-rotate screen” option. Toggle the switch next to this option to turn auto-rotate on or off.

By following the steps outlined in this guide, you can easily toggle the auto-rotate screen feature on or off using the Quick Settings menu or the system settings. This gives you greater control over your tablet’s behavior and allows you to customize your viewing experience to suit your preferences.

