In this comprehensive guide, we’ll take you through the step-by-step process to mount your camera on a tripod like a seasoned pro.
Capturing sharp, stable images is a fundamental goal for any photographer or videographer. Whether you’re shooting landscapes, portraits, or action-packed scenes, a sturdy tripod can be your best friend.
But mastering the art of mounting a camera on a tripod isn’t just about attaching your gear and hoping for the best. It’s about understanding the principles of stability, balance, and precision.
Watch: Samsung Galaxy A55 5G: How To Add Multiple Clocks To Always ON Display
Mount a Camera On a Tripod
Before you can mount your camera, you need to select the right tripod for your needs. Consider factors such as weight capacity, height, portability, and stability. Investing in a high-quality tripod that can support the weight of your camera and lens combination is essential for achieving steady shots.
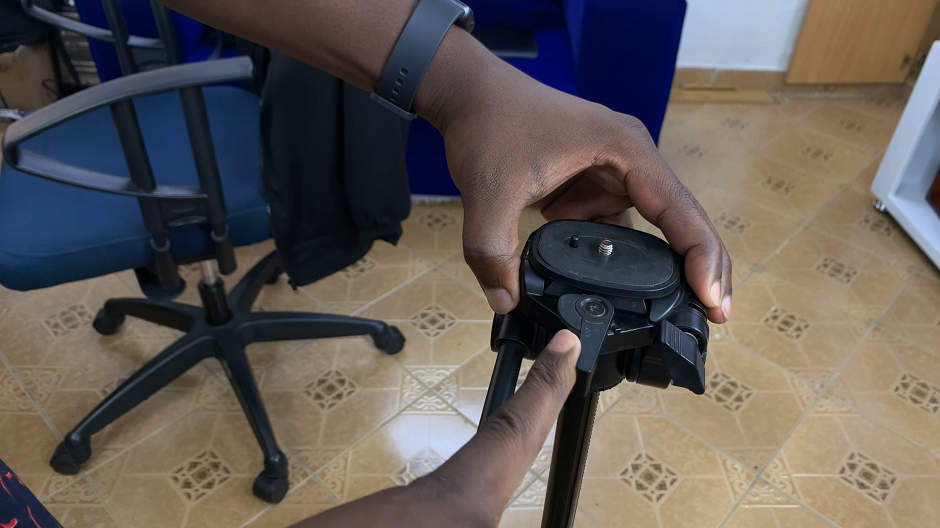
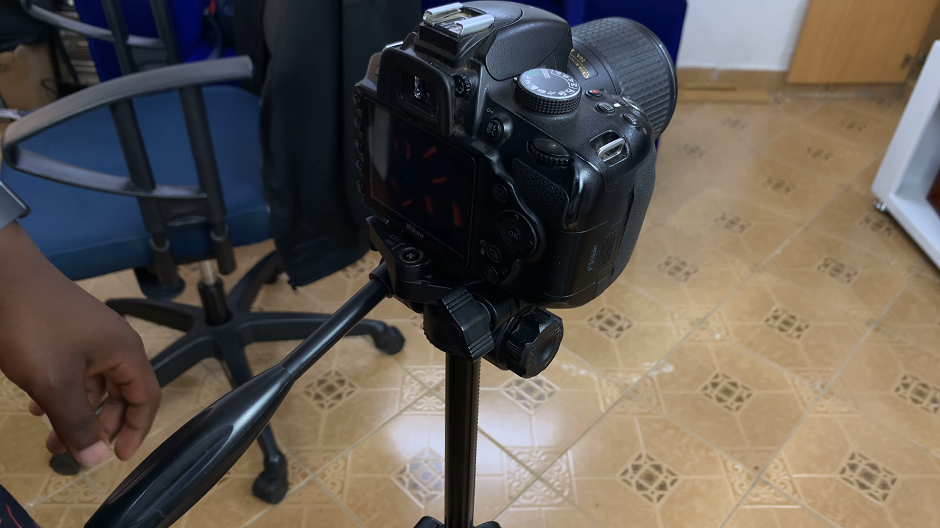
Once you’ve chosen your tripod, it’s time to attach your camera. Most tripods come with a quick-release plate that attaches to the bottom of your camera. Pull the lever outward to release the plate from the tripod.
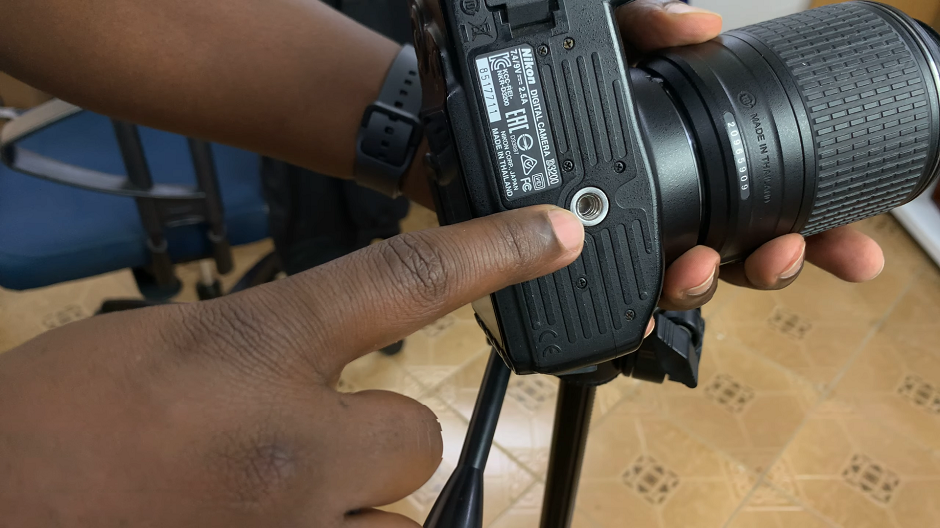
The plate should have a quarter-inch screw that you attach to the quarter-inch hole on the camera. Align the plate with the camera’s tripod mount and securely tighten it in place using a coin or screwdriver.
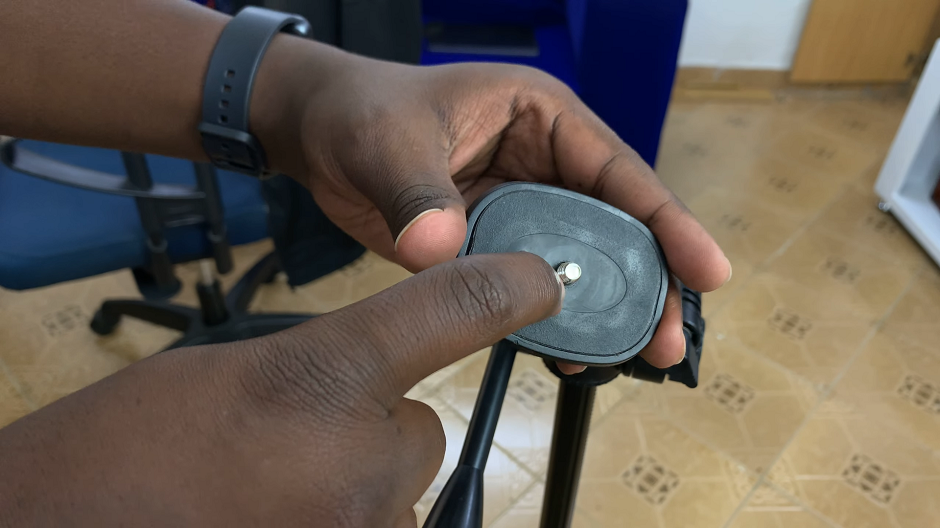
Make sure the plate is snug and in the direction you want the camera to face to prevent any wobbling or movement. However, don’t fasten it too tight.
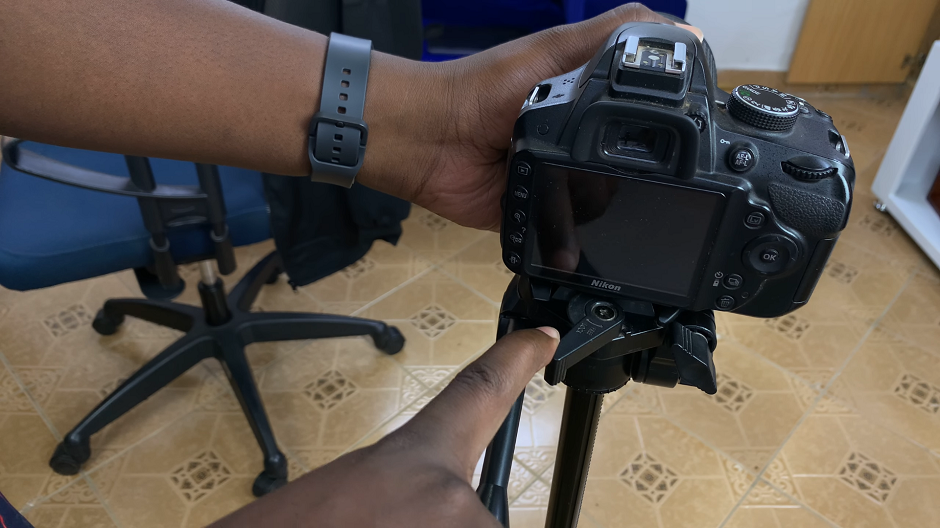
Pull the plate lever outward once again, and fix the plate – now attached to the DSLR camera – back to the tripod.
Next Steps
Adjusting the Tripod Legs: Properly adjusting the tripod legs is crucial for stability. Start by spreading the legs to your desired height, ensuring that the center column is locked in place. If you’re shooting on uneven terrain, adjust the individual leg angles to level the tripod. Use a bubble level or the built-in level on your camera to ensure the tripod is perfectly straight.
Achieving Balance: Achieving balance is essential for smooth panning and tilting movements. Position your camera on the tripod so that it’s evenly distributed over the center of gravity. If your tripod has a ball head or fluid head, adjust the tension to control the resistance of the movements. Practice adjusting the tilt and pan of your camera to find the perfect balance for your shot.
Securing Your Setup: Once your camera is mounted and balanced, double-check all connections to ensure everything is secure. Tighten any knobs or locks to prevent any accidental movement during shooting. If you’re shooting outdoors or in windy conditions, consider using sandbags or weights to further stabilize your tripod.
Common Mistakes to Avoid
Overloading the tripod with too much weight.
Not tightening the quick-release plate securely.
Forgetting to level the tripod on uneven terrain.
Neglecting to check for stability before shooting.
Mounting a camera on a tripod may seem like a simple task, but it requires careful attention to detail and proper technique. By following these steps and practicing regularly, you’ll soon master the art of stability and be well on your way to capturing stunning, shake-free images and videos. So grab your tripod, set up your camera, and get ready to take your photography and videography to new heights!

