Adobe Premiere Pro has been one of the leading video editing software out there for the web, TV and mostly film.
This owes to the fact that it simply does the job of editing footage in most formats you choose, coupled with the fact that it works seamlessly with other Adobe Creative Cloud services such as After Effects, Photoshop and Adobe Audition to name a few.
So, just how do you export your sequence in Premiere Pro once you’re done editing?
1. Open The Export Settings Window
What you want to do first is ensure your sequence is selected to make the timeline panel active. Then go to File > Export > Media (or simply use the keyboard shortcut Ctrl + M on Windows and Command + M on Mac).
Bonus Tip – In the event that you have more than one sequence on your timeline, you can place the playhead at the start of your sequence and press ‘I’ (in point) on your keyboard and then place it once again at the end of your sequence and press ‘O’ (out point). This will make sure that only that sequence that is selected will be selected and exported.

2. Customize or Choose Your Sequence Settings
Here, the settings you need to tweak are Format and Preset. The format used most times is the H.264 especially when exporting for YouTube, though there are more options at your disposal. But if you want the exact settings of your sequence to be used, you can simply check the Match Sequence Settings option at the top, although this will limit you in terms of the codecs that are required by delivery destinations such as YouTube, Vimeo, Instagram or Facebook aside from the intermediate codec or common editing.
As mentioned earlier, Premiere Pro has pre-existing presets for various video formats, and you can choose any depending on the destination it is bound for. Footage can be edited in any format all the way to 8k and even virtual reality.
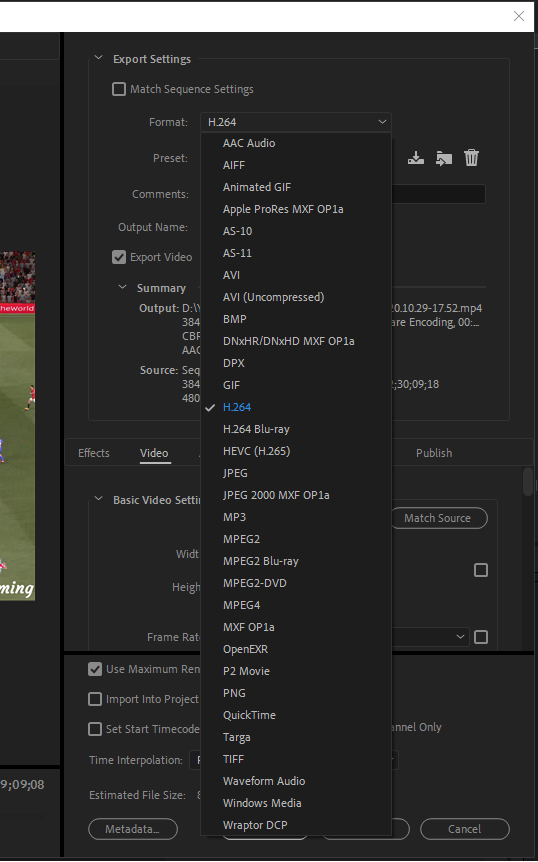
You could also export using Custom Settings that you have fine-tuned yourself based on your preference and save this preset for use when required.

3. Edit The Output Name
Once you are satisfied with the sequence settings, choose a file name and location to save your file. To do this, click on the Output Name, which is blue in color and bears the name of the sequence by default. Clicking on this name will open a Save As dialog box, which will give you the option of the destination in which to save your export.
It is important to save the file at a location where you can easily find it. By default, Premiere Pro opens the last location you saved an export in and it is easy to get a mix up by losing track of where the export is saved. So be very careful here.

4. Complete Your Export
At this point, Premiere Pro offers you two export options: Queue and Export.
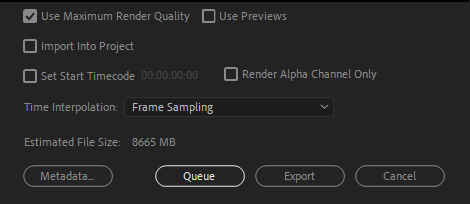
Queue adds your sequence(s) to a queue, after sending you to the Media Encoder. The advatage of using queue is that it gives you the option to add multiple sequences simultaneously (stacking exports). All you have to do now is click the green button and as you continue to work on Premiere Pro, the Media Encoder exports in the background. Handy eh?
Export on the other hand simply does just that. It exports the sequence right from that window. This means that you will not be able to use Premiere Pro as the export is in progress.
All the same, you should be able to have an excellent Premiere Pro experience.

