I mentioned in a previous article that you can use Custom Preset Settings that you have fine-tuned yourself based on your preference and save those presets for use when required in Adobe Premiere Pro. Let’s discuss how you can do that in more detail.
HIGHLIGHT YOUR IN AND OUT POINTS
You can simply highlight your in and out points by dragging the playhead to the start point of your rendered frame and press ‘I’ on your keyboard. Then drag the playhead to the end point of the render sequence and press ‘O’. This will highlight only the sequence you selected in the event that there are more than one sequences in your timeline.

Now go to File > Export > Media (or use Ctrl + M on Windows and Command + M on Mac).
CHOOSE YOUR SEQUENCE SETTINGS
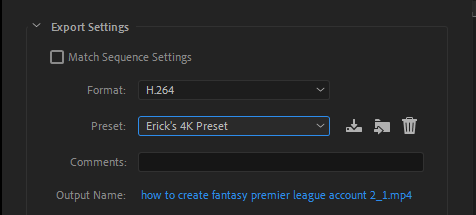
From the resulting Export Settings window, we need to select appropriate settings that can be handled accordingly during compression especially when uploading to YouTube, Vimeo or Facebook. Under the Format section, select the H.264 format from the drop down menu. Then select Custom under Preset.

If this option is not available to you simply select any preset, say, YouTube 2160p 4K Ultra HD if you want to change the settings to 4K Preset settings or its 1080p equivalent if that’s what you’re going for. Once you start editing the settings, the preset should automatically change to Custom.
In this day and age, the lowest quality anyone could possibly go for especially on the aforementioned platforms is 720p. But I must admit, I am a sucker for quality and nothing beats that, so anything below 1080p tends to lean towards a no-no for me.
Under the Output Name click on the blue text to choose a location and change the name to save your video file. Then make sure that the Export Video and Export Audio boxes are checked.
ADJUST VIDEO AND BITRATE SETTINGS
For YouTube, Vimeo and Facebook, or any other video site that offers support for up to 4K videos, select the Video Tab in the middle of the dialog box and set the Profile to High and the Level to 5.2 for 4K. For 1080p, set the Profile to High and the Level to 4.2.
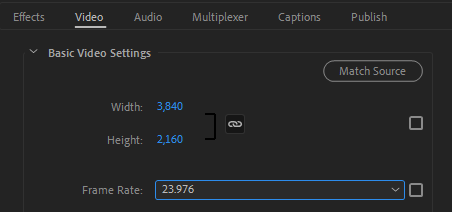
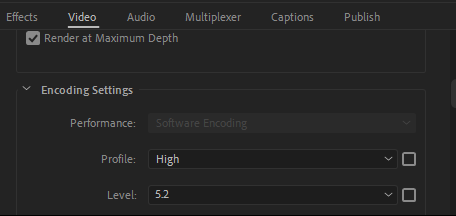
You should then go ahead and make sure that your width and height respectively are as follows: 3840×2160 for 4K and 1920×1080 for 1080p. For both, you can set the frame rate to 23.976fps. Also, ensure you check the box with Render at Maximum Depth written beside it.
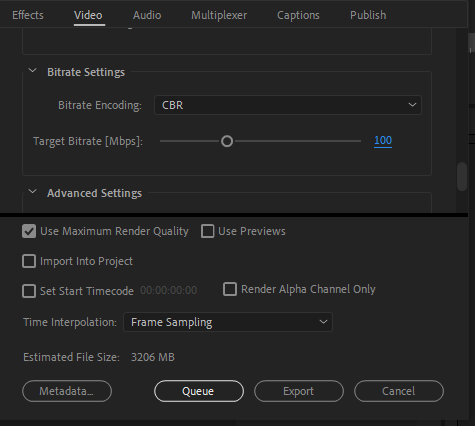
Under Bitrate Settings, set Bitrate Encoding to CBR for both 4K and 1080p and your Target Bitrate (Mbps) to 40 for 1080p and 100 for 4K. Finally, under Bitrate settings, make sure the Use Maximum Render Quality box is checked.
Something to note, however, is the size of the video after implementing all these settings might be quite large. Although that might be the case, this will ensure that your video maintains its quality when it is converted or compressed to various formats and resolutions when you upload it the various video sites.
SMALLER FILE SIZES
A way round large files, mainly the ones you don’t intend to upload or rather just want to have for normal use, say, submit to a client, is to use different Bitrate Settings. So, for both 1080p and 4K, use the VBR 2 Pass Bitrate Encoding.
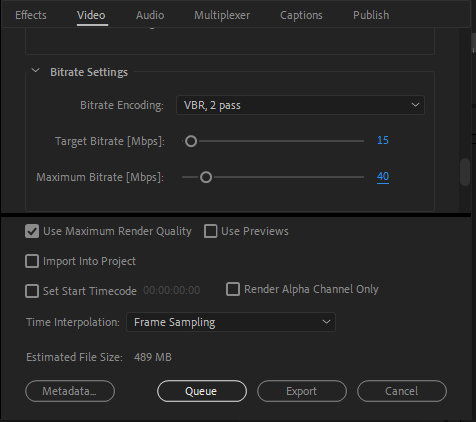
The only difference would be to set the Target Bitrate (Mbps) down to about 15, with its Maximum Bitrate (Mbps) at about 40 for 1080p and 40 and 60 respectively for 4K. At this point, also ensure that Use Maximum Render Quality box is checked before proceeding.
ADJUST AUDIO EXPORT SETTINGS
This is pretty easy and straightforward to adjust and applies to almost all video formats, in our case, both 1080p and 4K. So, select the Audio Tab just next to the Video Tab and make the following adjustments:
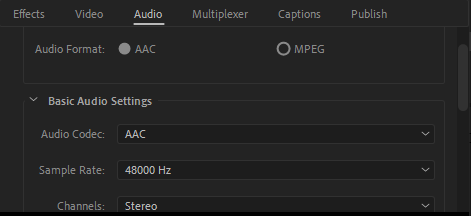
Both Audio Format and Audio Codec to AAC, Sample Rate to 48000Hz, Channels to Stereo and Audio Quality to High. Under Bitrate Settings, ensure Bitrate (kbps) is 320kbps and finally, under Advanced Settings, make sure the Precedence is set to Bitrate.

SAVE YOUR PRESET
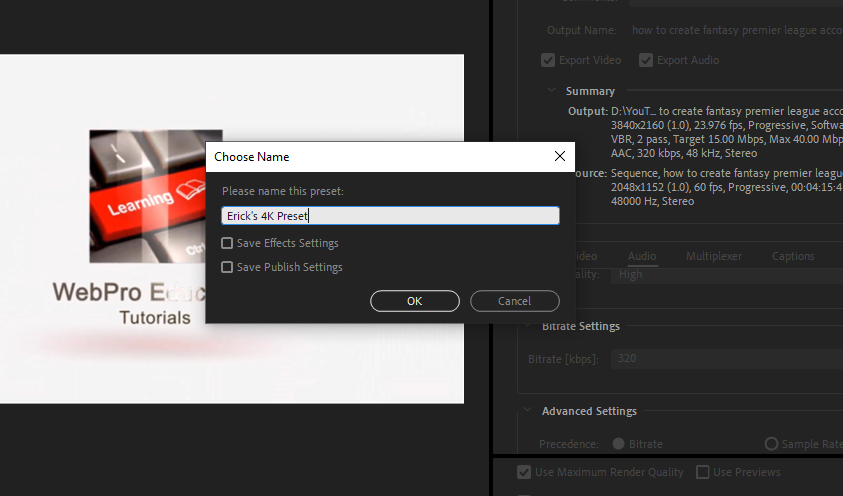
It is important to save the presets you have fine tuned in the event that you would like to use them again in future or if you use the said custom preset frequently.

There next to the Preset dropdown, hover your mouse cursor on the first icon that is there and it should read Save Preset. So, click on it, give it a name, hit save and it should now appear on the list of presets moving forward.
EXPORT YOUR VIDEO
At this point, your video sequence is now ready to render. Make use of the Queue or Export buttons to start this process.
The process should be quick and easy if you follow these steps. If not feel free to ask questions and/or comment below.

