In a world where convenience is key, wireless audio devices have become indispensable companions for our daily activities. Whether you’re working, exercising, or simply relaxing, the freedom from tangled cords enhances the overall experience.
Among these wireless wonders, the Oraimo FreePods 4 stand out, offering exceptional sound quality and comfort. If you’re a proud owner of these sleek earbuds and own a Mac, you might be wondering how to seamlessly integrate them for an enhanced audio experience.
In this guide, we’ll walk you through the comprehensive step-by-step process on how to connect your Oraimo FreePods 4 to any Mac.
Also Read: How To Put Oraimo FreePods 4 In Bluetooth Pairing Mode
How To Connect Oraimo FreePods 4 To ANY Mac
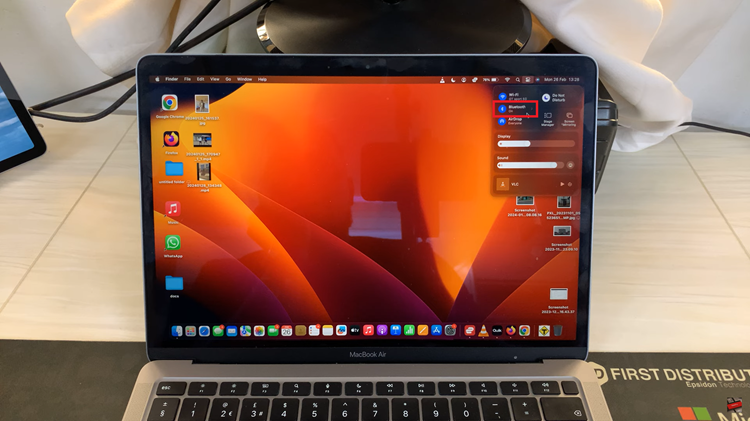
Before we dive into the pairing process, ensure that your Oraimo FreePods 4 are fully charged and in pairing mode. Once your FreePods 4 are in pairing mode, it’s time to turn your attention to your Mac. Navigate to the Bluetooth settings. Click on the system tray in the top-left corner of your screen, and select “Bluetooth.”
Tap on Bluetooth settings. With the Bluetooth settings open on your Mac, it will automatically begin searching for nearby Bluetooth devices. This may take a few moments. Once the search is complete, you should see a list of available devices. Look for “Oraimo FreePods 4” in the list of available devices and click on it to select it.
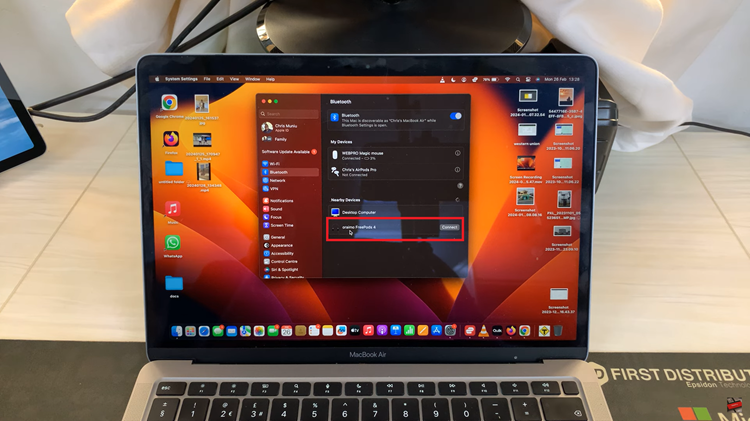
Your Mac will then initiate the pairing process with your FreePods 4. Once the pairing process is complete, you’re all set to enjoy wireless audio streaming on your Mac.
Connecting your Oraimo FreePods 4 to your Mac is a straightforward process. By following the simple steps outlined in this guide, you’ll be up and running in no time, ready to immerse yourself in your favorite music, podcasts, and more. Say goodbye to tangled wires and hello to seamless connectivity with your Mac and Oraimo FreePods 4!

