Your Samsung Galaxy A55 5G is not just a smartphone; it’s a powerful tool that reflects your style and personality. With its stunning display and advanced features, you have the opportunity to customize every aspect of your device to suit your preferences. One such feature that adds both functionality and flair is the screen saver.
The screen saver on your Samsung Galaxy A55 5G serves multiple purposes. Not only does it protect your screen from burn-in, but it also provides an avenue for personalization, allowing you to showcase your favorite photos or dynamic themes. Whether you’re looking to conserve battery life or add a touch of creativity to your device, mastering the activation and deactivation of the screen saver is essential.
In this guide, we’ll take you through the steps to enable and disable the screen saver on your Samsung Galaxy A55 5G, empowering you to take full control of your device’s display settings. So, grab your device, and let’s dive into the world of screen savers on the Samsung Galaxy A55 5G.
Watch: How To Enable Samsung Health Customization On Galaxy A35 5G
To Enable & Disable Screen Saver On Samsung Galaxy A55 5G
To begin, open the “Settings” app on your Samsung Galaxy A55 5G. You can do this by tapping on the gear icon in the app drawer or by swiping down from the top of the screen and tapping the gear icon in the quick settings menu.
Following this, scroll down and select “Display” in the Settings menu. This will open up various display-related options. Within the Display settings, locate and tap on “Screen saver.” This will take you to the screen saver settings.

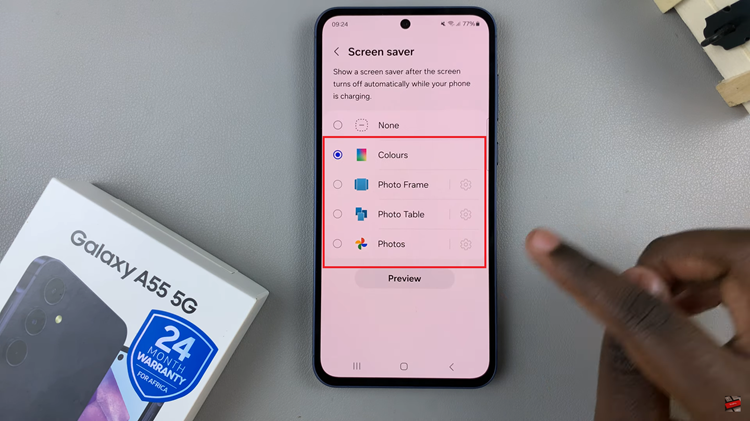
At this point, you’ll see a couple of screen-saver options. To enable the screen saver on your Galaxy A55 5G, choose between ‘Colors,’ ‘Photo Frame,’ ‘Photo Table,’ and ‘Photos.’ Then, tap on the settings icon and customize your screensaver to suit your preferences.
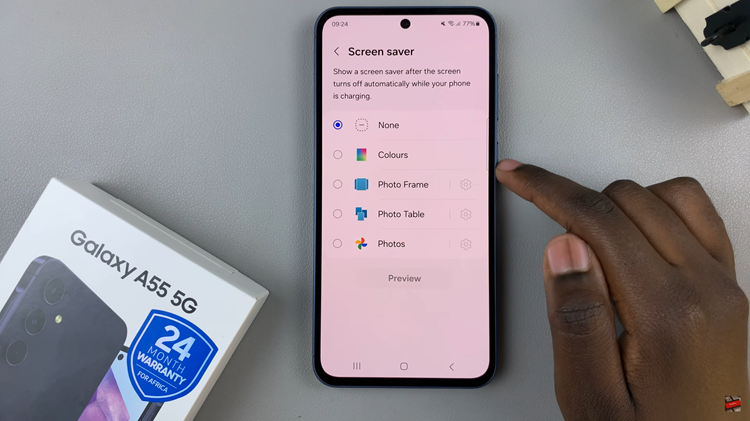
However, if you’d like to disable the screensaver, simply tap on “None.” This will prevent the screen saver from activating when your device is idle. After enabling or disabling the screen saver, make sure to save the changes by exiting the settings page.
In conclusion, enabling and disabling the screen saver on your Samsung Galaxy A55 5G is a straightforward process that allows you to personalize your device and optimize its functionality to suit your preferences. Whether you prefer to have a dynamic display of your favorite photos or simply want to conserve battery life when your device is idle, the screen saver feature offers versatility and convenience
Read: How To Add Analog Clock To Always ON Display On Samsung Galaxy A55 5G
