In this article, we’ll walk you through a simple, step-by-step guide on how to change the date and time on your iPhone photos, ensuring that your pictures are correctly labeled and easy to locate.
Capturing moments on our iPhones has become an integral part of our lives, but what happens when the date and time on our precious photos are incorrect? Whether it’s due to a time zone change or a simple oversight, having accurate timestamps on our iPhone photos is essential for organizing and preserving our memories.
Having correct date and time information on our iPhone photos allows us to effortlessly organize and relive our cherished memories.
Watch: How To Switch Clock Format On iPhone (12 Hour and 24 Hour Time System)
Change Photo Date and Time On iPhone
To begin, unlock your iPhone and locate the Photos app on your home screen. Tap on the app icon to launch it. The Photos app is your gateway to all the images and videos stored on your device.
Once you have opened the Photos app, navigate to the specific photo for which you want to change the date and time. You can browse through different albums or use the search feature to locate the desired photo quickly.
Once you have selected the photo, tap on the three dots next to the Edit button located at the top-right corner of the screen. This will open up a range of options for your photo, including the ability to change its date and time.
Adjust Date and Time for Multiple Photos
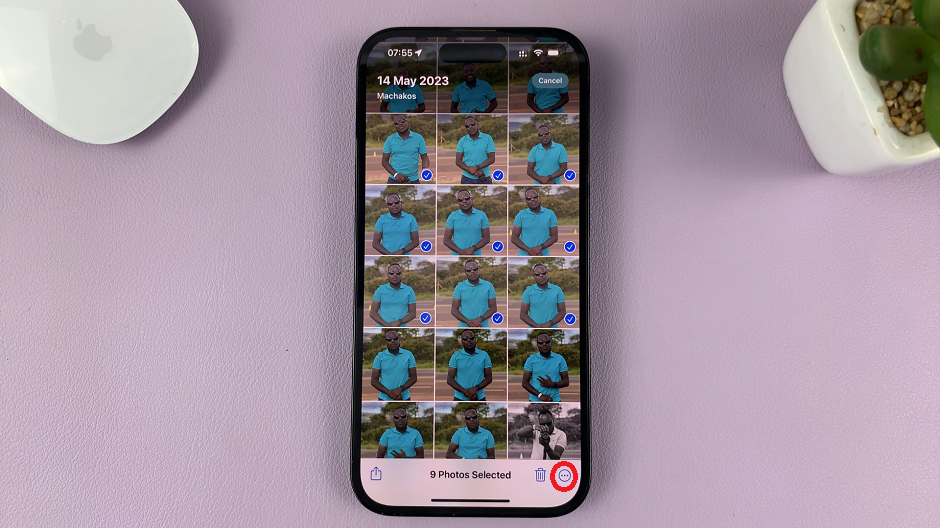
To change the date and time for multiple photos, select all the photos you want to change. Then tap on the three dots next to the Edit button. This time round it is located at the bottom-right corner of the screen.
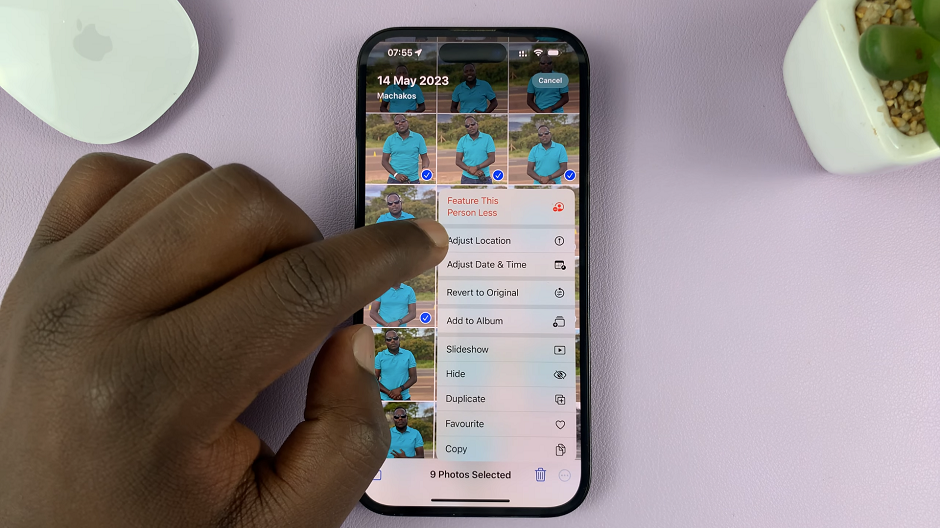
In both instances continue by looking for the Adjust Date & Time option. It is usually represented by a calendar and clock icon from the menu. Tap on it to proceed.
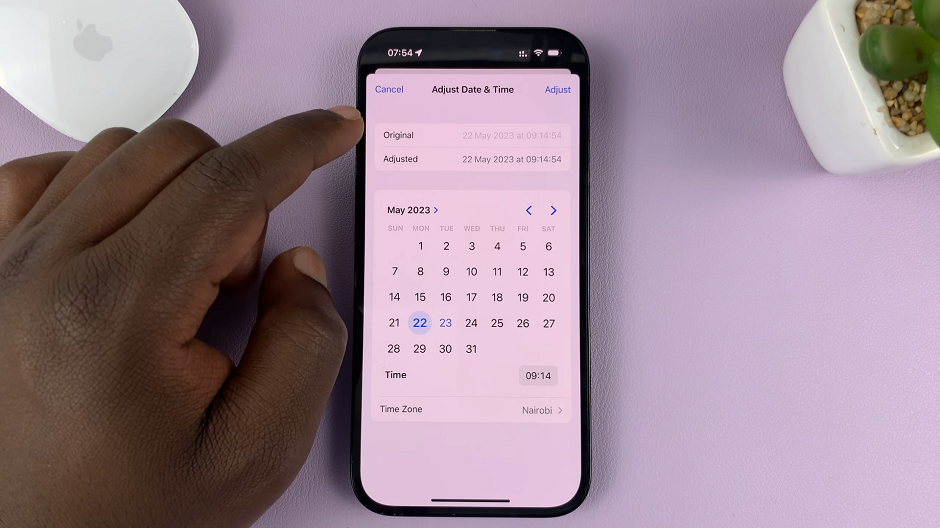
In the Adjust Date & Time screen, you will see three options: Time Zone, Date and Time. By default, they are set to match the original capture date and time of the photo. To change the date, tap on the Date option and use the date picker to select the desired date. Similarly, tap on the Time option and adjust the time using the scrolling wheels.
Once you have adjusted the date and time to your satisfaction, tap on the Adjust button located at the bottom-right corner of the screen. Your changes will be saved, and the photo’s timestamp will be updated accordingly.
Remember to double-check the changes and synchronize your devices for consistent results. Now you can enjoy a properly organized photo library, with accurate timestamps that reflect the true moments captured by your iPhone.
Disclaimer: The process may vary slightly depending on the iOS version and the model of your iPhone. The steps provided in this guide are based on iOS 16.
Read on: How To Stop Game Controllers From Using Assistive Touch Button On iPhone

