Unlock the full potential of your Samsung Galaxy A55 5G by mastering its performance maintenance techniques. One crucial yet often overlooked aspect of optimizing your device’s performance is clearing the cache partition.
As you delve into the intricacies of mobile technology, understanding how to effectively wipe the cache partition empowers you to ensure seamless operation and swift responsiveness from your device. In this guide, we’ll embark on a journey together, exploring the steps required to wipe the cache partition on your Samsung Galaxy A55 5G.
With these steps, you’ll equip yourself with the knowledge and skills necessary to unleash the full capabilities of your device. Let’s dive in and unlock the secrets to optimal performance maintenance.
Watch: How To Bypass Forgotten PIN On Samsung Galaxy A55 5G
To Wipe Cache Partition On Samsung Galaxy A55 5G
Firstly, you’ll need to power off your Samsung Galaxy A55 5G. Press and hold the Power button until the Power off menu appears on the screen. Then, tap on “Power off” and wait for the device to shut down completely.
Once your device is powered off, you’ll need to boot it into Recovery Mode. To do this, connect your Galaxy A55 5G to a computer, then press and hold the Power button & Volume Up button simultaneously until the Samsung logo appears on the screen. Then, release all the buttons to enter Recovery Mode.
In Recovery Mode, you’ll see a list of options. To navigate through the menu, use the Volume buttons to scroll up or down, and use the Power button to select an option. Look for the “Wipe Cache Partition” option using the Volume buttons and select it by pressing the Power button.
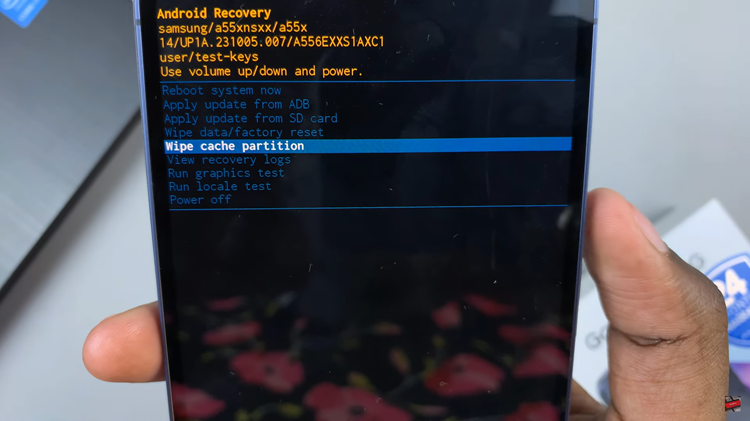
After selecting the “Wipe Cache Partition” option, you’ll be prompted to confirm your action. Use the Volume buttons to highlight “Yes” and press the Power button to confirm. This will initiate the process of wiping the cache partition on your Samsung Galaxy A55 5G.

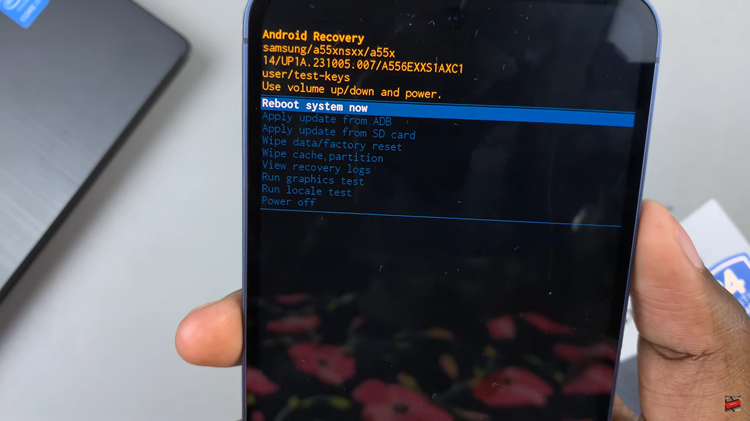
Once the cache partition has been wiped successfully, you’ll see a message indicating the completion of the process. Use the Volume buttons to highlight the “Reboot system now” option and press the Power button to reboot your device.
In conclusion, wiping the cache partition on your Samsung Galaxy A55 5G can help improve performance and resolve certain issues caused by cached data. By following the step-by-step guide provided above, you can easily clear out the temporary system and app data stored in the cache partition.

