The Samsung Galaxy A17 5G represents the next generation of accessible performance in Samsung’s mid-range lineup. It delivers powerful connectivity, a sleek design, and modern features suited for both first-time smartphone users and experienced Android enthusiasts.
However, before you can explore its capabilities, it’s essential to complete the initial setup correctly. In this guide, we’ll walk you through the comprehensive step-by-step process on how whether you’re a beginner or you just need a refresher, to set up your Samsung Galaxy A17 5G.
Also Read: How To Enable Radar In FC 26
How To Set Up Samsung Galaxy A17 5G
Press and hold the power button on the right-hand side of the Galaxy A17 until you feel a slight vibration and see the Samsung logo appear on the screen. Allow the device a few moments to start up and load the initial setup interface. Once the phone powers on, you’ll see a “Welcome” screen.
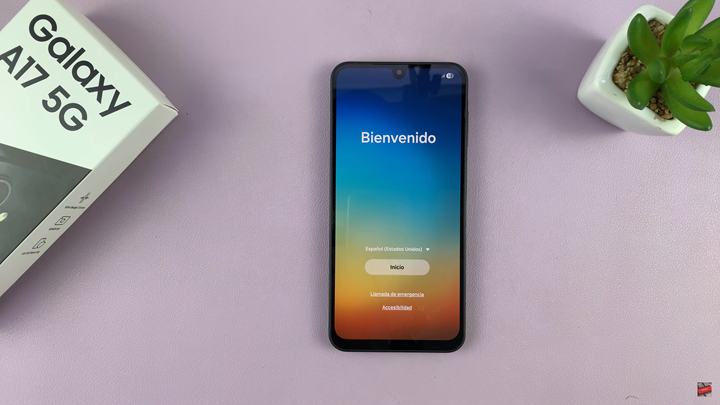
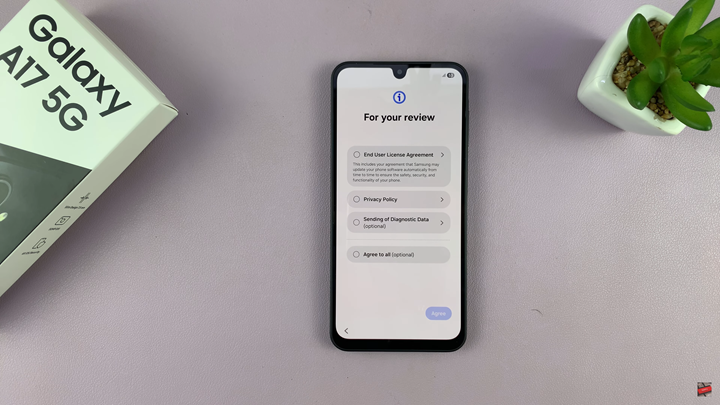
Tap on the language drop-down menu to select your preferred language and region. After making your selections, tap on “Start” to proceed. You will now be prompted to review Samsung’s “End User License Agreement” and “Privacy Policy.” You can select each option individually or check “Agree to All” for convenience. Once done, tap “Agree” to continue.
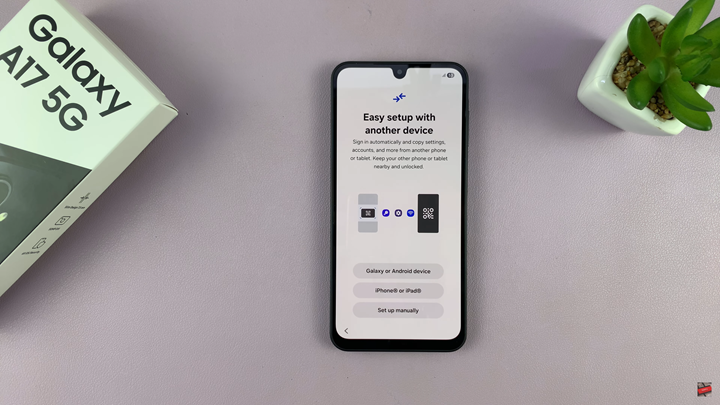
The next screen will present several options for how to continue setup. You can choose “Galaxy or Android Device,” “iPhone or iPad,” or “Set Up Manually.” If you’re transferring data from an old phone, select one of the first two options. If this is your first device or you prefer to start fresh, select “Set Up Manually.”
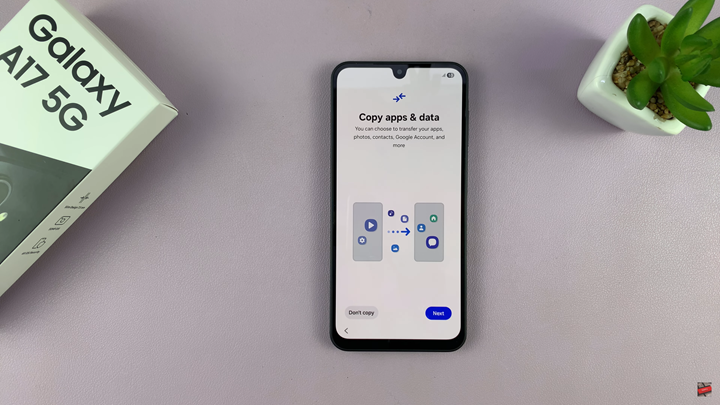
Connecting to the internet is essential for downloading apps and syncing data. Select your Wi-Fi network from the list, enter the password, and tap “Connect.” Once connected, tap “Next.” You’ll now decide whether to transfer data from another device. Tap “Next” if you want to copy apps, contacts, and settings, or choose “Don’t Copy” if you prefer to begin with a clean slate.
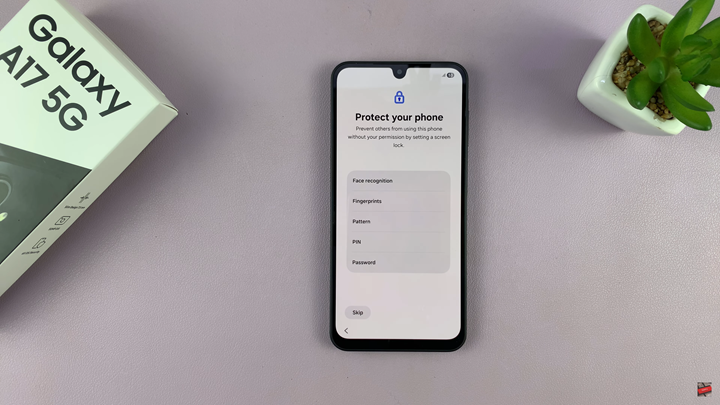
At the Google sign-in page, enter your credentials and tap “Next” to log in. If you prefer to skip this step, tap “Skip,” and confirm by selecting “Skip” again when prompted. This can always be done later in Settings. Next, you’ll be offered several security options, including a PIN, password, pattern, face recognition, or fingerprint setup. If you wish to skip this step, tap “Skip,” then “Skip Anyway” to confirm
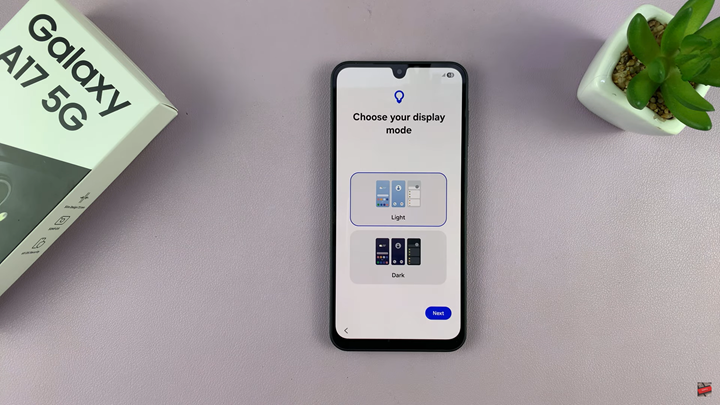
Select the Google Service Legal Information options you agree to by checking the corresponding boxes. Do the same for the Samsung service permissions, then tap “Agree” to proceed. You’ll now have the option to choose between Light or Dark mode for your device’s appearance. Make your selection and tap “Next” to finalize your choice.
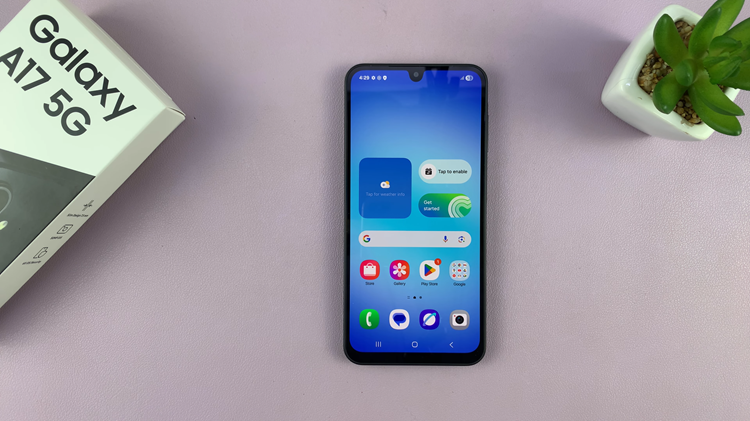
The setup process is now complete. Tap on “Home” to enter the Galaxy A17’s main interface. You may be prompted to explore available apps; choose “Continue” to proceed or “Later” to skip. Confirm by selecting “Yes” if you opt to skip, and your device will take you directly to the One UI home screen.
Setting up your Samsung Galaxy A17 5G is only the beginning of your experience with one of Samsung’s most reliable and efficient smartphones. Once you’ve completed these initial steps, take some time to explore its powerful features, from the smooth 5G connectivity to the customizable interface of Samsung’s One UI.

