In this comprehensive guide, we’ll walk you through the steps to remove/change bands on your Xiaomi Smart Band 8 Pro, giving you the freedom to express yourself and keep your device looking fresh.
The Xiaomi Smart Band 8 Pro is a versatile and stylish wearable device that offers a range of features to help you stay connected and track your fitness goals.
One of the standout features of this smart band is its interchangeable bands. This allows users to customize their device to suit their personal style.
Watch: How To Enable PUSH Notifications From Xiaomi Smart Camera C500 Pro
Remove Bands
First, make sure you have the necessary tools on hand. You’ll typically only need a small flathead screwdriver or a similar tool with a thin, flat edge. You can also just use your finger. Additionally, having a soft cloth or microfiber towel can be helpful to protect your device from scratches during the band removal process.
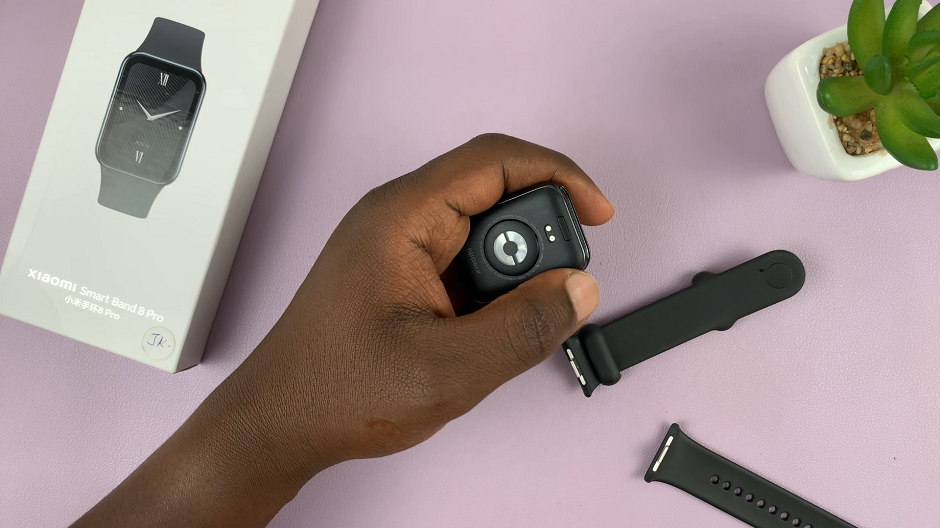
Next, locate the release buttons. On the underside of the Xiaomi Smart Band 8 Pro, you’ll find two small release buttons. They are located near the connection point of the band and the main body of the device. These buttons are designed to secure the bands in place and will need to be pressed to release the bands.
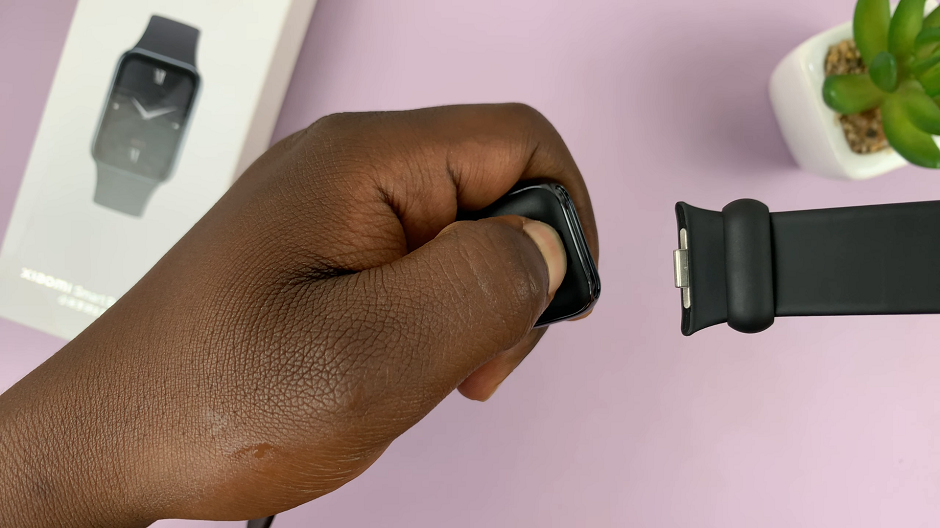
Using your flathead screwdriver or your finger, gently press and hold the release buttons simultaneously. Apply even pressure to both buttons to avoid damaging the device or the bands.
While holding the release buttons, carefully slide the bands away from the main body of the Smart Band 8 Pro. You may need to wiggle the bands slightly to loosen them from the connection points. Once the bands are free, continue sliding them until they are completely removed from the device.
Change Bands On Xiaomi Smart Band 8 Pro
To attach new bands to your Xiaomi Smart Band 8 Pro, simply align the connection points on the bands with the corresponding slots on the main body of the device. Once aligned, gently slide the bands into place until you hear a click, indicating that they are securely attached.
After attaching the new bands, double-check to ensure that they are securely in place and aligned properly with the device. You should not be able to see any gaps between the bands and the main body of the Xiaomi Smart Band 8 Pro.
With the new bands securely attached, your Smart Band 8 Pro is now ready to wear and showcase your personal style. Whether you opt for a vibrant color, a sleek metallic finish, or a classic leather band, the possibilities for customization are endless.
Removing or changing bands on your Xiaomi Smart Band 8 Pro is a straightforward process that allows you to personalize your device and make it truly your own. By following the simple steps outlined in this guide, you can easily switch up the look of your smart band to match your mood, outfit, or activity.
Read: How To Delete Registered Fingerprints On Samsung Galaxy A35 5G

