In today’s digital age, our homes are becoming increasingly interconnected, with smart devices seamlessly integrating into our daily lives. Among these, the Samsung Smart TV stands as a cornerstone of entertainment, offering a vast array of streaming services and features.
However, like any device, it occasionally encounters connectivity issues that may disrupt our viewing experience. One common problem arises when we need to delete a saved Wi-Fi network from our Samsung Smart TV.
Whether it’s to troubleshoot connection problems or simply to tidy up our network list, knowing how to remove a saved Wi-Fi network can prove invaluable. In this guide, we’ll walk you through the steps to accomplish this task effortlessly.
Read: How To Connect Samsung Smart TV To Hidden Wi-Fi Network
Delete a Saved Wi-Fi Network On Samsung Smart TV
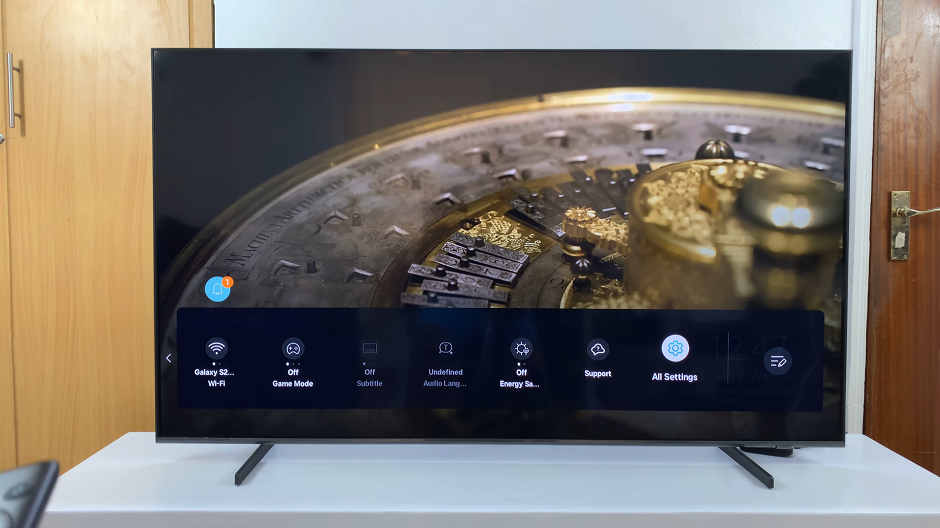
To begin, go to the home screen of your Samsung Smart TV. If you’re not on the home page, press the home button on the remote control.
Using your remote control, scroll left once to the TV menu. From the TV menu, scroll down to get to Settings. Press OK on the remote to access the Settings menu, then scroll until you get to All Settings.
Select the Connection option, press OK and select Network by pressing OK once again.
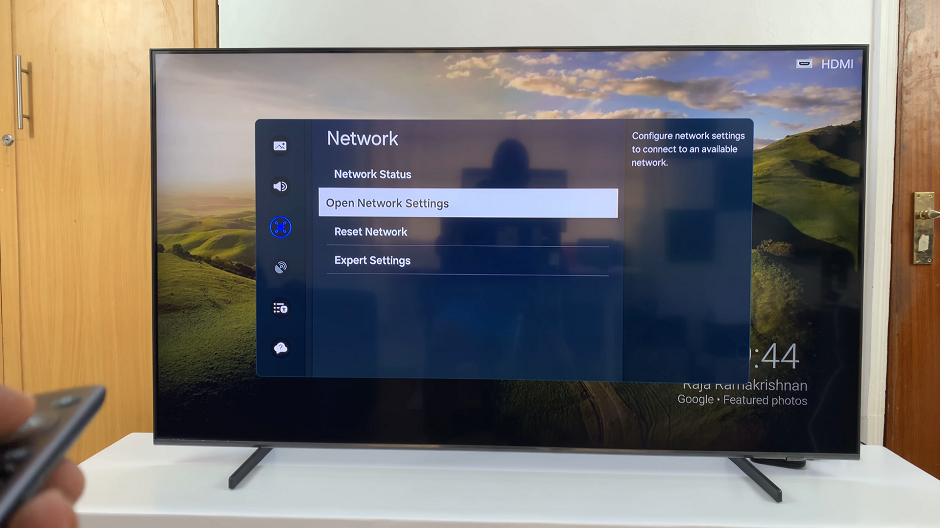
Under Network, select Open Network Settings. Here, choose Wireless in the Network Type page.
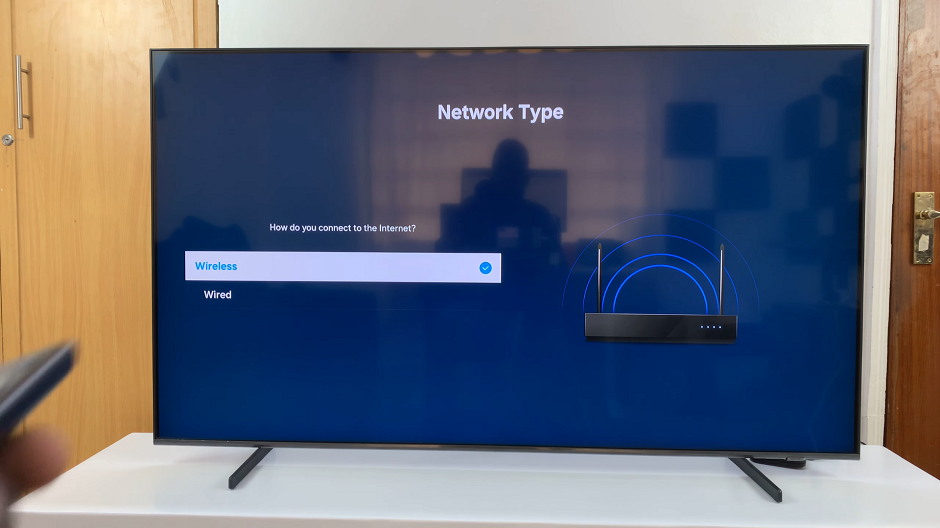
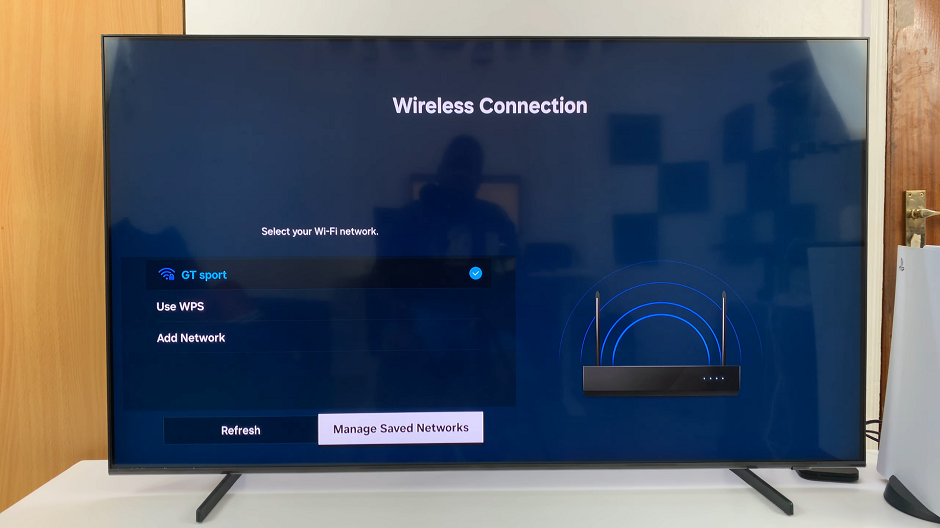
Your TV will start to scan for available networks. You will see the network you’re connected to in the list of networks available, as well as others you can connect to.
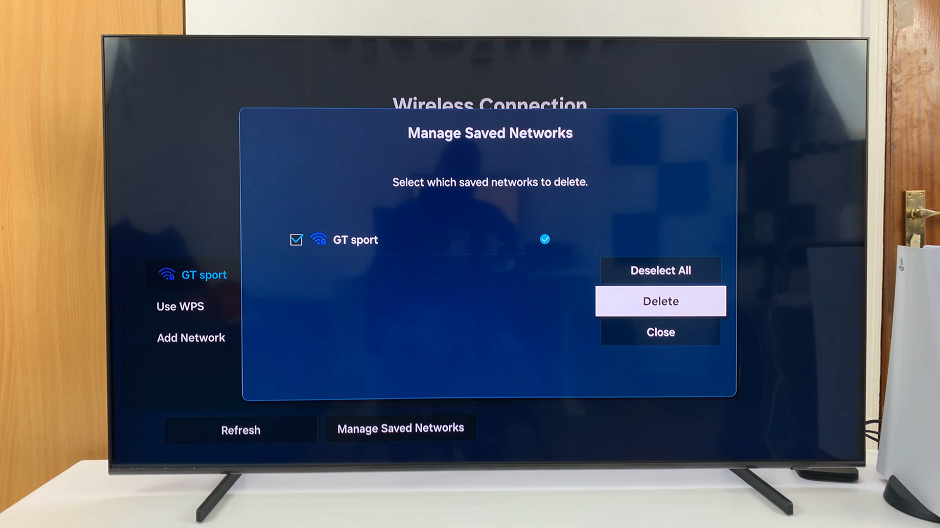
Scroll down and select Manage Saved Networks. Use the check box to select the network you want to delete.
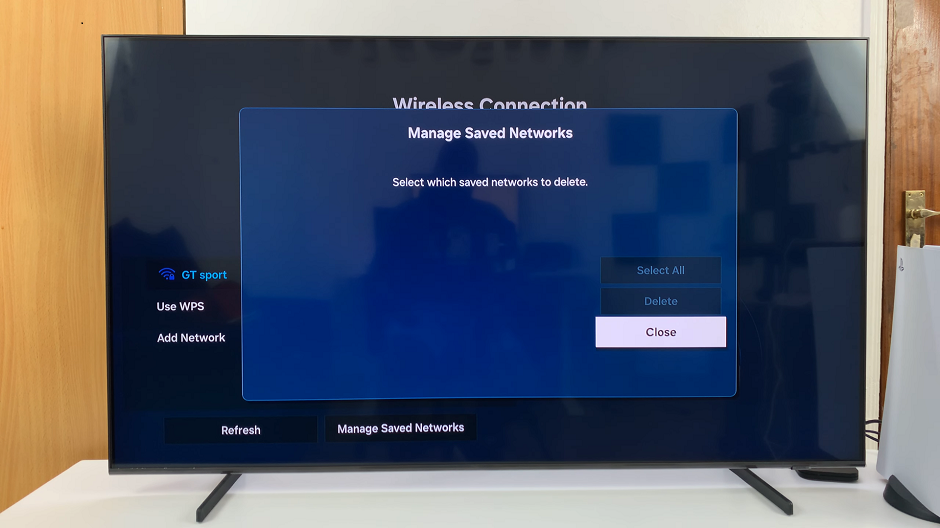
Highlight the Delete option and press OK. The Wi-Fi network will be deleted. Once deleted, you will still see it on the list of devices, but you will need to re-enter the password to connect to it. It will not connect automatically anymore.
Repeat this for all other Wi-Fi networks you want to delete.
After confirming the deletion, your Samsung Smart TV will no longer automatically connect to the deleted Wi-Fi network. This action can help resolve connectivity issues and ensure that your TV connects seamlessly to your preferred network in the future.
In conclusion, knowing how to delete a saved Wi-Fi network on your Samsung Smart TV is a handy skill that can streamline your viewing experience and troubleshoot connectivity problems. By following the simple steps outlined in this guide, you can easily manage your network settings and maintain optimal performance from your smart TV. So the next time you encounter a pesky Wi-Fi issue, rest assured that you have the knowledge to tackle it with confidence.
Watch: Samsung Smart TV: How To Disable Airplay | Turn OFF Airplay

