In today’s digital age, adding text to photos or pictures has become a popular way to personalize and enhance your photographs. This is an invaluable skill to any meme creator.
Whether you want to create eye-catching social media posts, design captivating invitations, or simply add captions or quotes to your favorite images, the ability to add text to pictures on your iPhone can be a valuable skill.
Fortunately, with the built-in Photos app on iOS, you can easily add text to your pictures without the need for any third-party apps. In this article, we will guide you through the step-by-step process of adding text to pictures in Photos on your iPhone.
Step 1: Open the Photos App
To get started, unlock your iPhone and locate the Photos app. The app icon resembles a multicolored flower, and you can usually find it on your home screen or in your app drawer. Tap on the Photos app to open it and navigate to the image to which you want to add text.
Step 2: Select the Image
Once you’re in the Photos app, navigate to the album or collection where your desired image is stored. Tap on the album or collection to open it, and then locate and tap on the specific image you want to edit. This will open the image in full-screen mode.
Step 3: Tap on Edit
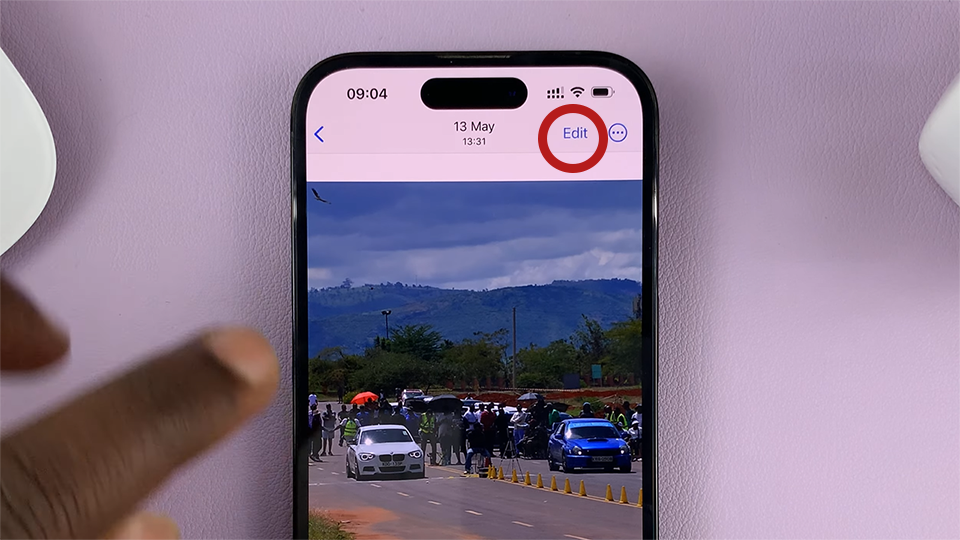
In full-screen mode, tap on the “Edit” button located at the top right corner of the screen. Tapping on this button will open the editing options for the selected image.
Step 4: Tap on the Markup Button as Shown
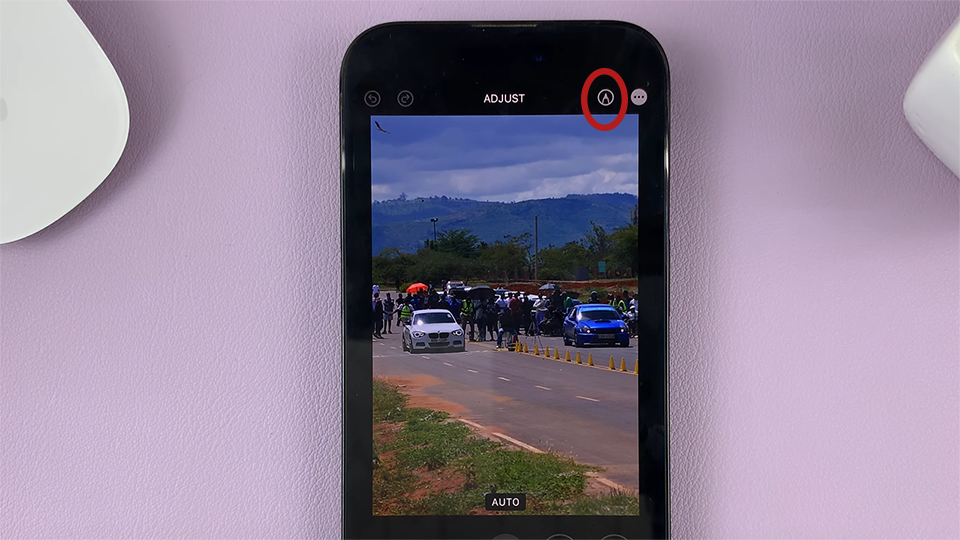
From the resulting screen, locate and tap on the “Markup” button. The Markup feature allows you to draw and add text to your images.
Step 6: Tap on the Plus (+) Icon
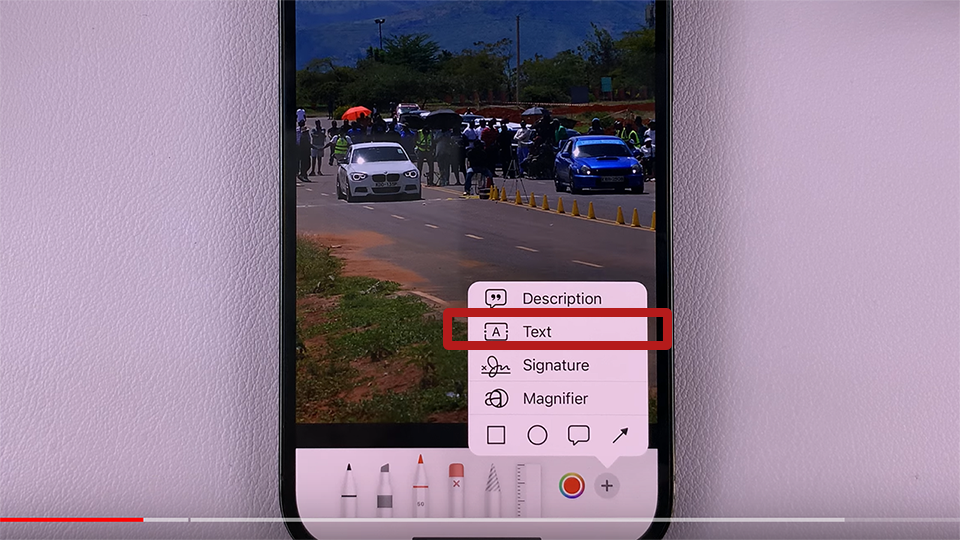
In the Markup screen, you’ll see various tools at the bottom of the screen. To add text, tap on the plus icon (+), which is typically located on the right side of the toolbar. Tapping on this icon will open a menu. On that Menu, tap on the ‘Text’ option.
Step 7: Enter Your Text
Once the text box appears, you can start typing your desired text. The keyboard will automatically appear at the bottom of the screen, allowing you to enter your text. You can also customize the font, size, and color of the text by tapping on the respective options at the top of the screen.
Step 8: Adjust Text Position and Size
After entering your text, you can adjust its position and size on the image. To move the text box, simply drag it to the desired location. To resize the text, place two fingers on the text box and pinch or spread them apart.
Step 9: Customize Text Appearance (Optional)
If you want to further customize the appearance of the text, you can do so using the available options in the Markup toolbar. You can change the font style, font size, text color, and even add additional effects like outlines or shadows.
Step 10: Save Your Changes
Once you’re satisfied with the text placement and appearance, tap on the “Done” button located at the bottom right corner of the screen. This will save your changes and apply the text to the image.
Step 11: Save or Share Your Edited Image
After tapping on “Done,” you’ll be taken back to the main editing screen. From here, you can either save the edited image by tapping on “Save,” or you can share it

