
Video:How To Rename HDMI Inputs On Sony Smart TV
Organizing your home entertainment system becomes much easier when you know how to rename HDMI inputs on Sony Smart TV. With multiple devices connected, keeping track of each input can quickly become confusing.
By renaming HDMI inputs, you can clearly identify which device is connected to each port, making navigation faster and more convenient. In addition, proper labeling enhances your overall viewing experience by reducing the time spent searching for the right input.
Furthermore, as technology continues to advance, customization and personalization of your smart TV setup have become increasingly important. Therefore, understanding how to rename HDMI inputs on Sony Smart TV allows you to take full control of your entertainment environment. As a result, you can manage your devices more efficiently, streamline your viewing experience, and enjoy a well-organized home theater setup.
Watch:How To Unpair Bluetooth Headphones From Sony Smart TV
Rename HDMI Inputs On Sony Smart TV
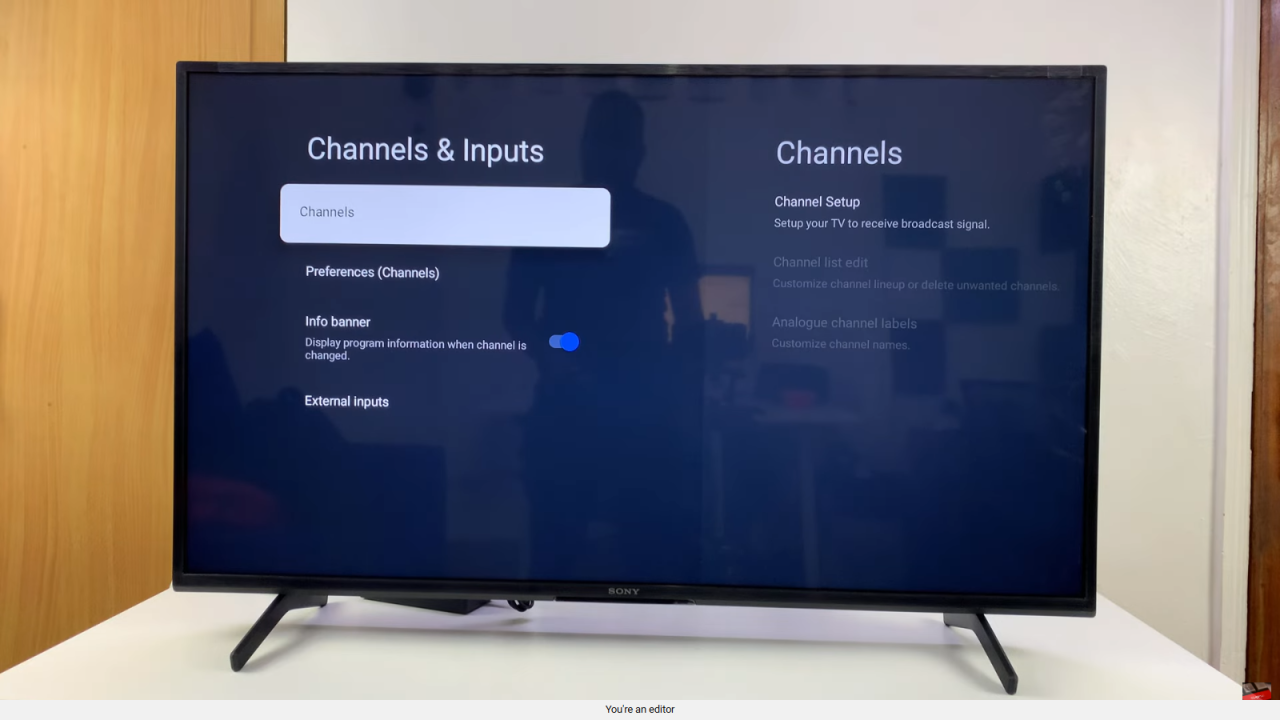
Open Settings
Scroll across the top menu on your Sony Smart TV and select Settings.
Go to Channels and Inputs
Under Settings, select Channels and Inputs.
Access External Inputs
Choose External Inputs and then click on Manage Inputs.

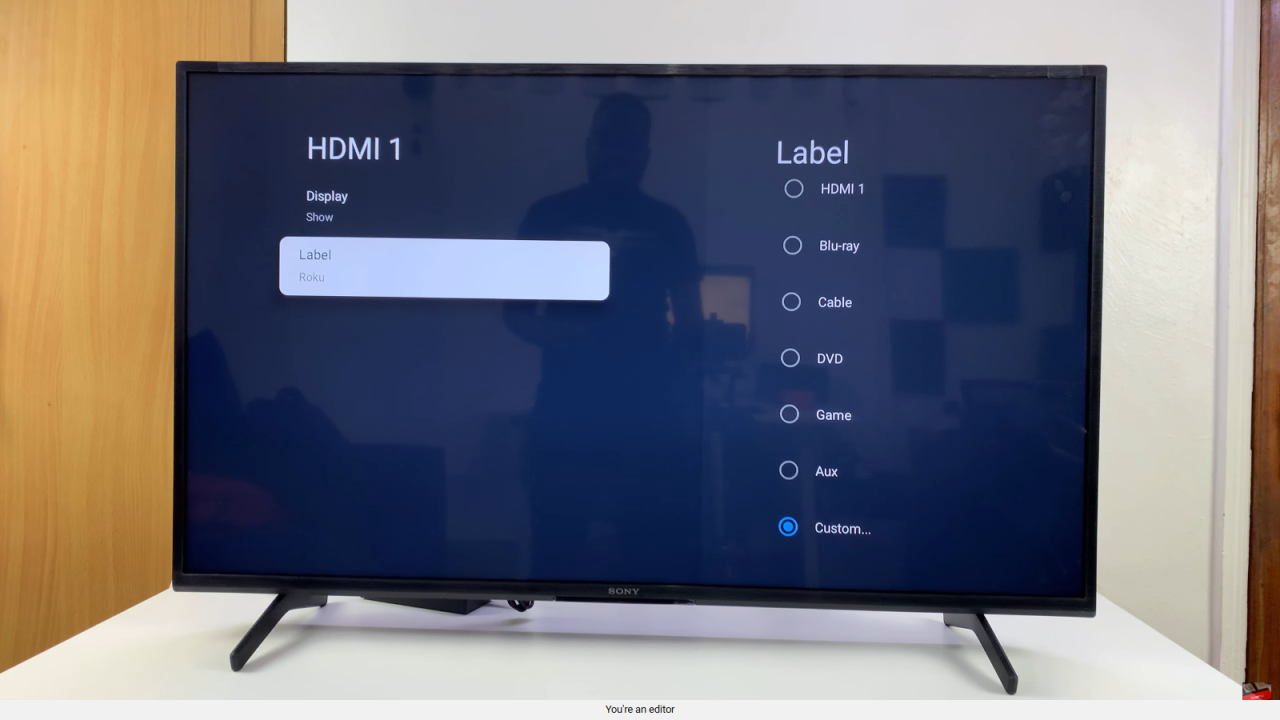
Select an HDMI Input
Pick the HDMI input you want to rename, such as HDMI 1.

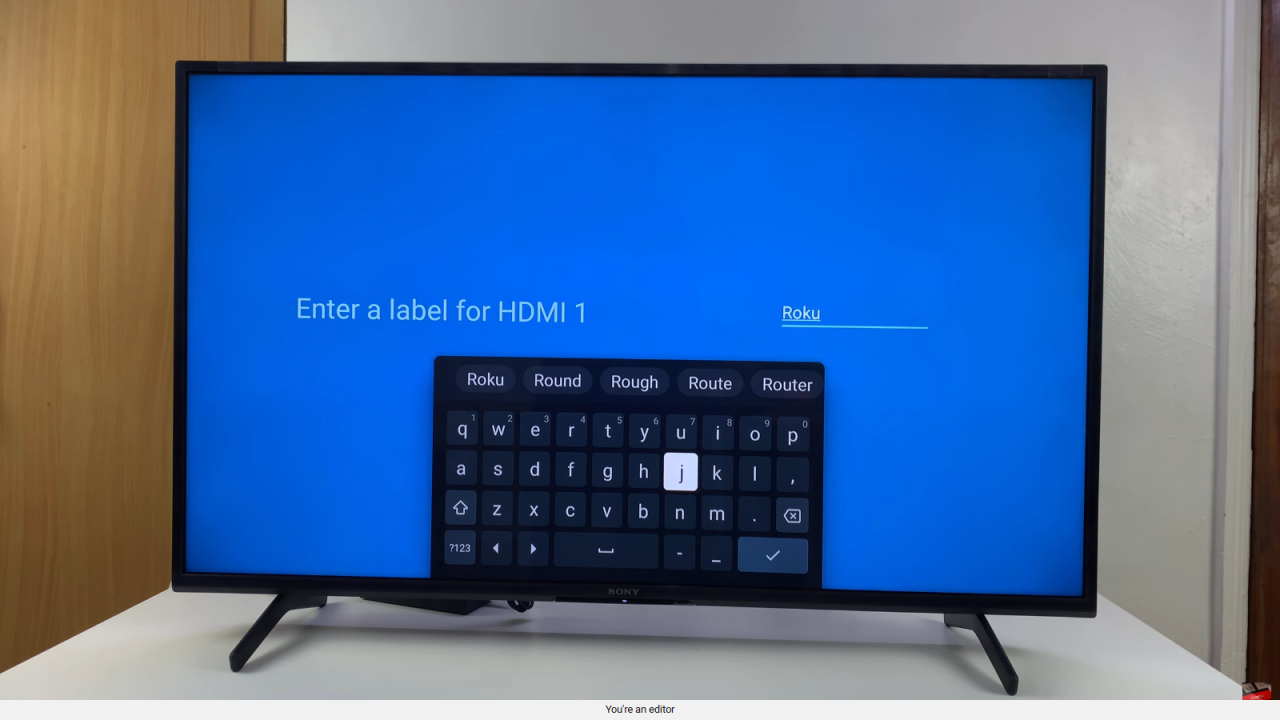
Choose a Label or Custom Name
Select Label, then choose a preset option like Blu-ray, Cable, or DVD, or enter a custom name.
Save the New Name
Click the check mark to confirm, and the HDMI input will now display the new name.
Repeat for Other Inputs
You can rename all other HDMI inputs to keep your setup organized and easy to navigate.

