One of the easiest ways to use your MacBook Neo is by taking advantage of the AirDrop feature. With the help of this option, it becomes easy for users to share pictures, videos, and documents with other Apple devices via a wireless network connection. For MacBook Neo owners, using AirDrop makes sharing files easier as there is no need to send emails or use external USB drives.
If you are new to Mac, then finding this feature to use it and getting started might be difficult for you. Here in this article, we will show you some easy steps that will help you turn ON this feature on your MacBook Neo device.
Not only will you learn about AirDrop but also get to know about how to change visibility options on your MacBook Neo.
Watch: How To Turn OFF MacBook Neo
Turn ON AirDrop On MacBook Neo
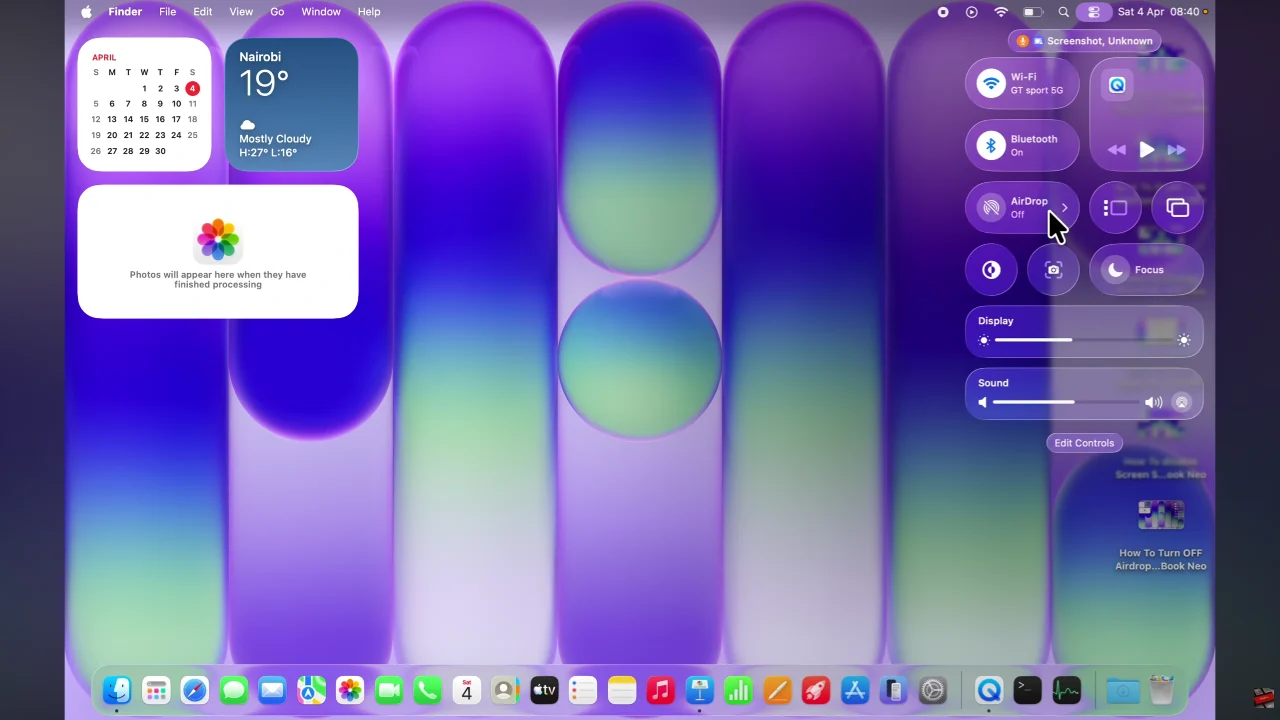
Begin by clicking on the Control Centre located in the top right corner of the screen. Then, click on ‘AirDrop‘ from the menu that appears.
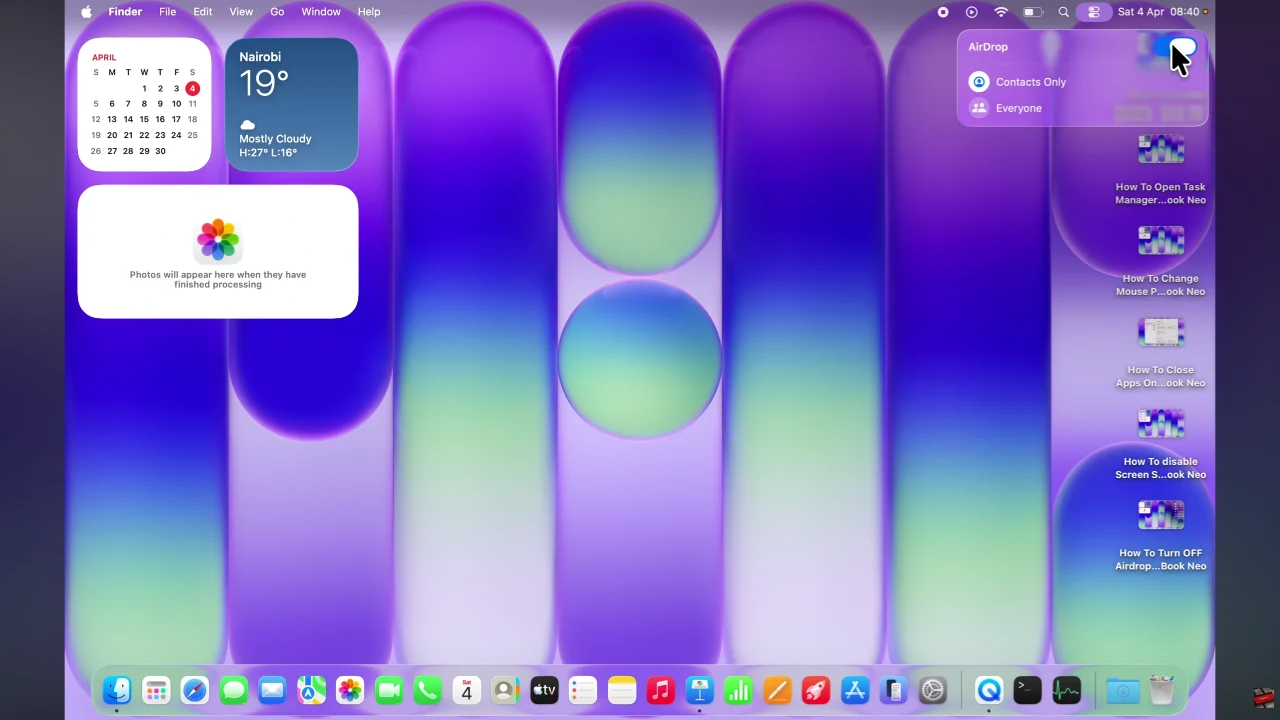
Following this, you’ll notice a toggle switch that you can use to enable AirDrop. Toggle the switch to the ON position and this will enable this feature on your MacBook. Afterwards, you can either choose ‘Everyone’ or ‘Contacts Only’ to select the group which will receive your AirDrops.
In conclusion, turning on this feature on your MacBook Neo is a simple process that makes file sharing faster and more convenient than ever. By enabling AirDrop and adjusting your visibility settings, you can instantly send and receive files across your Apple devices without needing cables or third-party apps.
Read: How To Enable & Disable Head Gestures On Sony WF-1000XM6

