Google Chrome’s default setting is to check, download and install updated in the background while you browse. It was designed this way to ensure you are always using the latest version of Chrome. Updates come with bug fixes and security fixes.
While it’s a good thing to have these updates installed without any effort on your side, some people prefer to have more control of the updates that get installed in their computers.
Google does not support the idea of disabling automatic updates and have not included the option in the user interface of the browser. The best you can do is check what version you are currently running. Watch this video: How To Update Google Chrome
If you really want to disable automatic updates in your Chrome browser, you have do more outside the Google chrome interface. The way you do it depends on what you are trying to achieve really.
The easiest way is using the group policy template that Google gives Windows system administrators. Download the ADM template and save it on your PC. Extract the contents of the zip file using Winzip or any other program.
Also Read: How To Uncompress Files Online
Tap on the Windows key once you are done, type gpedit.msc and hit enter. This should open the Local Group Policy Editor. Open ‘Computer Configuration’ > ‘Administrative Templates’.
Right click on ‘Administrative Templates’ folder and select ‘Add/Remove Templates’. Add the GoogleUpdate.adm template that you have downloaded. Close the window.
Now, go to Computer Configuration > Administrative Templates > Classic Administrative Templates (ADM) > Google > Google Update
You’ll see an ‘Applications’ folder under Google Update. Open it. Open the ‘Update Policy Override’.As you would expect, it is disabled by default.
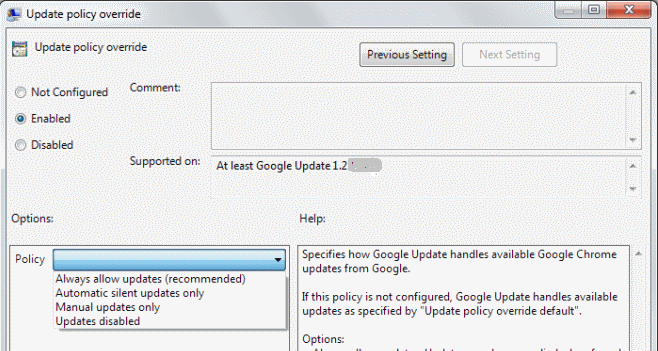
Enable it and you will see several other options to deal with your Chrome update. Choose under ‘Options’ how you want your chrome updates handled. Then don’t forget to click ‘Apply’ and OK at the bottom of the page.
It’s important to note that this will not work on all versions of Windows.
Source: ghacks.net

