With the advent of smartphones, capturing and storing photos has become incredibly convenient. The iPhone, in particular, offers a seamless experience when it comes to managing and sharing your photo albums.
Whether you want to share memories with friends and family or collaborate on a project, the iPhone provides multiple options for sharing photo albums.
In this article, we will guide you through the process of sharing photo albums on your iPhone, making it easier than ever to share your favourite moments with your loved ones.
Also Read: How To Turn On System Haptics On iPhone
How To Share Photo Albums On iPhone
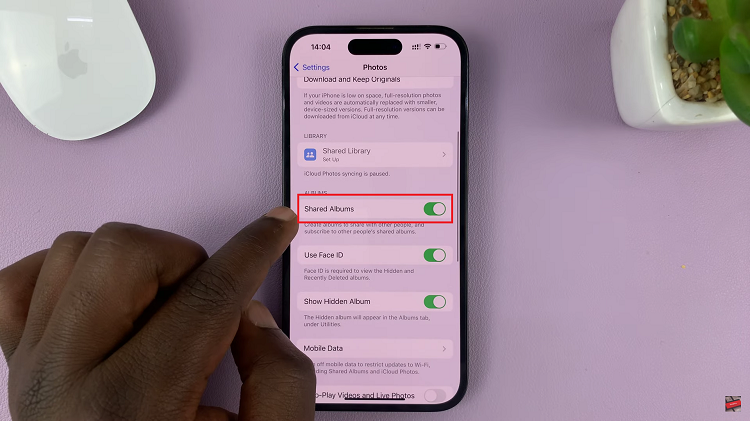
First, create a shared album on your iPhone. To do this, ensure the “iCloud Photos” & “Shared Albums” options are enabled. Go to “Settings” > “Photos” and tap on the toggle icons next to “iCloud Photos” & “Shared Albums.”
Next, open the Photos app and tap on the “+” symbol to create a new album. Tap on “New Shared Album” and give it a name. Add the contacts you’d like to share the album with and tap on “Create“.

To add photos to the shared album, tap on the created album, then tap on the “+” icon. Choose the desired images from your Camera Roll or other albums and tap on “Add.” Once done, tap on “Post” and the photos will be instantly uploaded and shared with others.
And thats how to share albums on your iPhone. Contributors can also add their own photos to the shared album by tapping on the “Add” button within the album. This makes it incredibly convenient for everyone involved to share their unique perspectives and capture unforgettable moments.

 Xiaomi Smart Band 8 Pro From Android Phone")