Setting up Touch ID on your MacBook Neo is perhaps the simplest way of increasing both the security and convenience of using your Mac. No more logging into your MacBook with your password because now you only have to use a fingerprint to perform such actions as unlocking your computer and confirming purchases.
Touch ID works using highly sophisticated biometric technologies that scan and recognize your individual fingerprint, providing you with additional protection for the data on your Mac. Be it a first-time setup of your MacBook Neo or the desire to get some additional functionality, getting familiar with the configuration process of Touch ID is a must.
In this guide, we will guide you through how to set up fingerprint on MacBook Neo.
Watch: How To Open Task Manager On MacBook Neo
Set Up Touch ID (Fingerprint) On MacBook Neo
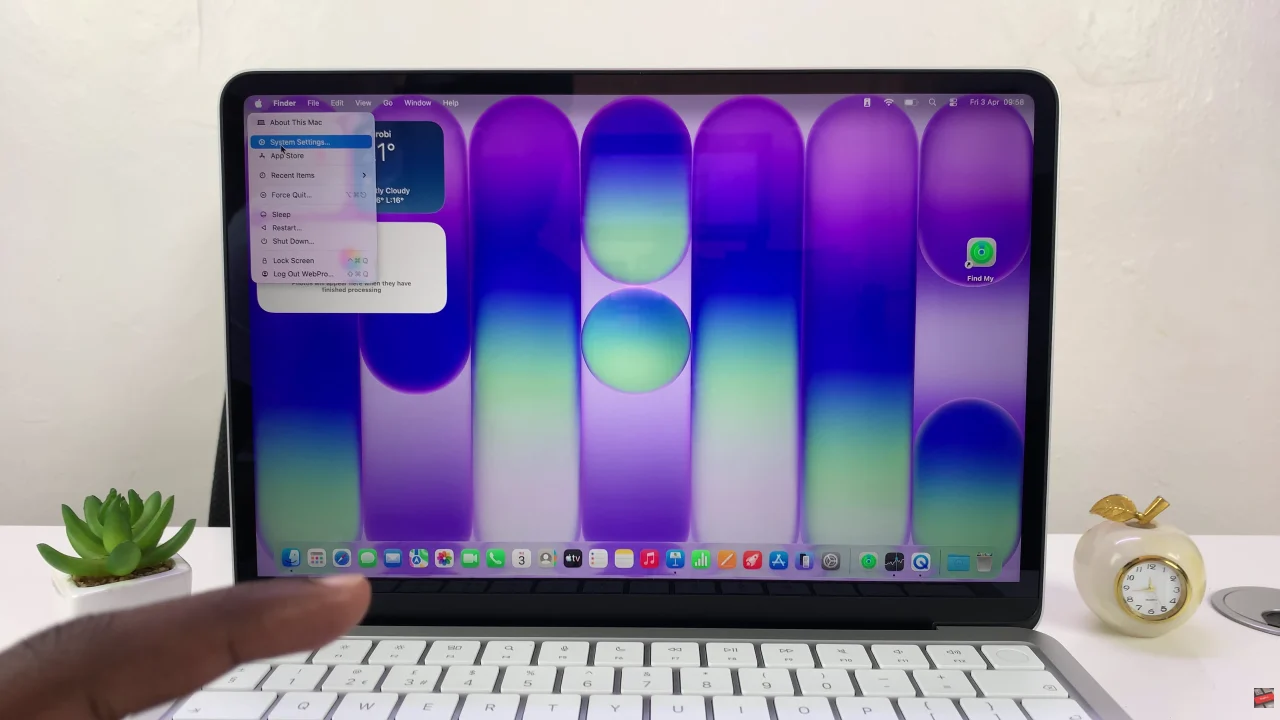
Begin by accessing the system settings on your MacBook Neo. Click on the Apple logo located in the top right corner and select ‘System Settings‘ from the menu that appears.
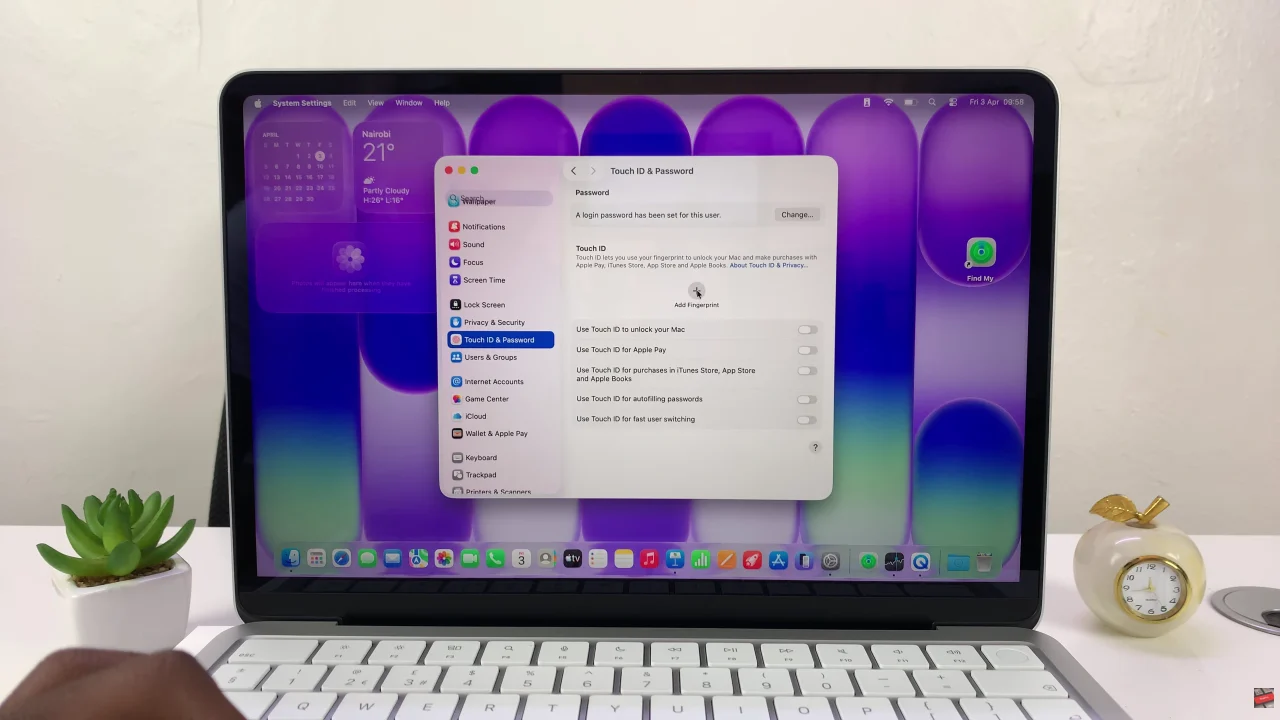
Following this, scroll through the settings and select ‘Touch ID & Password‘. From here, click on ‘Add Fingerprint‘ and confirm your identity by typing in your password.
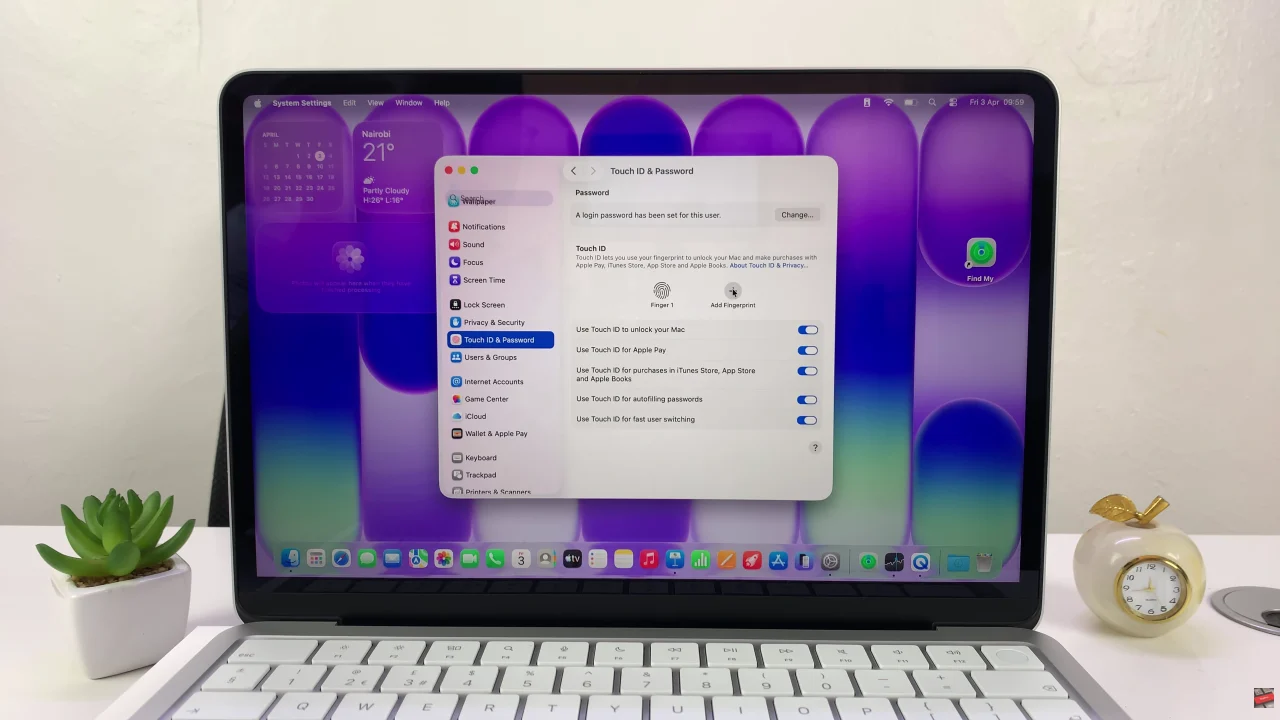
Afterwards, tap on the fingerprint sensor and register your fingerprint on your MacBook Neo. Additionally, you can customize the fingerprint settings to suit your needs.
In conclusion, setting up Touch ID on your MacBook Neo is a simple yet powerful way to improve your daily workflow and device security. With just a few steps, you can unlock your Mac, authorize purchases, and access apps more quickly than ever.
Read: How To Enable & Disable Auto Power OFF On Sony WF-1000XM6


 On MacBook Neo)