Setting up Face ID on iPhone 17 and iPhone 17 Pro is one of the best ways to keep your device secure while enjoying quick and effortless access. Apple’s advanced facial recognition technology allows you to unlock your phone, authorize purchases, and sign in to apps simply by looking at your screen no passcode required.
The Face ID setup process on the iPhone 17 series is simple and user-friendly, designed to ensure accuracy and reliability even in different lighting conditions. With improved sensors and faster processing, Face ID on these models is faster and more responsive than ever before.
In this guide, we’ll walk you through how to set up Face ID on iPhone 17 and iPhone 17 Pro step by step. Whether you’re setting it up for the first time or reconfiguring it for better recognition. This tutorial ensures you get the most secure and seamless experience possible.
Read: How To Take Photos In ProRaw Format On iPhone 17 Pro
How To Set Up Face ID On iPhone 17 & 17 Pro
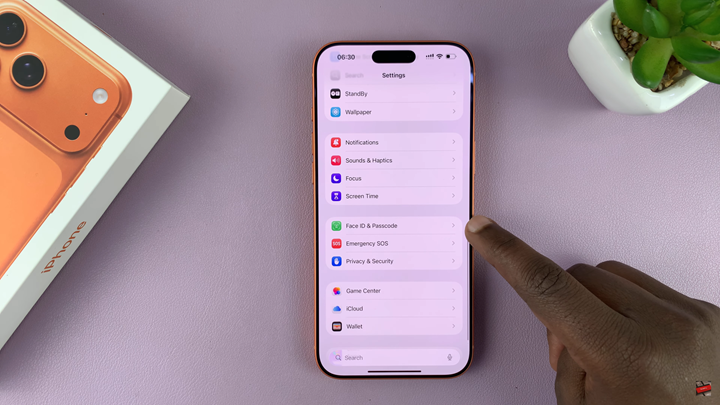
Launch the Settings app on your iPhone and scroll down to select Face ID & Passcode.
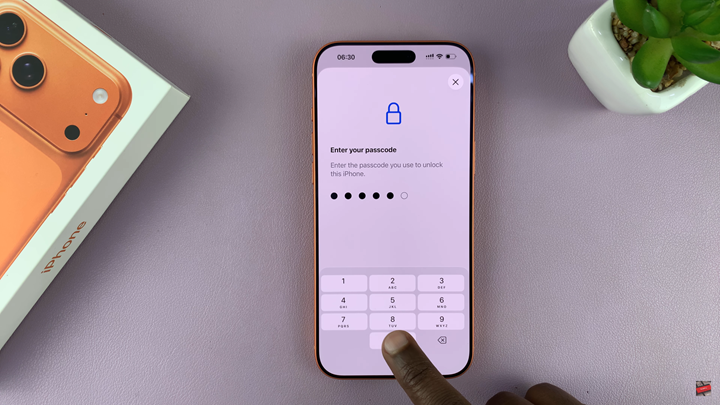
Enter your device passcode when prompted to proceed.
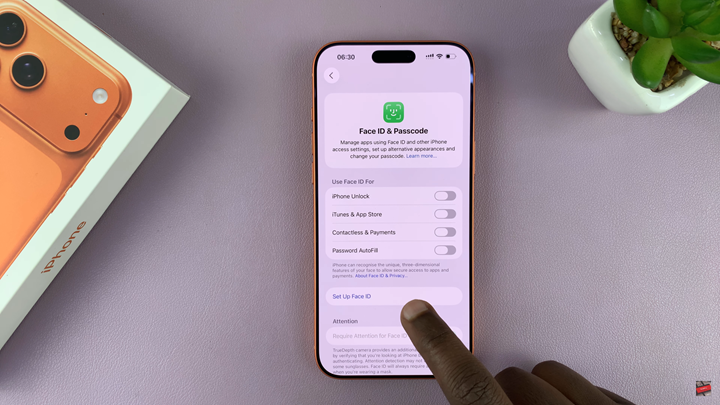
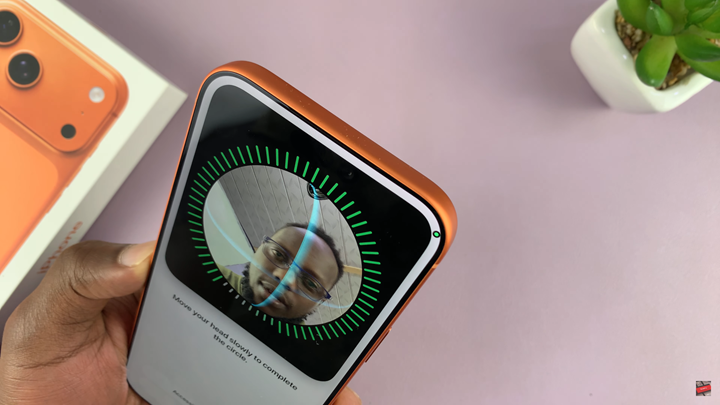
Tap on Set Up Face ID, then select Get Started to begin the face registration process.
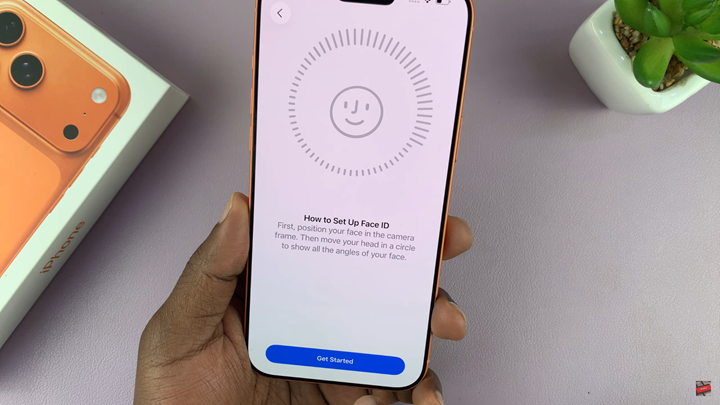
Position your face within the frame and slowly move your head in a circle to capture all angles. Once done, tap Continue to complete the first scan.
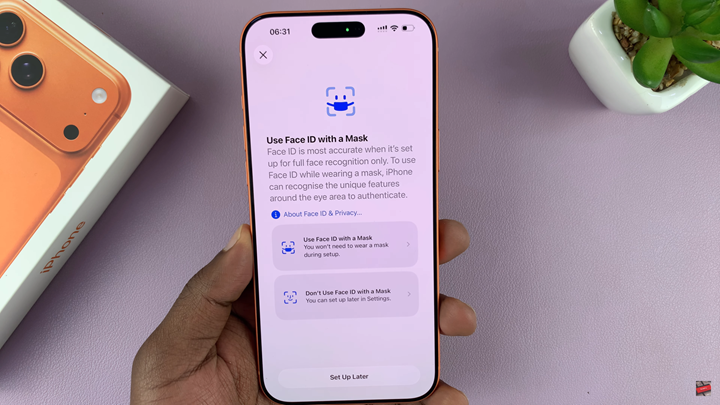
Configure Face ID with Mask (optional) if you wish to unlock your device while wearing a mask. After setup, tap Done to finish.

Once completed, Face ID will be enabled on your iPhone 17 / 17 Pro, allowing you to unlock your phone, authorize payments, and access secure apps quickly and securely.

