In today’s interconnected digital world, our smart devices often come with a myriad of features and functionalities aimed at enhancing our user experience. Samsung Smart TVs are no exception, offering a range of services and conveniences, including the ability to link your Samsung Account to access personalized content and settings.
However, there may come a time when you need to remove your Samsung Account from your Smart TV, whether you’re transitioning to a new account or simply want to disassociate your TV from your existing one.
If you’re wondering how to go about this process, you’ve come to the right place. In this article, we’ll provide you with a comprehensive guide on how to remove your Samsung Account from your Samsung Smart TV.
Watch: How To Enable Caller Name Announcer On Samsung Galaxy A15
Remove Samsung Account From Samsung Smart TV
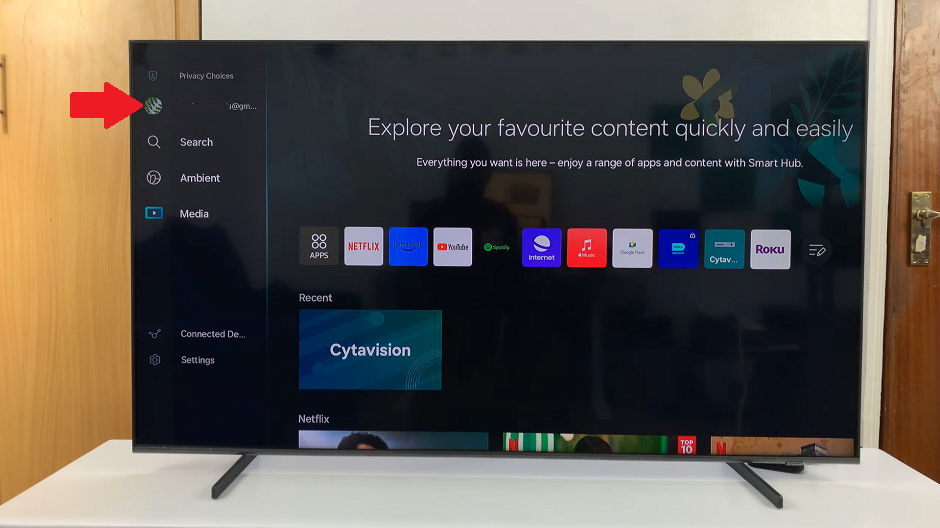
First, go to the home screen of your Samsung Smart TV. If you’re not on the home page, press the home button on the remote control.
Using your remote control, scroll left once to the TV menu. From the TV menu, scroll up to get to the Samsung Account. Press OK on the remote to access the Samsung account.
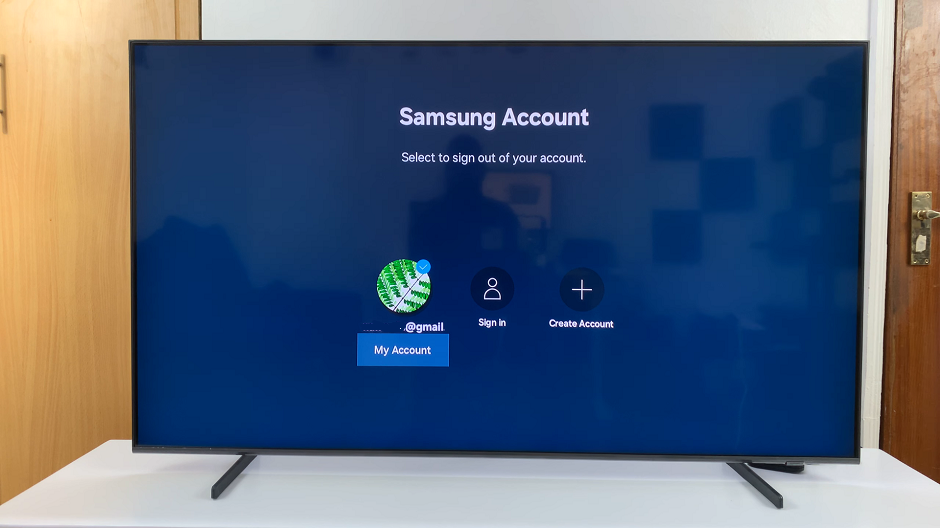
Within the Samsung Account menu, locate your Samsung account. Highlight your Samsung account and scroll down once to highlight My Account. Press OK to select.
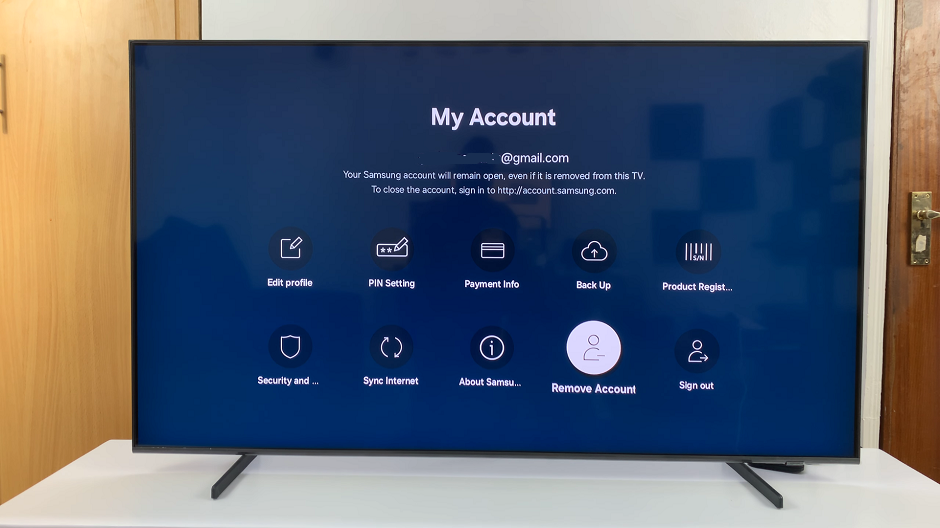
Under My Account, you should see various options related to it. Look for the Remove Account option. Remove account will erase all associated data and settings.
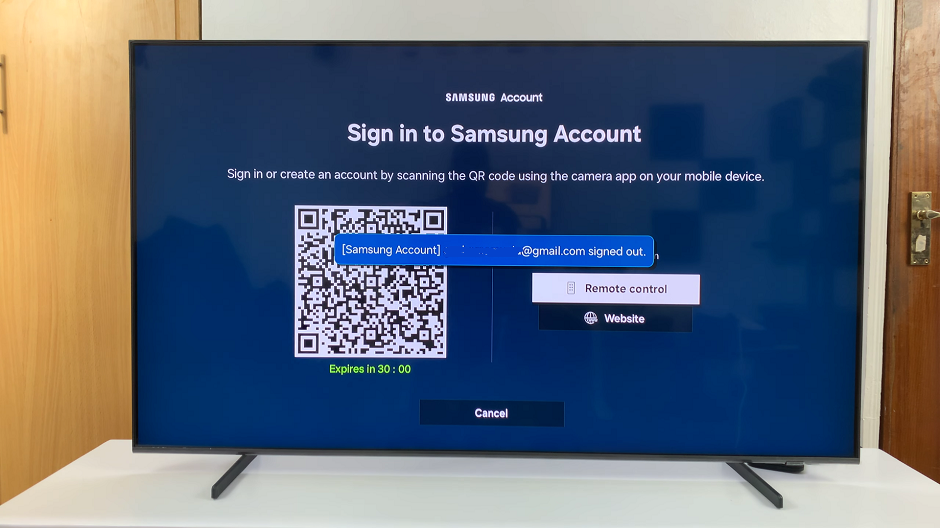
After selecting the Remove Account option, you may be prompted to confirm your decision. Select Yes. You should see the prompt that your Samsung account has been signed out.
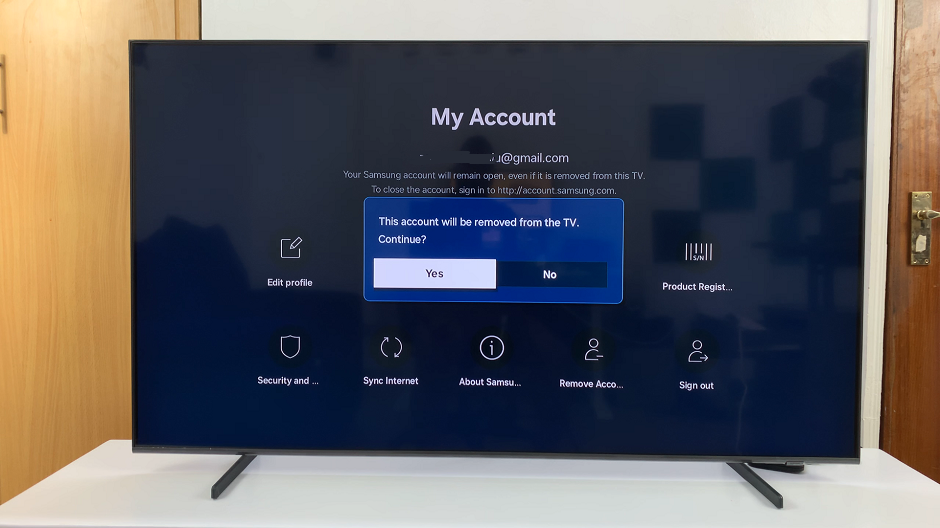
After the sign-out process is complete, you should return to the initial Samsung Account Sign In page. Your Samsung Account should no longer be listed among the linked accounts.
Congratulations! You’ve successfully removed your Samsung Account from your Samsung Smart TV.
Removing your Samsung Account from your Samsung Smart TV is a relatively straightforward process that can be completed in just a few simple steps. Whether you’re transitioning to a new account or simply want to disassociate your TV from your existing one, following the steps outlined in this guide will allow you to do so with ease.
By removing your Samsung Account, you regain control over your Smart TV’s settings and preferences, allowing you to manage your accounts as you see fit.
")
