Facebook asks for a user’s phone number for various reasons. The number can be used to reset a forgotten password and suggest people you may know so you can connect with them. It also helps to secure your Facebook account using two-factor authentication (2FA).
However, if your number is public to everyone, it might be risky. This is because you might receive calls and messages from unknown people. Some might be spam messages that are quite annoying. In the article, we will show you steps on how to remove phone number from Facebook.
Watch: How To Install Viber On iPhone
How To Remove Phone Number From Facebook
Make sure that you have Facebook installed on your device and that it has the latest update.
Then, launch the Facebook app from the home screen and sign into your account, if you aren’t logged in. Next, tap on the menu icon located at the bottom right of the page. On the next page, tap on your Facebook name, then tap on ‘Edit profile‘.
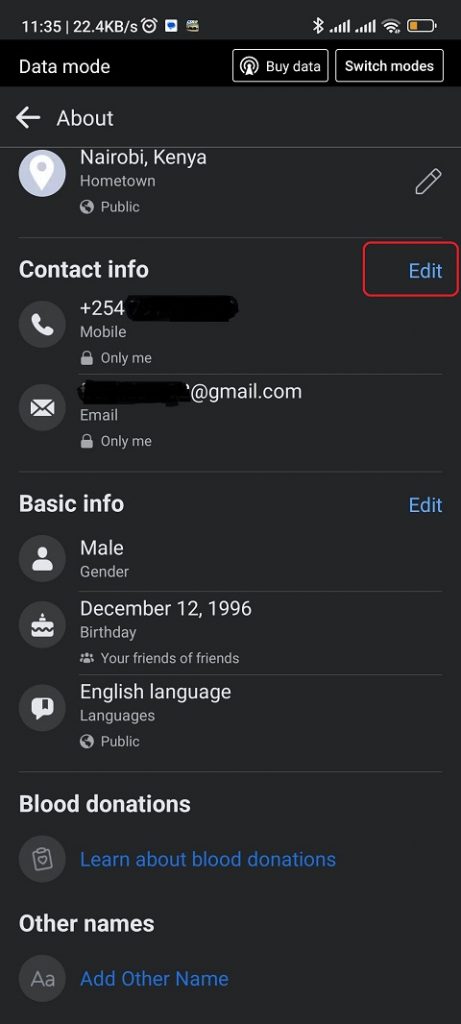
Next, scroll down and tap on ‘Edit Your About Info’. You can now see your whole information including your work, education, and other information about you. Scroll down to the ‘Contact info‘ heading and tap on ‘Edit‘.
The phone numbers you have linked to your Facebook account are visible here. You can see your Social links and websites also from here. Tap on ‘Manage contact info‘ and choose the phone number you’d like to remove. On the next page, you can adjust the privacy and choose who to share your number with.
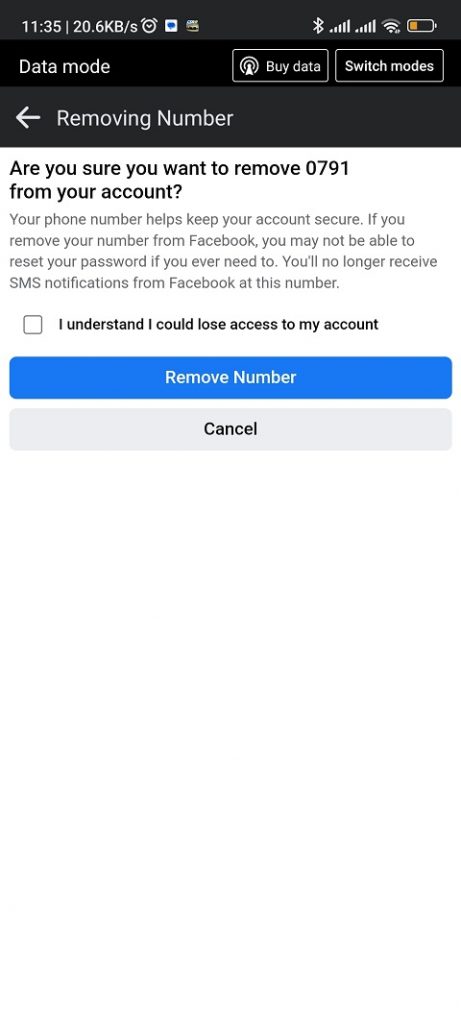
To remove your phone number, tap on ‘Remove‘, then tap on ‘I understand that I could lose access to my account‘, and select ‘Remove Number‘ to confirm the changes.
Remove Your Facebook Phone Number On Android
The steps below are quite similar to the iOS Facebook version.
Firstly, launch the Facebook app on your Android device and sign into your Facebook account. Next, tap on your profile icon, just below the home icon, then tap on ‘Edit profile‘.

Scroll down to the bottom of the page and tap on ‘Edit Your About Info‘.

You can now see your whole information including your work, education, and other information about you. Scroll down to the ‘Contact info‘ heading and tap on ‘Edit‘. All numbers that you’ve added to your Facebook account will be visible here. If you’d like to change the privacy settings of the phone number, simply tap on your number and choose your desired privacy option.
Then, tap on ‘Manage contact info‘ and choose the phone number you’d like to remove. To remove your phone number, tap on ‘Remove‘, then tap on ‘I understand that I could lose access to my account‘, and select ‘Remove Number‘ to confirm the changes.
Delete Phone Number On Web
You can remove your Facebook number from the browser. It’s quite an easy process and will take you a couple of minutes.
Firstly, open your browser and go to the Facebook site, then sign into your Facebook account. Once logged in, click on your profile icon at the top right corner of the page.
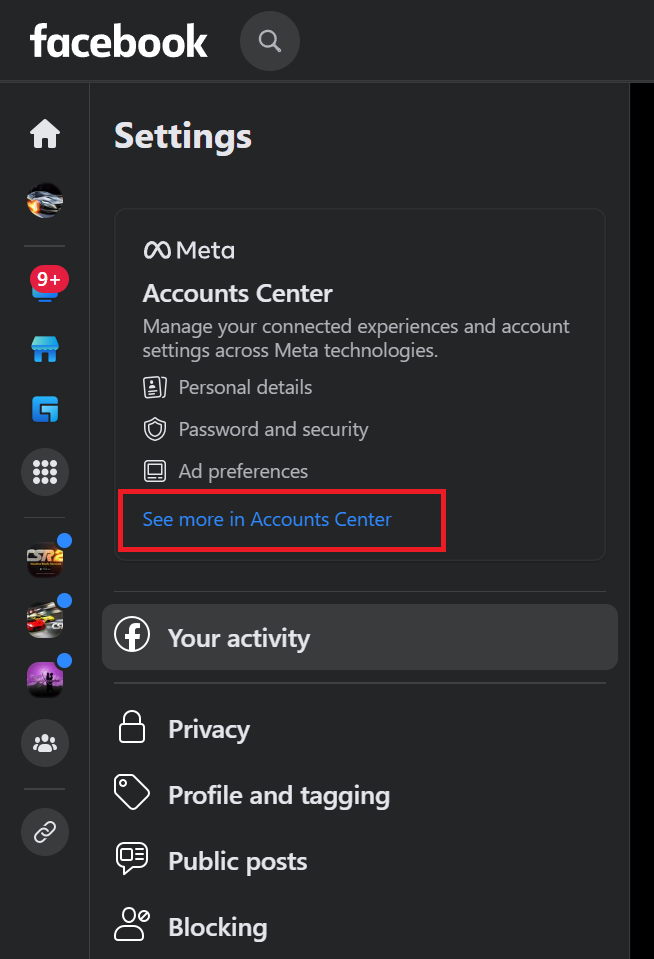
On the pop-up menu that appears, click on ‘Settings & privacy‘ then click on ‘Settings‘.

On the Facebook settings page, click on ‘See more in Account Center‘ under the Accounts Center section. This will take you to the accounts page where you can manage your account settings, account profiles, and many more.
Next, click on ‘Personal Details‘.
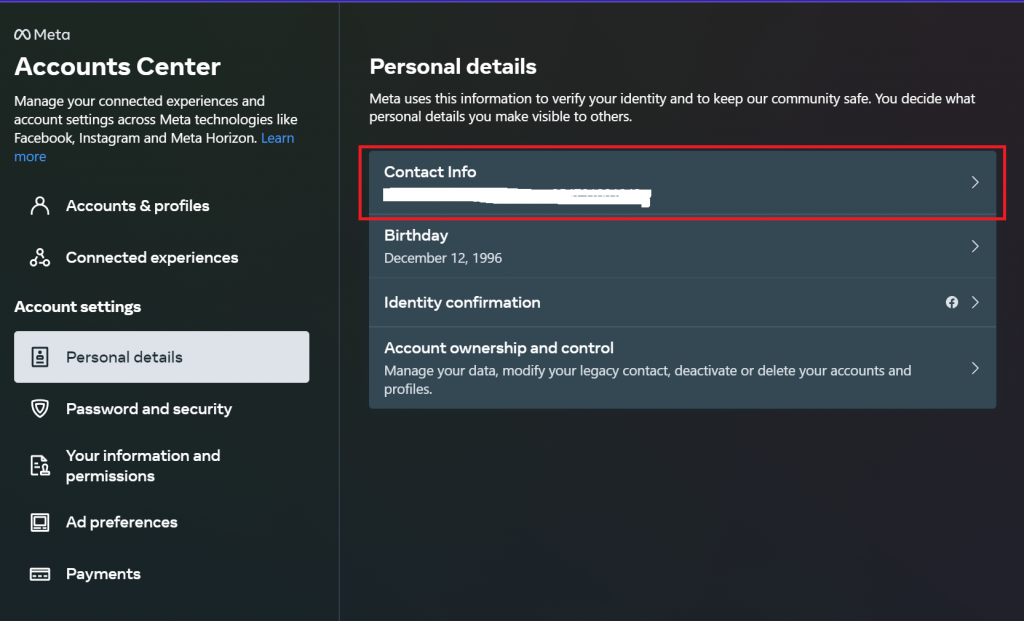
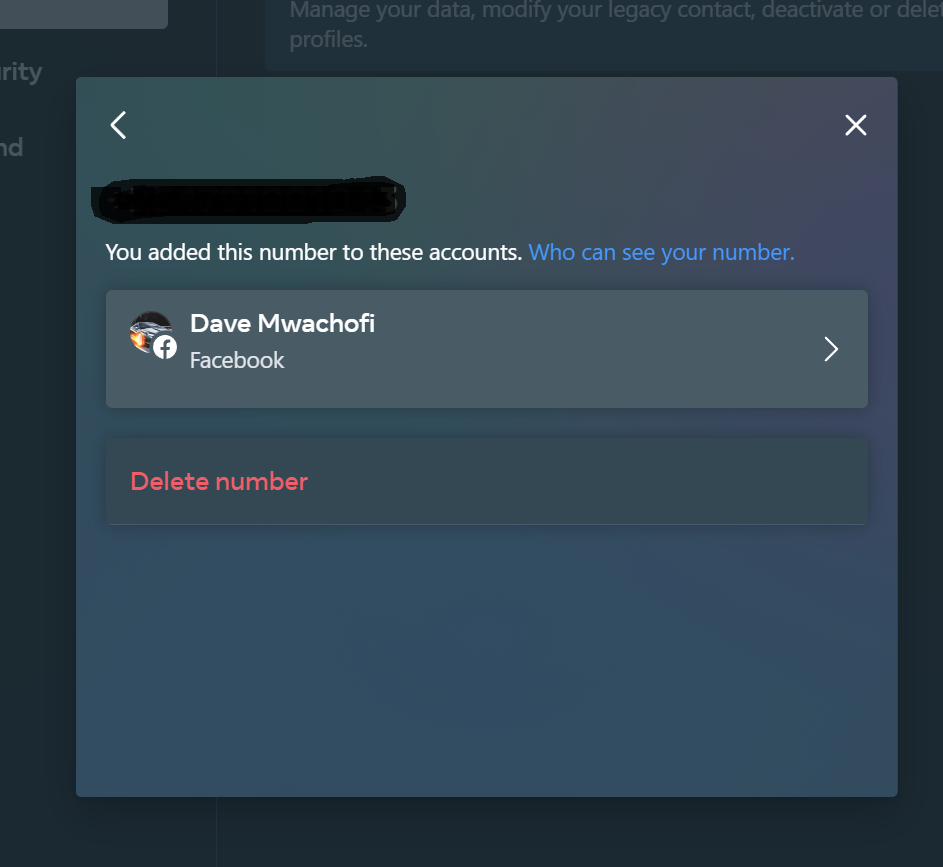
Your contact and birthday information will be visible here. Next, click on ‘Contact Info‘ and select your number. On the pop-up window, click on ‘Delete number‘, then click on ‘Delete‘ to confirm the changes. Your phone number will be removed.
That’s how to remove your phone number from Facebook. Let us know in the comment section below if you have any questions or suggestions.
Also read: How To Translate YouTube Subtitles (Closed Captions)

