If you want to run Intel apps on your M1 MacBook Pro, MacBook Air, or Mac, you need to install Rosetta 2. Essentially, Rosetta 2 is an emulator. It translates applications compiled exclusively for 64-bit Intel processors for execution on Apple silicon processors.
Since macOS Big Sur, you can find or install Rosetta 2 on every subsequent macOS. Without it, you won’t be able to run Intel-based applications on your M1 or M2-powered Mac. You can install it in two ways; using the terminal, or using an installer. Follow the steps below to learn how to install Rosetta 2 on Mac.
Watch: How To Exit Recovery Mode On Samsung Galaxy A14
Install Rosetta 2 On Mac
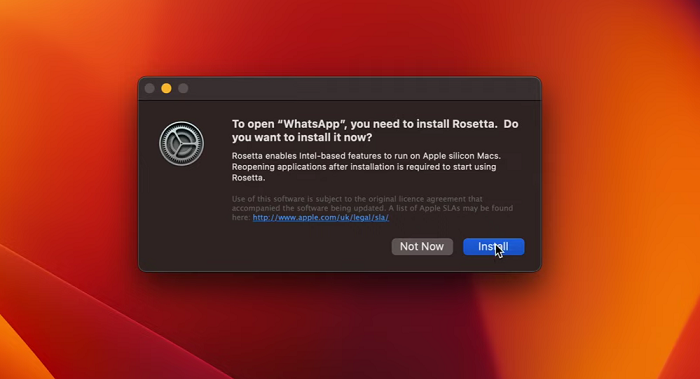
If you have the Intel app on your device, click to open it. Once opened, it will prompt you to install Rosetta. From the popup window that appears, tap on ‘Install‘ and follow any onscreen instructions to successfully install the application.
You can use the terminal to install the Rosetta application. Firstly, launch Terminal on your Mac or MacBook. You can do this by using the spotlight feature on your Mac. Next, on the terminal, type in this command: “softwareupdate –install-rosetta“.
Next, type the letter ‘A’ to continue with the installation process of the Rosetta application. Wait for a few minutes for the application to be installed on your Mac. Once done, launch the Intel apps you’d like to use and they’ll run successfully.
And that’s how to install Rosetta 2 on Mac. Let us know in the comment section if you have any questions or suggestions. If you found the article helpful, consider sharing it with your friends.
Read: How To Enable LED Flash Notification Alerts On Samsung Galaxy A14

