If you want better audio quality for recording, streaming, podcasting, or video calls, using an external USB microphone with your MacBook Neo is the way to go.
Unlike built-in microphones, USB mics deliver clear sound, reduce background noise, and give you full control over your recording setup. Here’s a step-by-step guide to connect and set up an external USB microphone on your MacBook Neo.
Before connecting your mic, make sure it is compatible with MacBook Neo. Most modern USB microphones are plug-and-play, which means you won’t need additional drivers. However, check the manufacturer’s instructions to confirm compatibility.
Watch: Connect AirPods To MacBook Neo
Connect External USB Microphone To MacBook Neo
To begin, connect your USB microphone to an available USB port on your MacBook Neo. Because the MacBook Neo only has a USB-C port, you’ll need to use a compatible USB-A to USB-C adapter, if the microphone has the legacy USB-A cable.
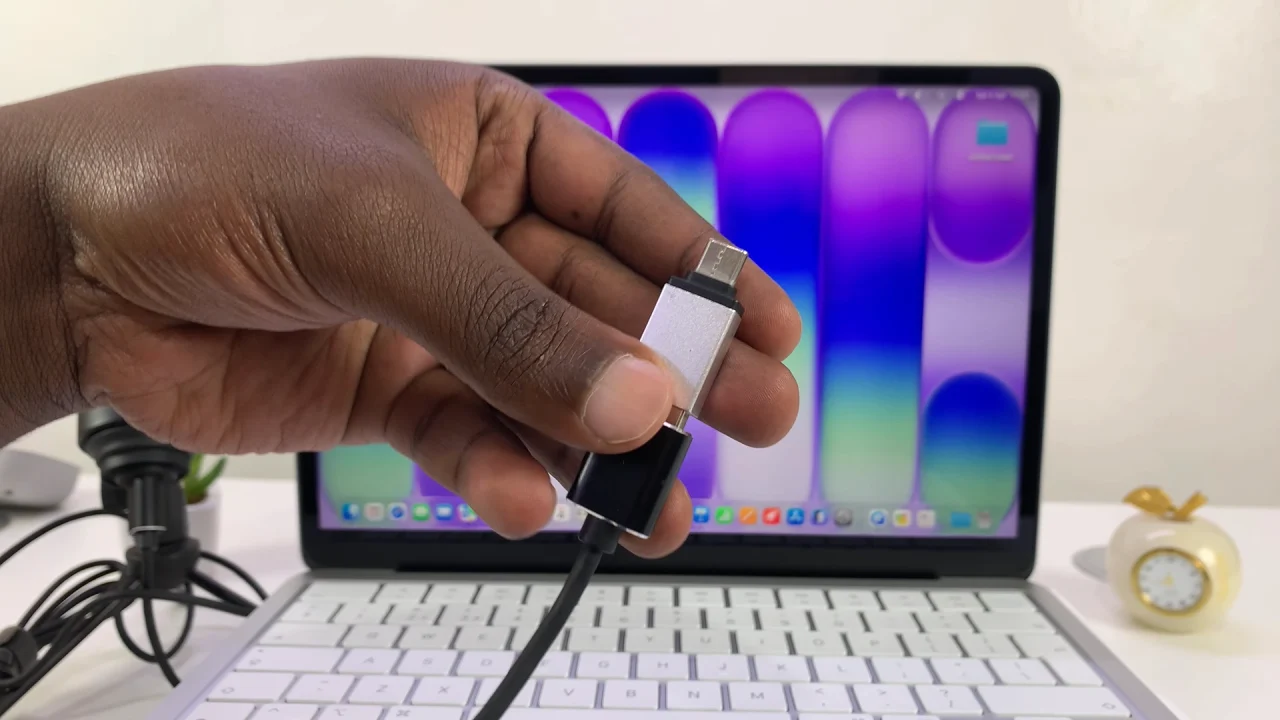
Wait a few seconds for your MacBook Neo to recognize the microphone. Most USB microphones are plug-and-play as earlier stated.
If it doesn’t happen by default, you’ll now need to select the USB Microphone as your default sound input device. Most apps you use for recording, like the in-built screen recorder offer you an option to switch the sound input on the interface.
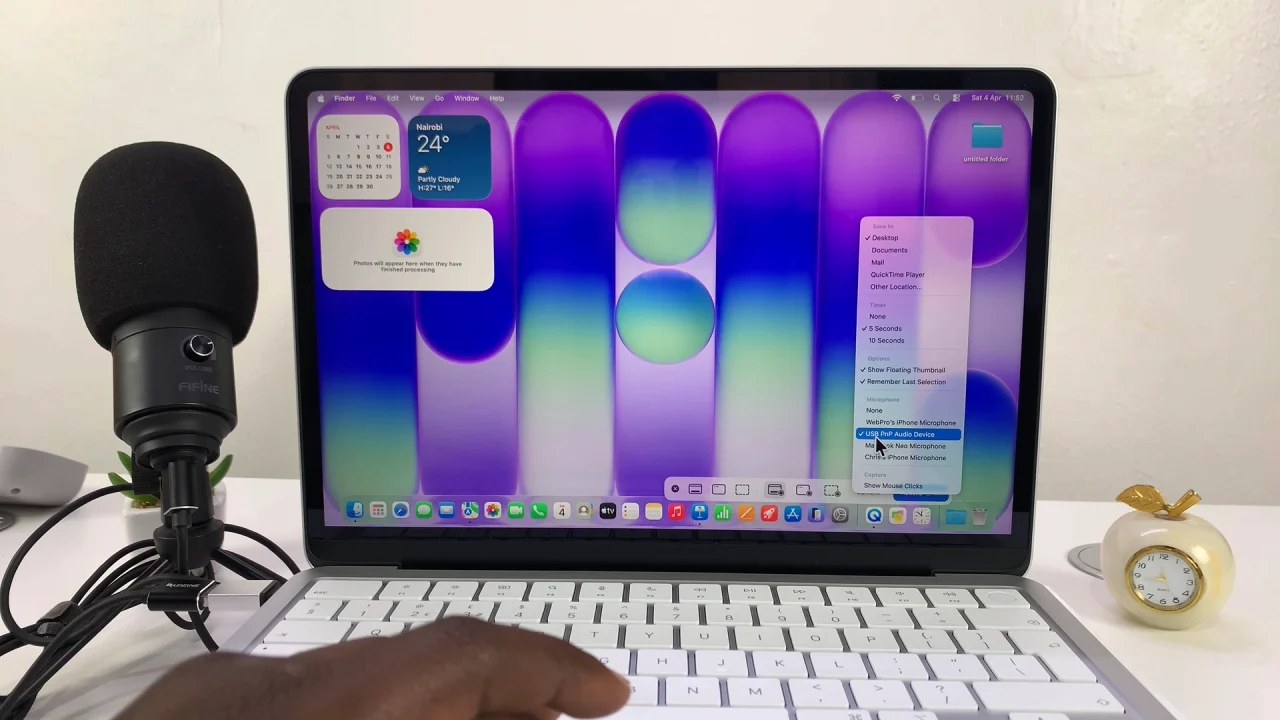
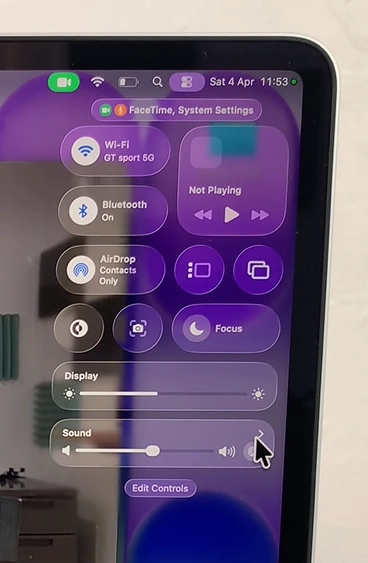
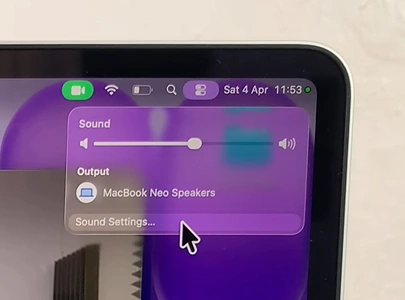
However, for those that don’t, or if you just want to make the switch manually, open Sound Settings on your MacBook Neo. Simply click on the Control Center icon in the top-right corner and click on the arrow next to Sound. Select Sound Settings.
Ensure you’re in the input tab, under Output & Input. Here, you should see your USB microphone listed as an available device. Click on it (USB PnP Audio Device) to select it as your default input device.
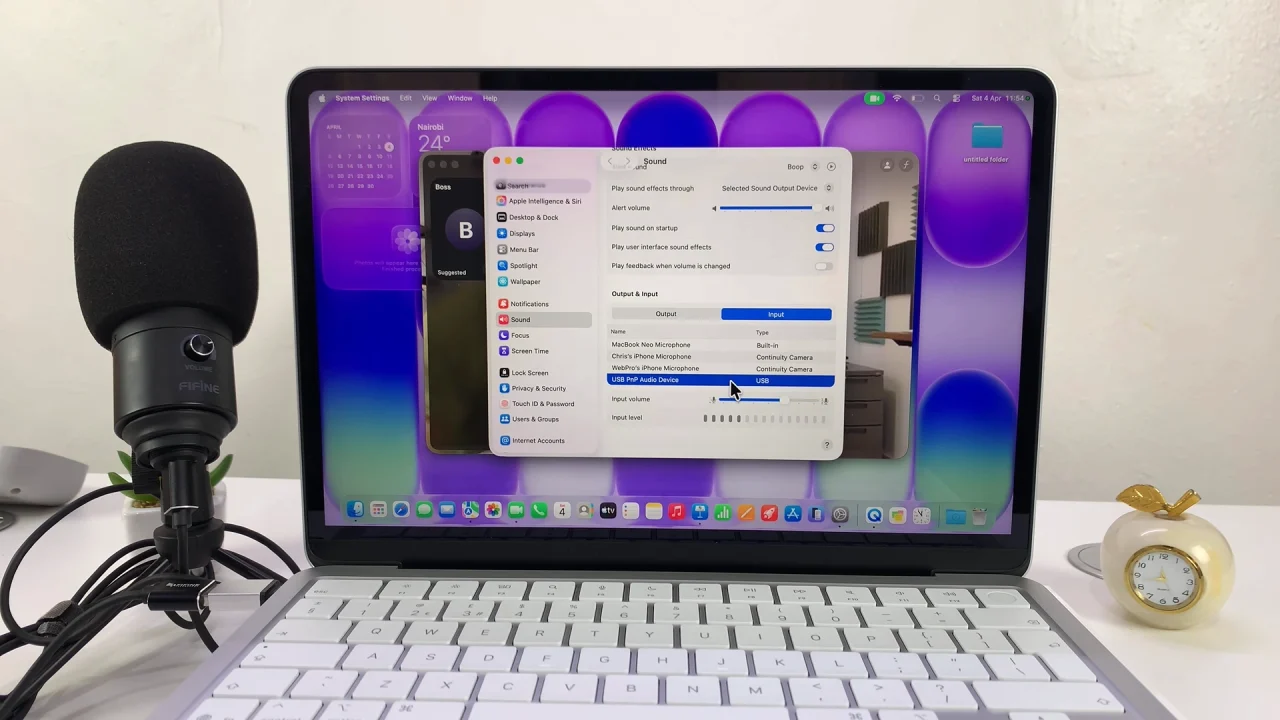
While still in Sound Settings, adjust the Input Volume slider to an appropriate level.
Speak into your microphone and check the input level bar. Avoid setting it too high to prevent distortion or too low to avoid weak audio.
Test Your Microphone
Before recording or streaming, it’s important to test your microphone. Open Voice Memos, GarageBand, or any recording app. Record a short clip and play it back.
If the audio is clear, your microphone is ready to use.
Troubleshooting Common Issues
Mic not recognized: Make sure your USB mic is fully plugged in and try a different USB port.
No sound: Check if the microphone is selected as the input device in System Settings.
Distorted audio: Lower the input volume and ensure you’re not too close to the mic.
Tips for Best Audio Quality
- Use a pop filter to reduce plosive sounds.
- Keep the microphone at a consistent distance from your mouth.
- Record in a quiet environment to minimize background noise.
