To get the most out of your Sony WF-1000XM6 earbuds, it is important to keep your headphones up-to-date to get the best sound quality, improvements and the latest bug fixes. Sony regularly publishes firmware updates that improve performance, and add new features yet not every user understands that these updates can be automatically applied.
Checking updates manually each time can be tedious and forgotten easily, so, to ensure that your earbuds always have the latest software it is a good idea to enable automatic updates and leave the rest to it. Within this tutorial, we are going to show you how to automatically update your Sony WF-1000XM6 earbuds, using the Sony Connect App.
By the end of this article, you will have an earbud that is up to date, optimized, and primed to achieve the best listening experience each and every time.
Watch: How To Set Up 360 Reality Audio On Sony WF-1000XM6
Automatically Update Sony WF-1000XM6 Earbuds
Start by launching the Sony Connect app on your device. If you don’t have the app installed, head to App Store or Google PlayStore and install it from there. Then, scroll down and select the ‘Device Settings‘ within the app.

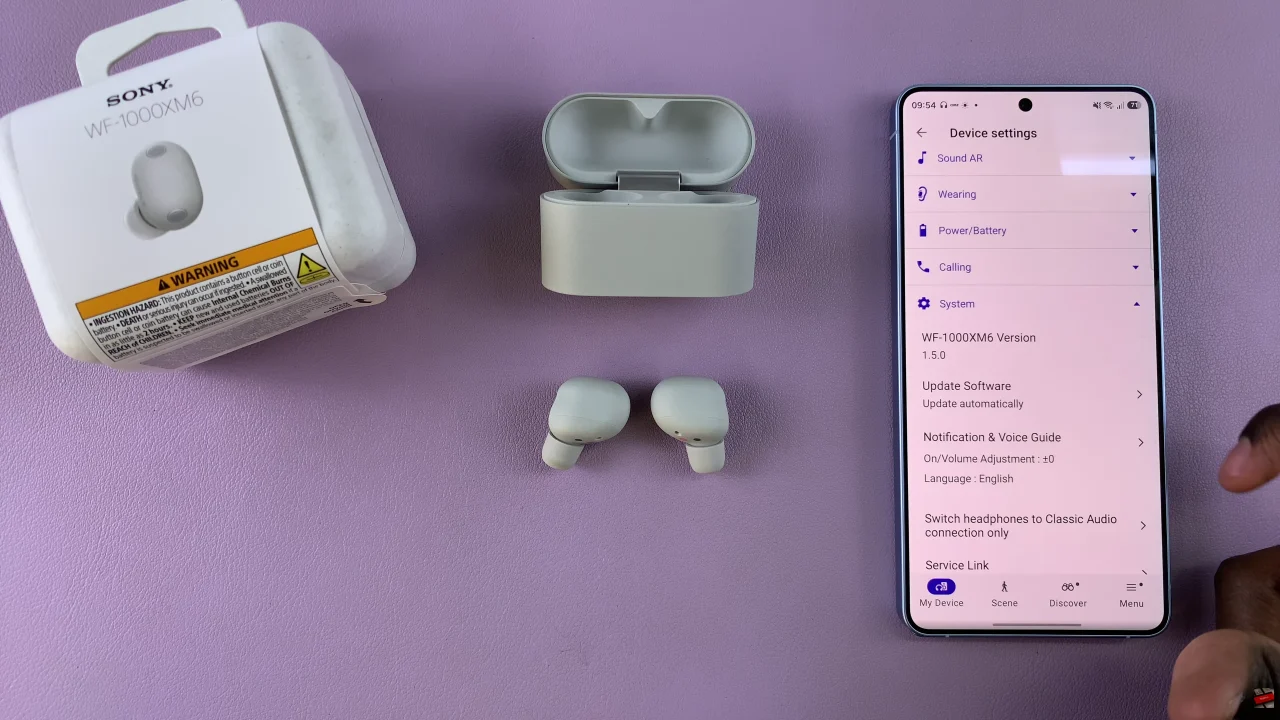
Following this, tap on ‘System‘ and select ‘Update Software‘ from the pop-up menu that appears.
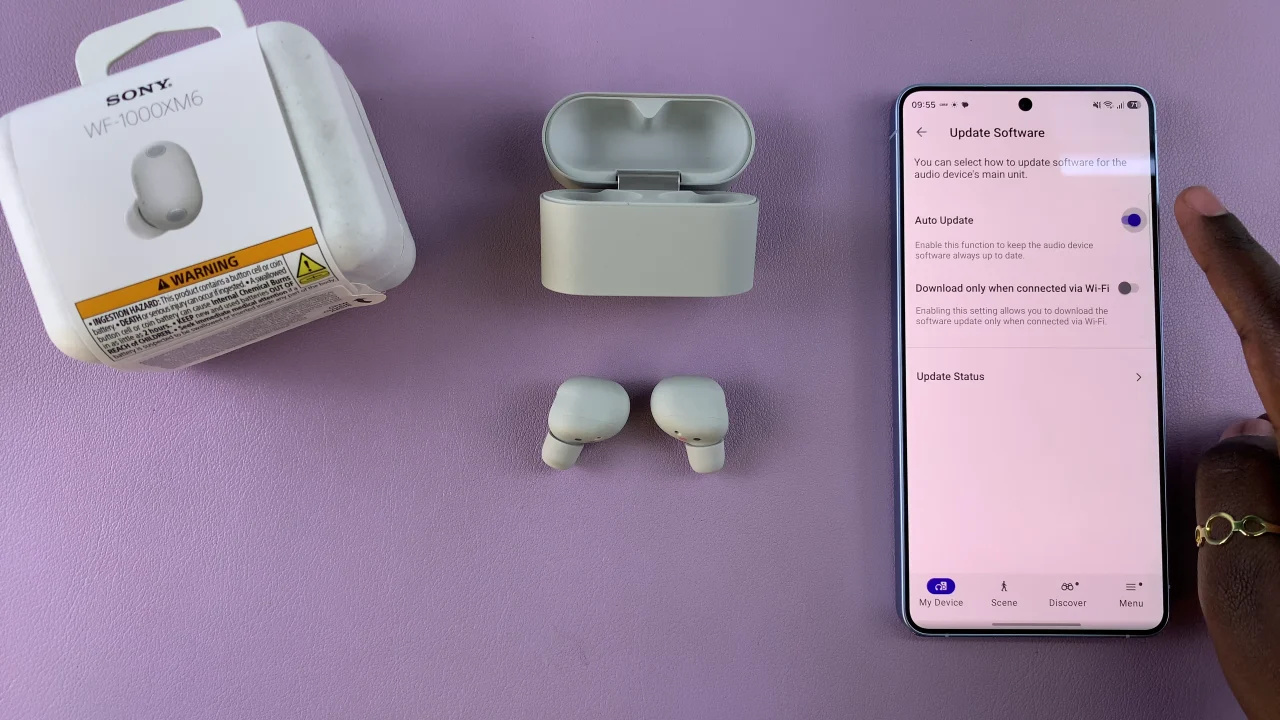
Within the Update settings find the ‘Auto Update‘ option. Tap on the toggle switch icon to enable automatic updates on your Sony WF-1000XM6 headphones.
By following the steps outlined in this guide, you can easily enable auto-updates through the Sony Headphones Connect app, saving time and avoiding the frustration of manual updates. For more tips, tricks, and tutorials, be sure to check our other guides and stay up-to-date with the latest Sony earbuds news.

