Apple continues to refine its personalization features in iOS 26, and one of the most visually striking additions is the ability to apply 3D Spatial Effects to your photos. This feature transforms flat images into immersive, depth-enhanced visuals, giving wallpapers, lock screens, and even shared images a sense of motion and realism.
If you want to bring your pictures to life, here’s a step-by-step guide on how to apply the 3D Spatial Effect to your photos in iOS 26.
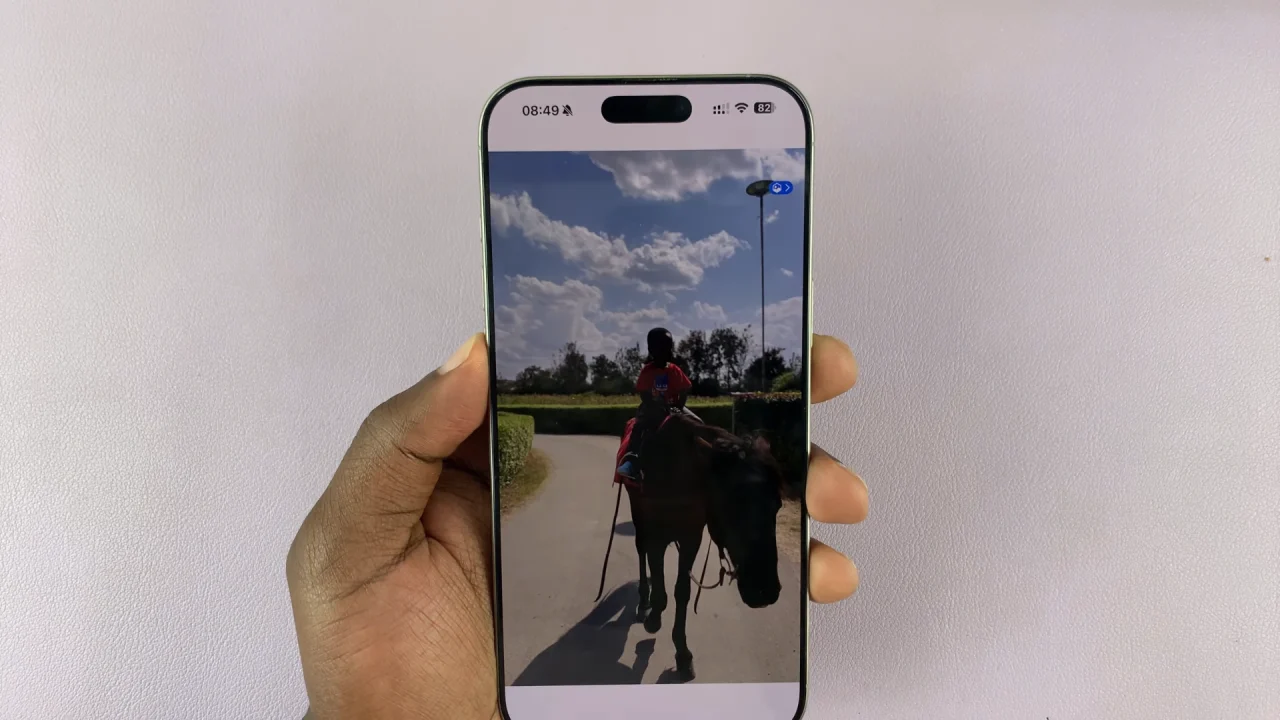
The 3D Spatial Effect uses depth mapping and Apple’s machine learning algorithms to separate foreground subjects (like people, pets, or objects) from the background. Once applied, your photo gains a parallax-like 3D appearance, making it appear as though the subject pops out of the screen when you tilt or move your iPhone.
This works especially well with Portrait mode photos and images with clear subject separation.
Watch: Enable Spatial 3D Wallpaper Effect In iOS 26
Apply 3D Spatial Effect To Photos In iOS 26
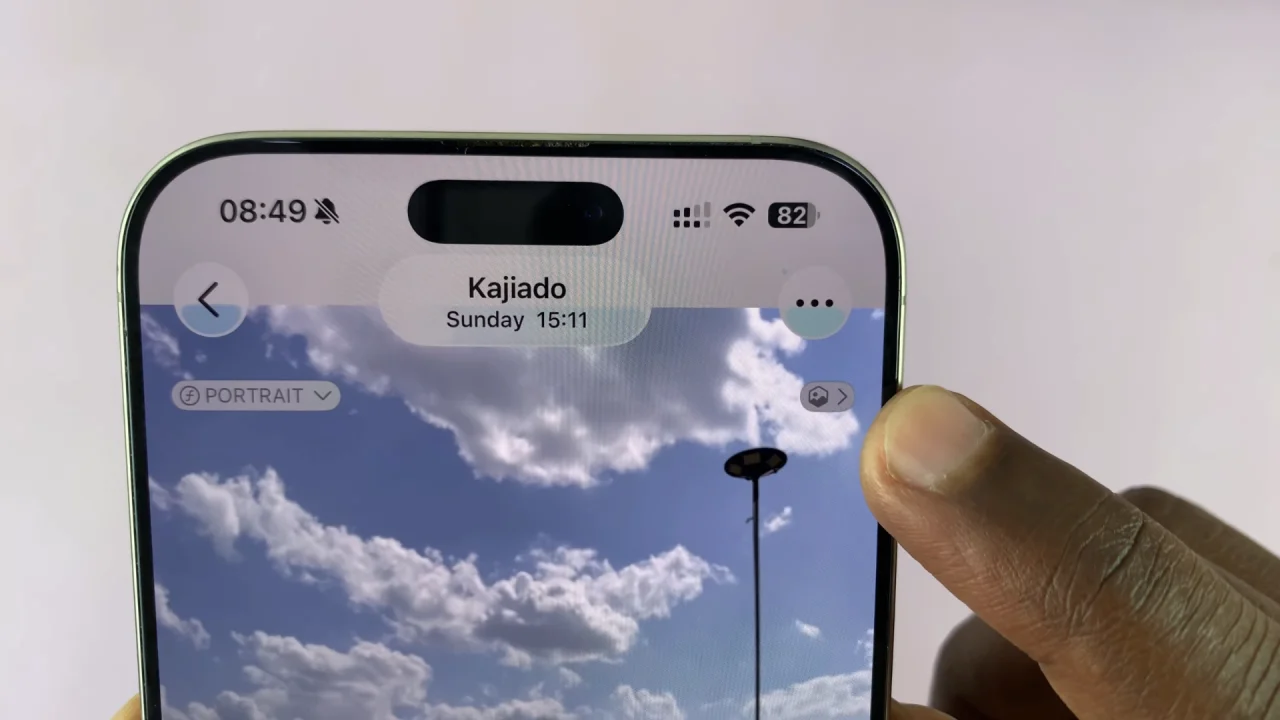
To apply the 3D effect, launch the Gallery app and find the photo you want to apply it on. Tap on the photo to view it in full screen.
Tap on the spatial scene option (greyed-out hexagonal Gallery icon) in the top-right corner of the photo. This will turn blue with the Spatial Scene moniker on it.
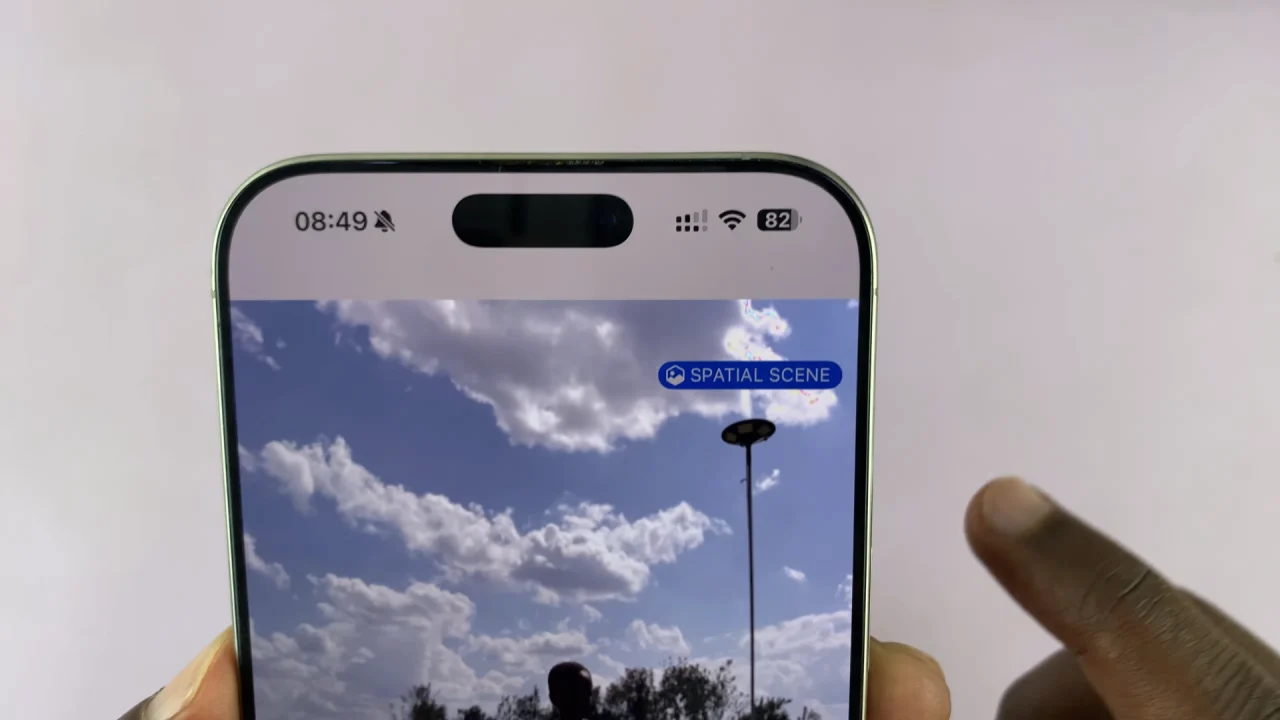
This will provide the 3D effect to the photo or image.
Using 3D Spatial Photos on Your iPhone
Once applied, you can:
Set as Wallpaper: Use it for your Lock Screen or Home Screen to enjoy the immersive parallax effect.
Share in Messages or AirDrop: Friends with iOS 26 will see the depth-enhanced version.
Showcase in Albums: The Photos app highlights spatial photos with a subtle 3D icon so you can easily find them.
Tips for Best Results
Use Portrait Mode photos for sharper subject separation.
Ensure good lighting so the effect looks natural.
Try different subjects—pets, people, and objects with contrasting backgrounds work best.
Read: How To Enable Spatial 3D Effect On Lock Screen Wallpaper In iOS 26

")