Most of us have wireless internet connections at home and we can simply connect all our laptops, tablets and smartphones onto it. But sometimes you will find yourself in a situation where you only have access to an Ethernet cable connection or broadband and you want to share this internet connection with your other wireless devices.
If your PC has a wireless NIC you can use it to broadcast the internet connection it’s getting from the cable or broadband and share it with your other devices. Windows and Linux operating systems allow you to create a wireless network on which you can hook up other devices and share the internet connection as a resource.
Windows, Mac and Linux are capable of sharing internet connection as a Wifi hotspot when you play around with the internet settings. But there is software that can do this and make your work easier. Personally, I prefer to avoid installing third party software when I can.
Windows 7:
The concept of turning your PC into a wifi hotspot started with Windows 7. You can do it right from the settings. Open network and Sharing center. You can do this by clicking on the start button and searching “Network and sharing” or you can find it in the control panel.
Click on “set up a new connection or network”. From the window that pops up, scroll down and select “set up a wireless ad-hoc (computer to computer) network. Click ‘Next”. Give your wireless network a name and a password. Click on the check box next to “Save this network”.
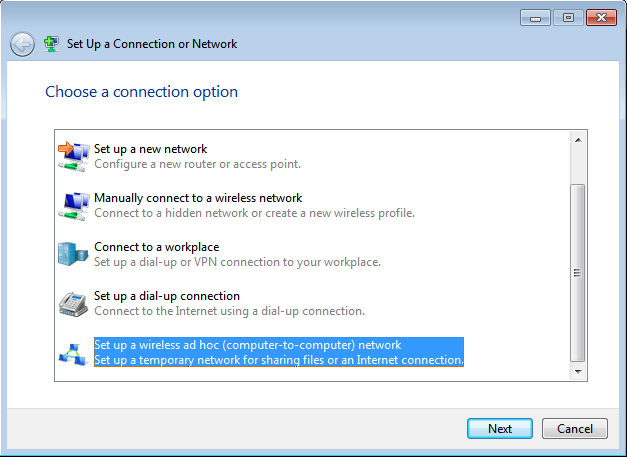
Tick on the check box next to “Allow other network users to connect through this computer’s Internet connection” so that you allow your PC to share its wired Internet connection with the devices connected to your PC over the ad-hoc network.
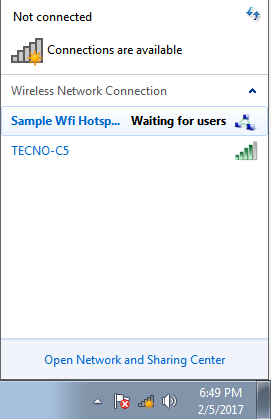
When the internet connection is created, you should see it when you click on the networks icon at the bottom right side of your screen. It’s now ready to share internet with devices that have wireless.
There have been problems before about wireless networks created in Windows 7 not able to connect to some devices especially Android devices. This problem can be corrected through the command line but to make your life easier, there are software utilities that will create this wireless networks for you.
Windows 8:
In windows 8, things can get a little trickier. I have no idea why Microsoft decided to remove this feature from Windows 8’s graphical user interface. The function is still there but you have to access it from the command line.
First open the Run dialogue box (Win + R) and type ‘nc.cpl‘ and hit Enter on your keyboard. In the networks and sharing Window, right click on your wireless network ans select properties. A small properties window will open. Click on the Sharing tab and allow other computers to connect through your computers internet connection.
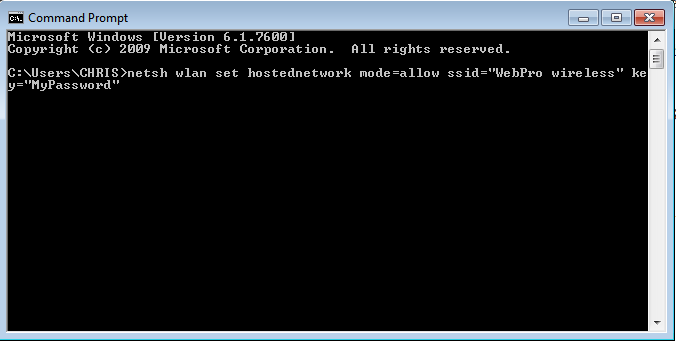
Once that is out of the way, open the command prompt. You have to be the PC’s admin to do this. Set up a wireless network using this command.
netsh wlan set hostednetwork mode=allow ssid=”SSID” key=”PASSWORD“
Write this command carefully into your command prompt window. Replace SSID with the name you want or your wireless network and PASSWORD with the password you want.
Press Enter. Then use this command to start sharing over the network you just created.
netsh wlan start hostednetwork
As you have noticed by now, it’s not the easiest thing to do in the world. You might opt to use third party software for now and maybe upgrade to Windows 10 for future because that is where things get easiest.
Window 10:
If you’re running Windows 10, you cannot get luckier. The user interface has a switch to turn your PC into a portable wifi hotspot. How cool is that?
Go to settings (Windows + I) and click on Network and internet. On the Network and Internet page click on ‘Mobile Hotspot’ on the left hand side menu.
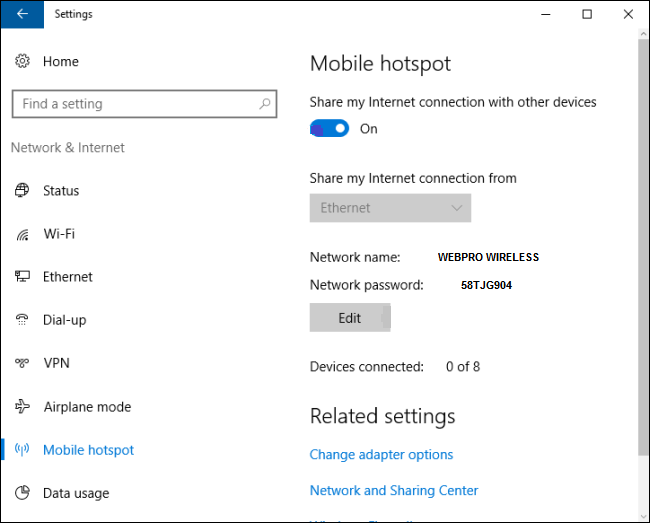
Then you can turn on Hotspot and click ‘Edit’ to change the name and password of your new wireless access point. Simple as that.
In creating a wireless hotspot, Windows 10 takes the cake. Apart from being easy to set up, I haven’t had a connectivity problem with my iOS and Android devices so far.