Efficient time management is vital when you are working, studying, or even trying to maintain a consistent schedule. With the MacBook Neo, there are time-related features integrated into the device, but not everyone knows how to fully harness the capabilities of these tools.
If you are interested in learning how to properly set and use a timer on your MacBook Neo, then you have come to the right place. This post will show you all the tips and tricks involved in utilizing this function.
After reading this guide on the matter, you will be equipped with the knowledge and skills needed to make good use of your MacBook Neo’s timer function.
Watch: How To Use Sticky Notes On MacBook Neo
Use Timer On MacBook Neo
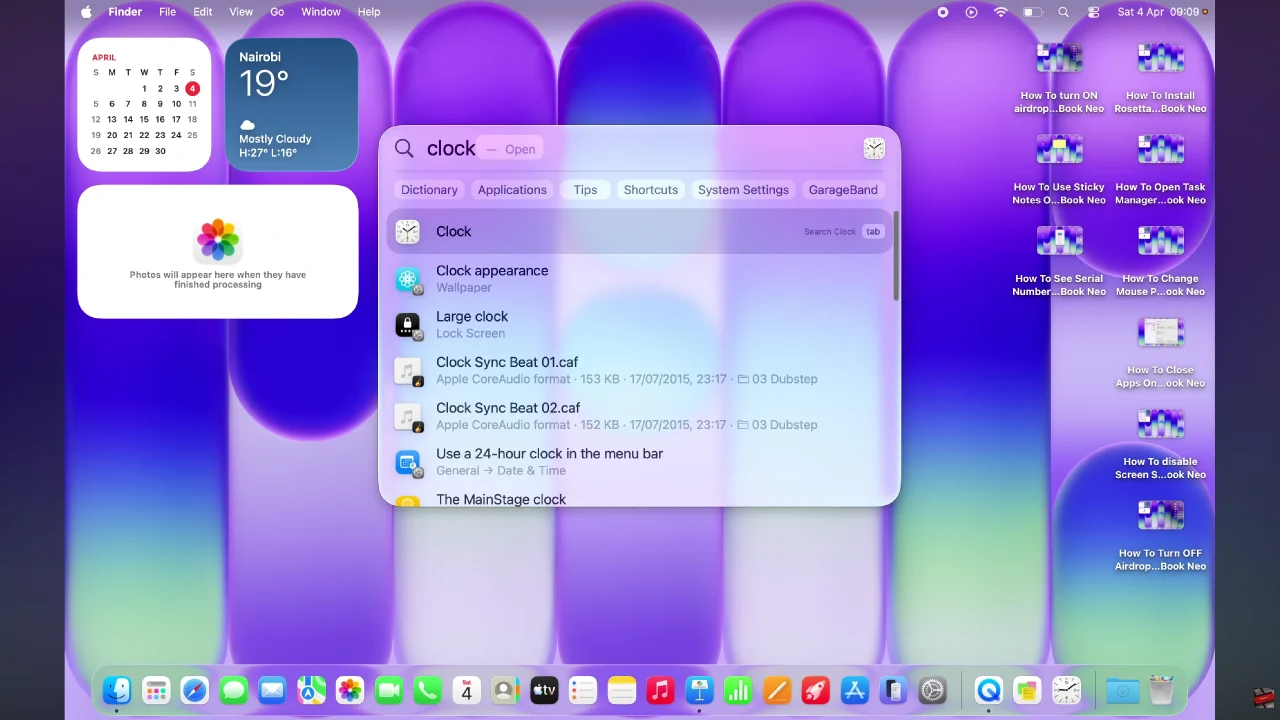
Begin by accessing the Spotlight feature on your MacBook Neo. Click on the Spotlight search icon in the top right corner and type in ‘Clock‘ from the menu that appears.
Following this, click on the ‘Timers‘ section in the Clock app.
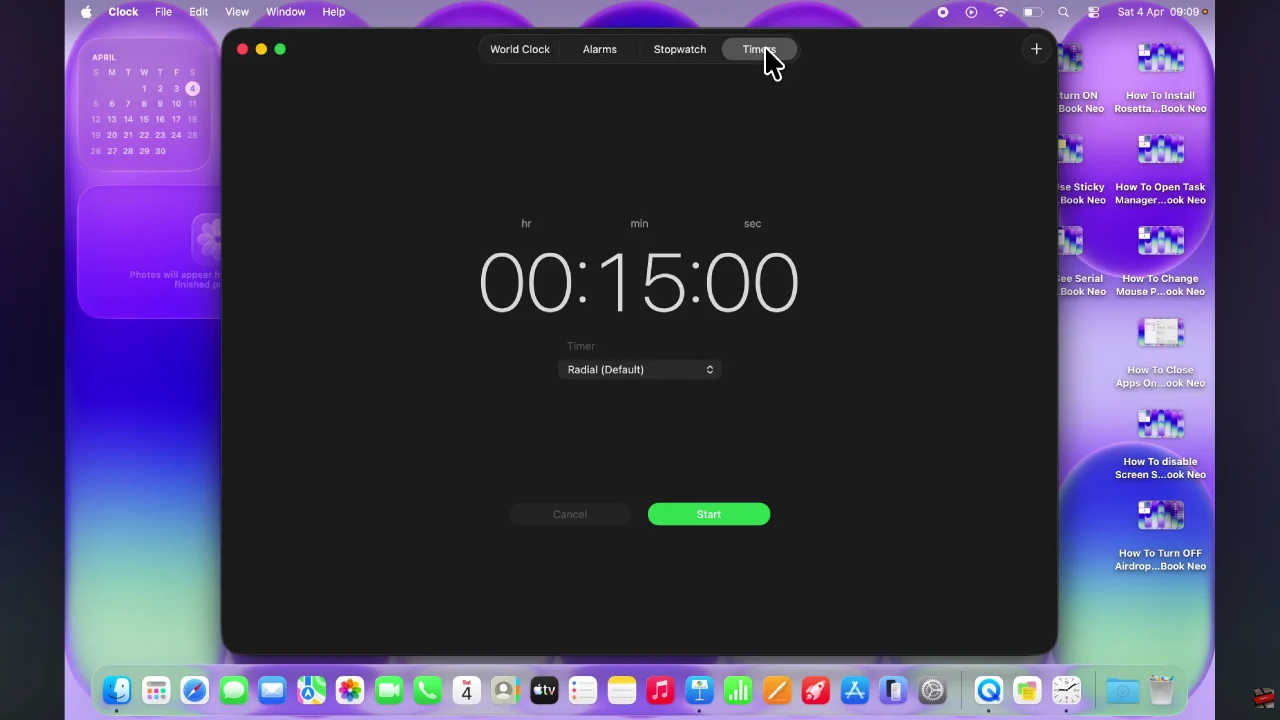
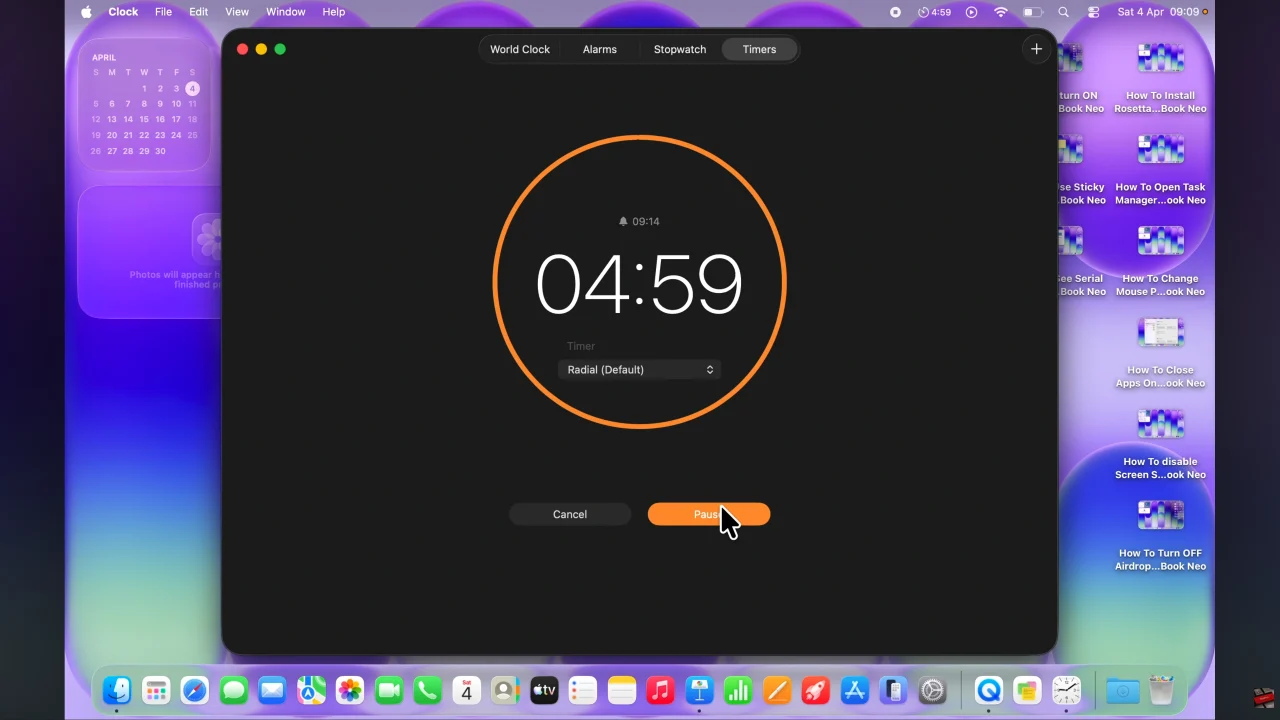
At this point, click on the time icon and set the timer you’d like to use. Additionally, you can also choose the sound that will ring once the timer runs out. After setting everything , click on ‘Start‘ and your timer will begin.
By following the instructions in this guide, you now know how to create and manage multiple timers on your MacBook Neo. Whether you’re managing work tasks, setting up and customizing timers ensures that you never lose track of important activities
