Sony Smart TVs come with a useful feature called HDMI-CEC (Consumer Electronics Control), also known as Bravia Sync on Sony devices. This feature allows you to control multiple HDMI-connected devices—like a soundbar, Blu-ray player, or gaming console—using just your TV remote.
Instead of juggling different remotes, you can enjoy a seamless entertainment experience. In this guide, we’ll walk you through how to set up HDMI-CEC on your Sony Smart TV.
HDMI-CEC is a protocol built into HDMI connections that allows devices connected via HDMI to send and receive control commands. On Sony Smart TVs, it’s branded as Bravia Sync. For example, with HDMI-CEC enabled:
Your TV can automatically switch to the correct HDMI input when you power on your Blu-ray player or PlayStation. Also, you can control connected devices (play, pause, volume, etc.) with your Sony TV remote. Power commands (on/off) can as well sync across multiple devices.
Read: How To Install Google Chrome On Sony Smart TV
Set Up HDMI-CEC On Sony Smart TV
To begin, press the Home button on your Sony TV remote. Then, scroll to the top-right corner of the screen and select the Gear icon to open Settings.
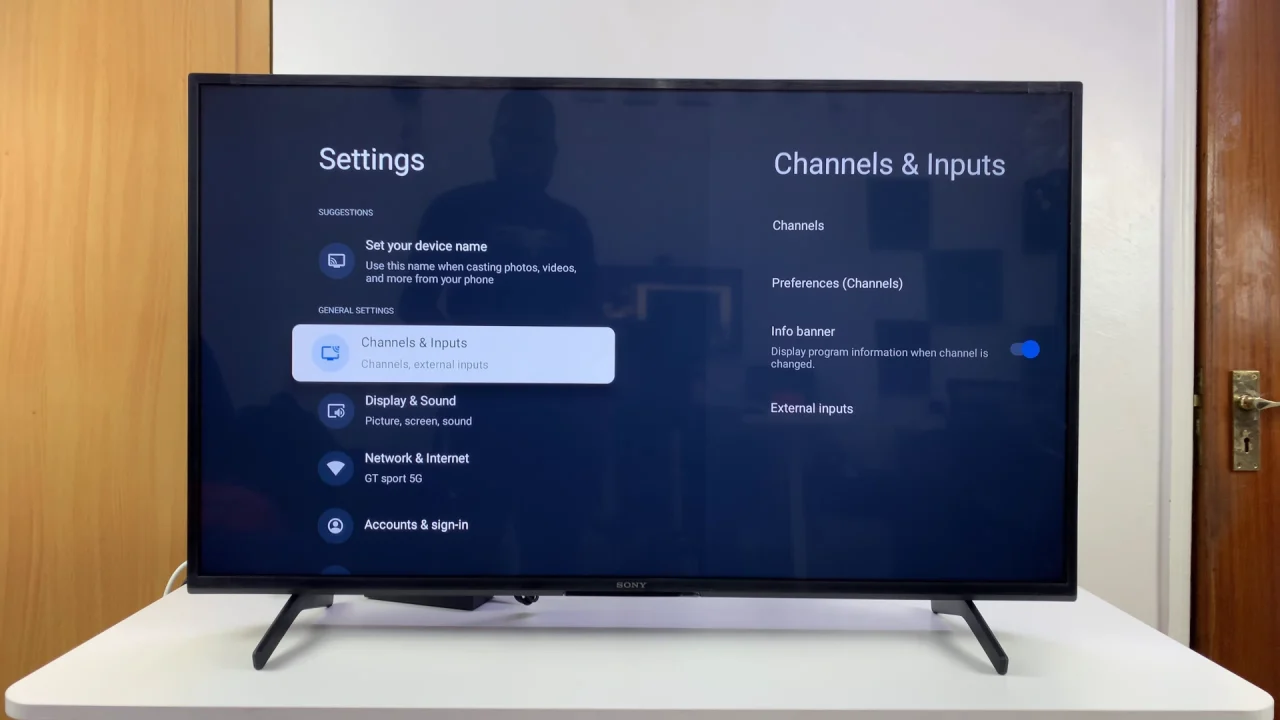
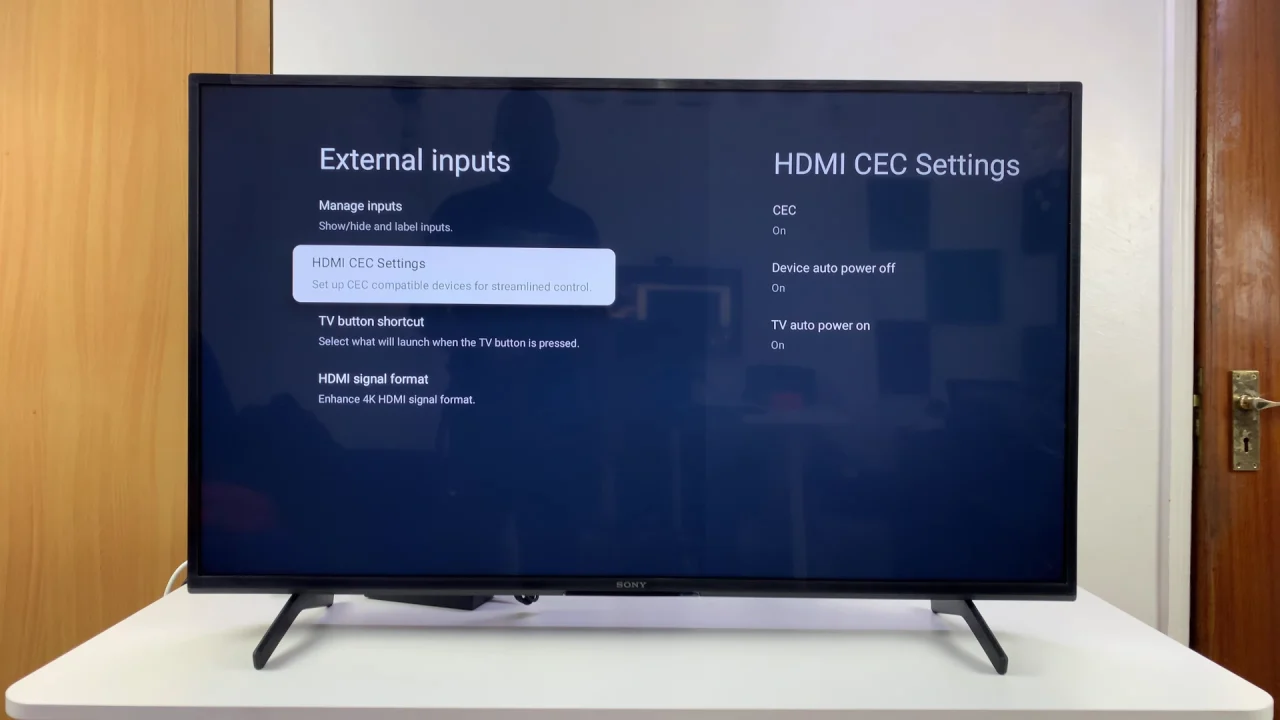
Select All Settings and click on Channels & Inputs. Here, you should find the HDMI CEC Settings option is enabled by default.

When enabled, it allows you to control and automatically turn on or off other HDMI CEC enabled devices with a single remote control.
Press OK to select the HDMI CEC Settings. Highlight the CEC option and select On to enable . To disable the feature, select the Off option.
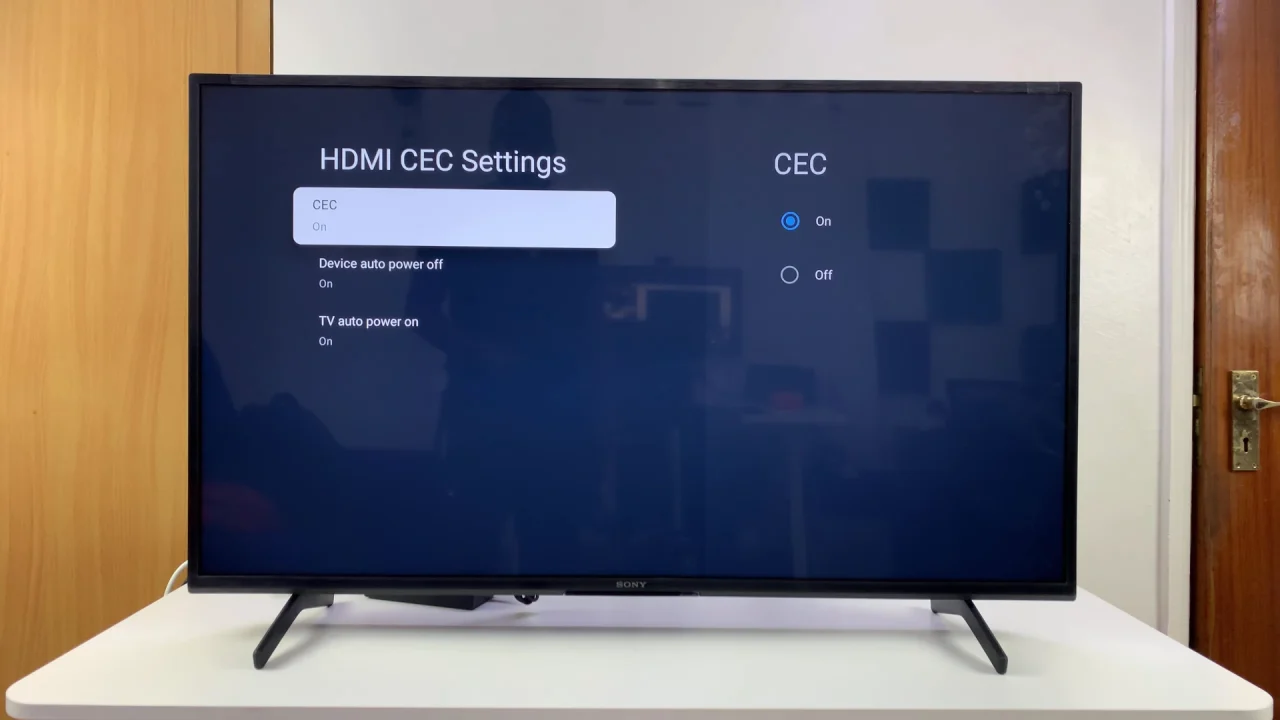
Turning off HDMI CEC on your Sony Bravia TV will stop it from controlling your TV’s power state, so your TV won’t turn on or off automatically when using your Sony Smart TV.
You can also fine tune the actions by highlighting Device Auto Power On and Device Auto Power Off, then select to turn the options on or off.
Once you’ve made your selection, exit the Settings menu. Your changes will be saved automatically, and HDMI CEC will now be set up based on your preference.

