Video:How To Set Up eSIM On iPhone 17 / 17 Pro
Setting up an eSIM on the iPhone 17 and iPhone 17 Pro has become increasingly relevant as more users look to manage multiple phone numbers without physical SIM cards. With the latest models supporting advanced eSIM functionality, understanding the setup process can streamline connectivity and simplify switching between carriers. As a result, this topic has garnered significant interest among tech enthusiasts and everyday users alike.
Moreover, as mobile networks evolve and digital SIM adoption grows, knowing the essentials of eSIM setup is more important than ever. From managing work and personal lines to enjoying greater flexibility while traveling, the process has become a key feature for maximizing the iPhone 17 and 17 Pro experience. Therefore, exploring the setup process is a crucial step for anyone aiming to make the most of their device
Watch:How To Force Restart iPhone 17 / 17 Pro
Set Up eSIM On iPhone 17 / 17 Pro
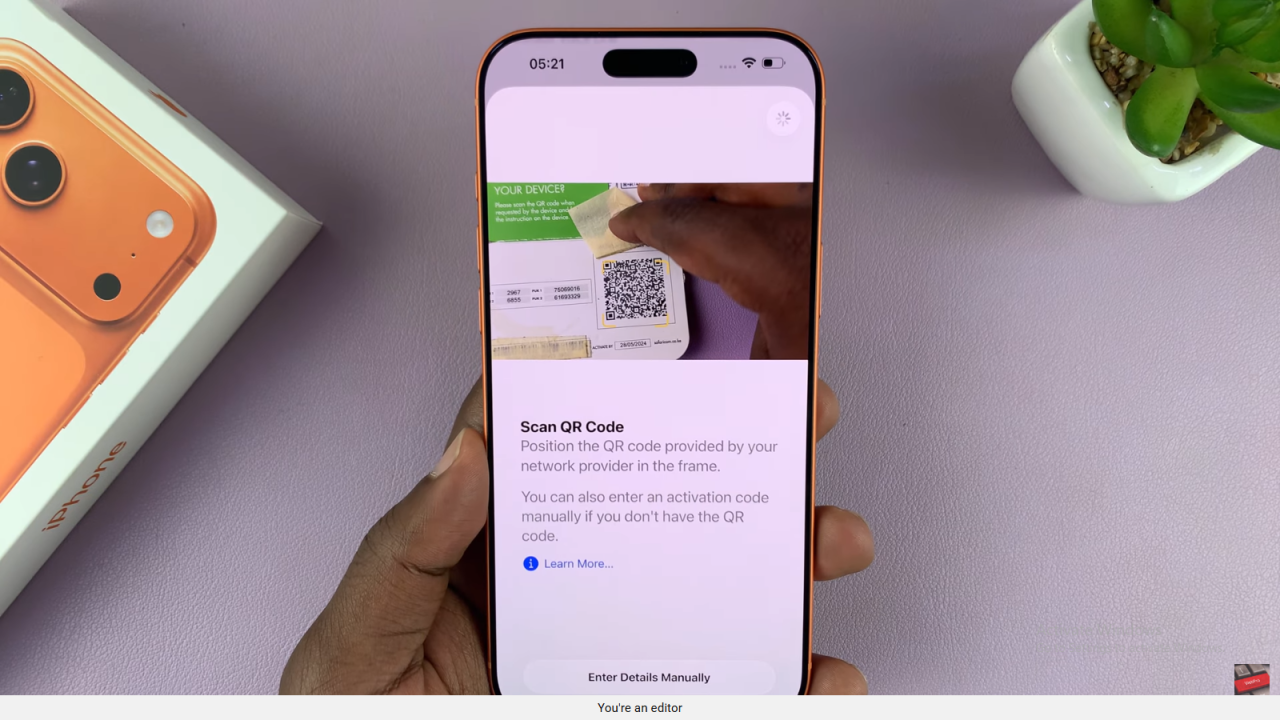
Obtain Your QR Code
Get a QR code from your carrier via email or a physical card. This code is needed to activate your eSIM.

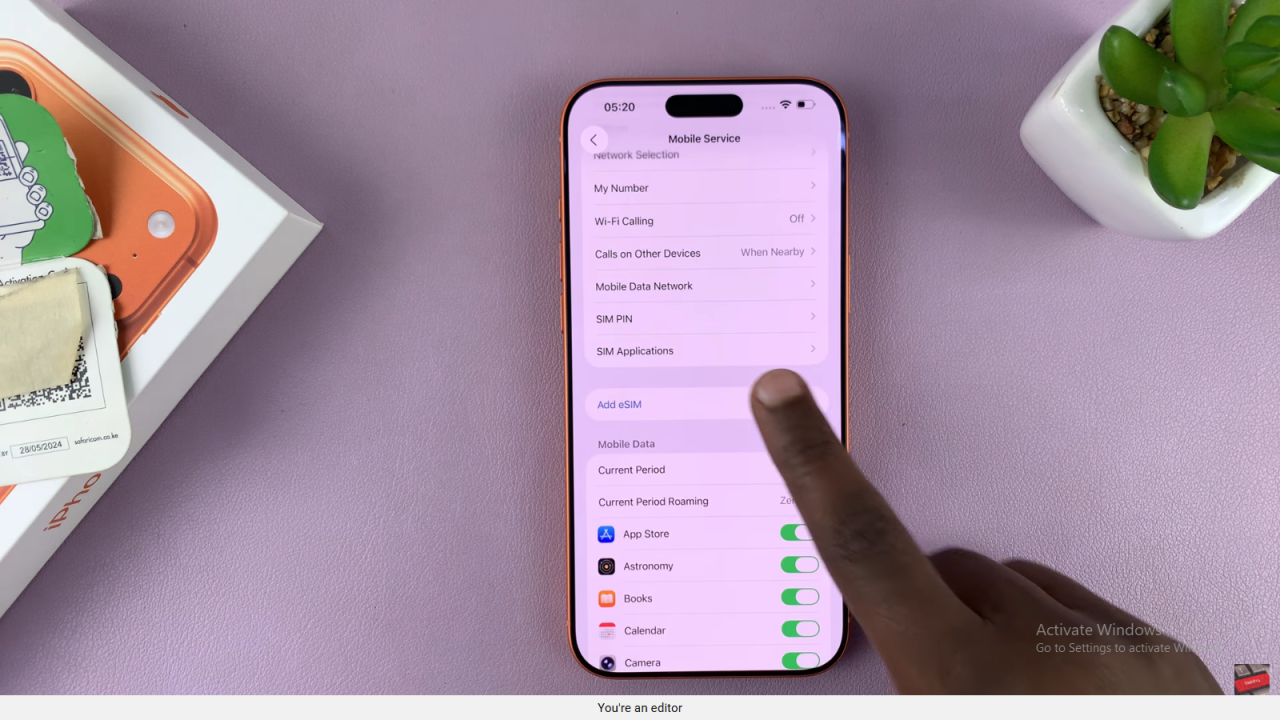
Open Mobile Settings
Go to Settings and select Mobile Service, then select Add eSIM.
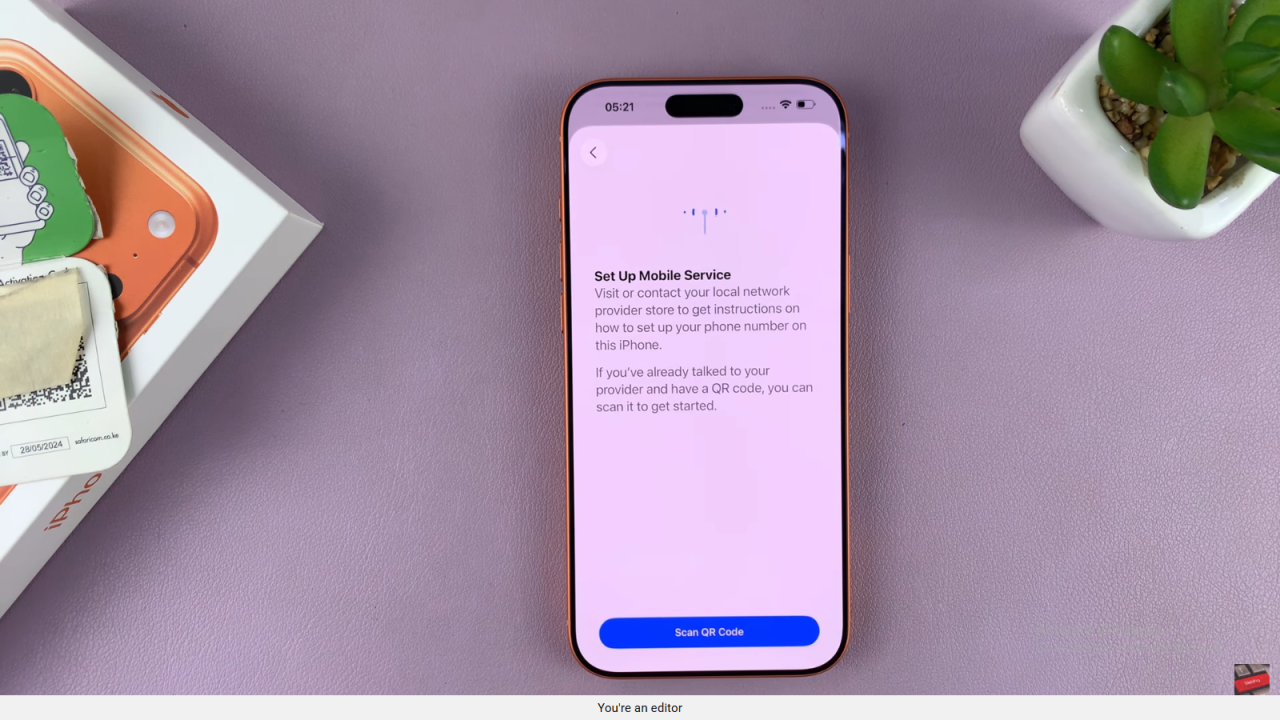
Choose QR Code Option
Select Scan QR Code from the options. Most users will use this method to add a new eSIM.
Scan the QR Code
Use your iPhone to scan the QR code provided by your carrier. This initiates the activation process.
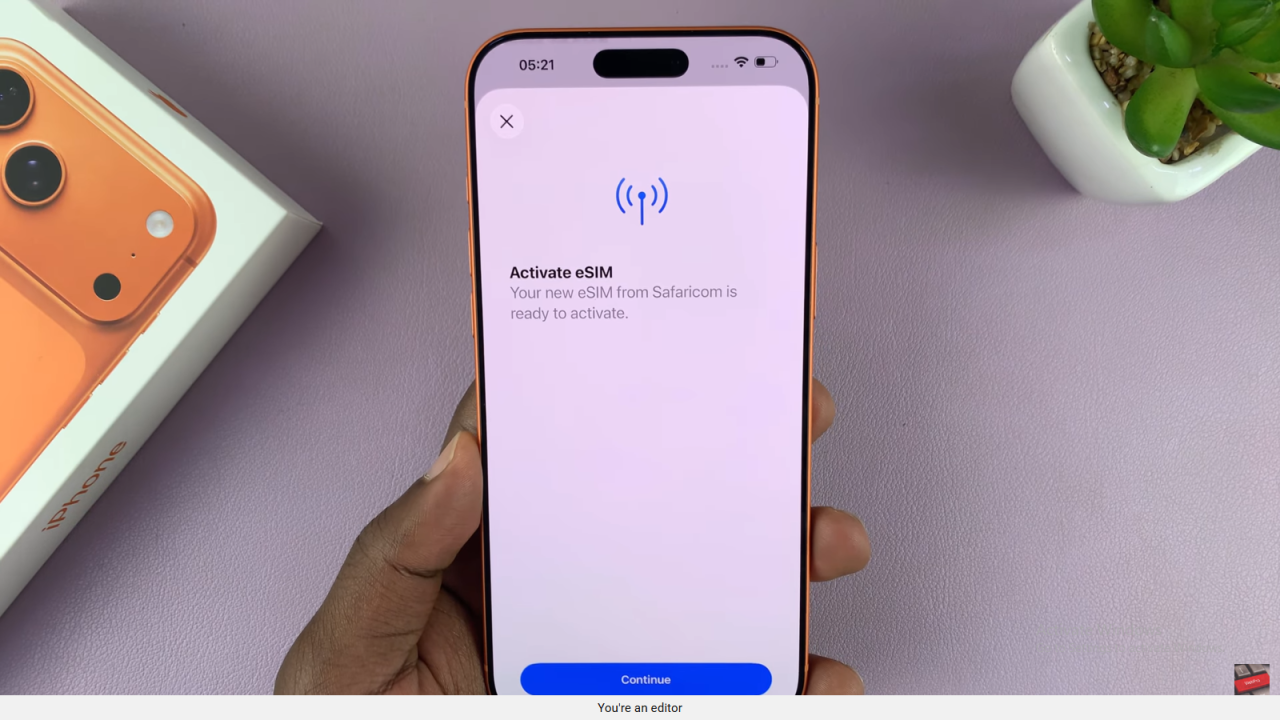
Activate Your eSIM
Tap Continue when prompted. If required, enter your eSIM SIM PIN to complete the setup.
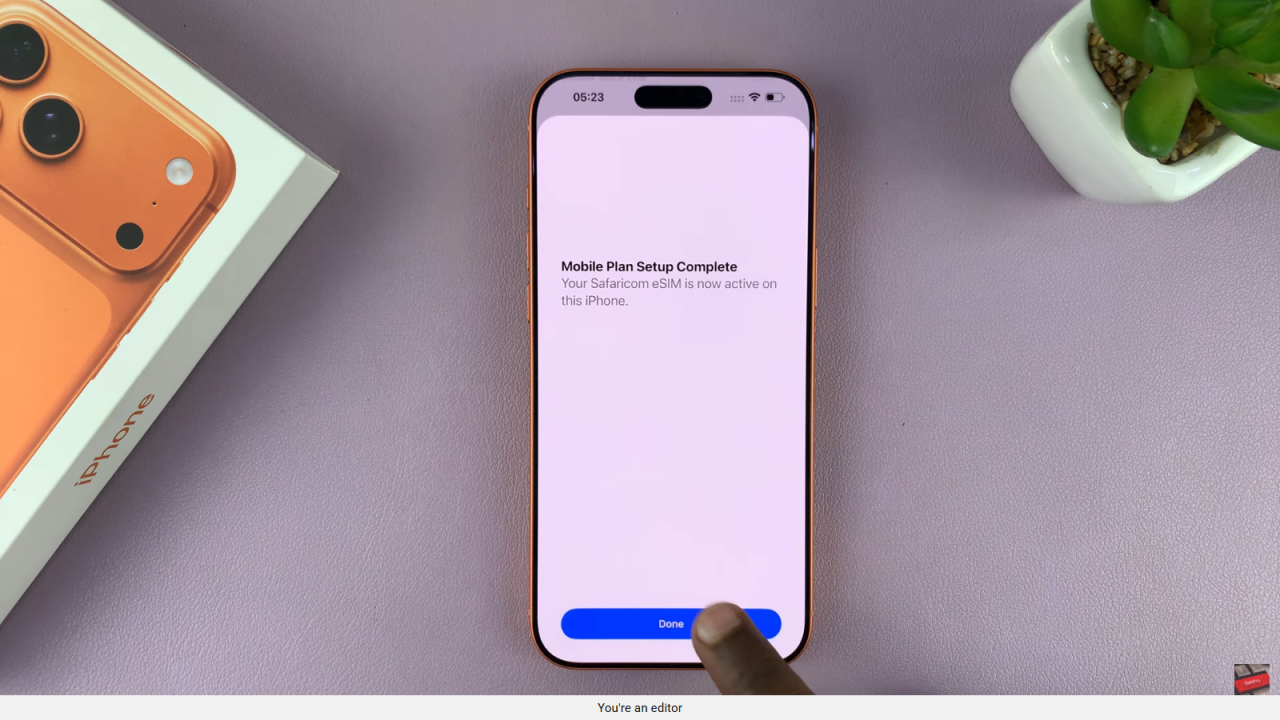
Finish Setup
Once activated, tap Done. Your iPhone will now show two active SIMs: the physical SIM and the newly added eSIM.

