Screen recording on your M4 iPad Pro is a powerful tool that allows you to capture everything happening on your screen with just a few taps. Whether you want to create engaging tutorials, showcase your gaming skills, document a problem for tech support, or record a video call, the screen recording feature is your go-to solution.
This guide will walk you through the steps required to screen record on your M4 iPad Pro, ensuring you can effortlessly record high-quality videos. By the end of this guide, you’ll be equipped with the knowledge to capture, edit, and share your screen recordings with ease.
Let’s dive in and explore how to harness the full potential of screen recording on your M4 iPad Pro.
Watch: How To Turn ON Mobile Data On M4 iPad Pro
Screen Record On M4 iPad Pro
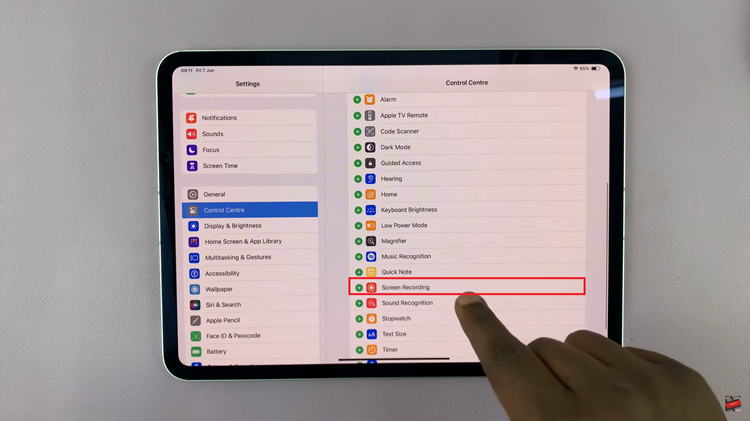
Before you start recording on your M4 iPad Pro, it is necessary to add the Screen Recording button to the Control Center. Begin by opening the Settings app on your iPad Pro. Once in Settings, scroll down and select “Control Center.”
Within the Control Center menu, you’ll see a list of all shortcuts that are on the Control Center and those that can be added. At this point, locate “Screen Recording” and tap the green plus (+) button next to it. This action will move the Screen Recording button to the Control Center, making it readily accessible for future use.
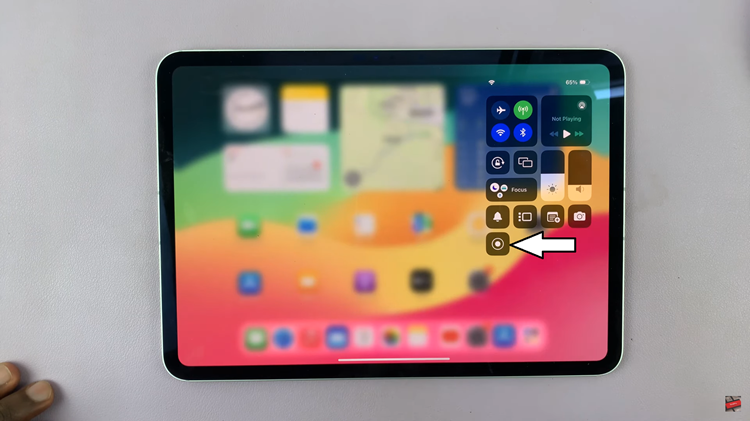
Then, swipe down from the top-right corner of the screen to open the Control Center. At this point, tap the Screen Recording button, which looks like a solid circle within a circle. After a three-second countdown, the recording will begin. You’ll know it’s recording when you see a red status bar or a red circle at the top of your screen.
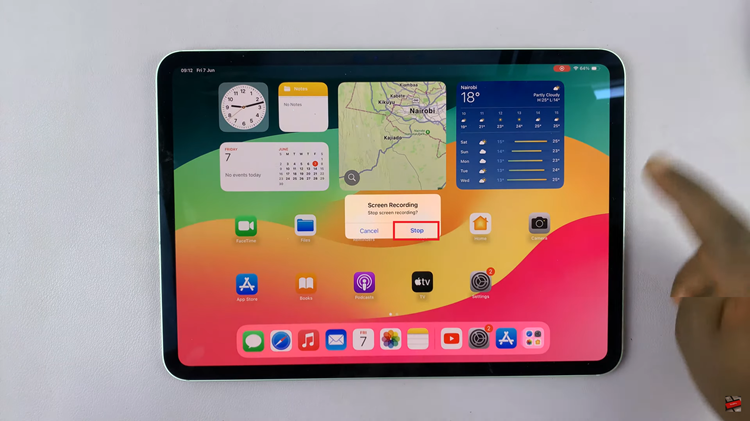
When you’ve captured everything you need, it’s time to stop the recording. Tap the red status bar at the top of your screen and then tap “Stop.” Alternatively, you can open the Control Center again and tap the Screen Recording button. The recording will be saved automatically to the Photos app. You can access it by opening the Photos app and navigating to your recent photos and videos.
By following these steps, you can easily create high-quality screen recordings on your M4 iPad Pro. Whether for personal use, educational purposes, or professional presentations, the screen recording feature is a powerful tool at your disposal.
Read: How To Enable & Disable Always On Display On Amazfit Pop 3R

