Gaming on a Mac used to be a challenge for Windows-exclusive titles. But with Crossover, you can now play many Windows games directly on your Mac or MacBook without needing Boot Camp or a separate Windows PC.
This guide will take you through the process to install Windows games via Crossover on a Mac / MacBook, step by step.
Crossover is a software application that allows you to run Windows programs and games on macOS. It creates a compatibility layer that mimics Windows, enabling many popular applications and games to run smoothly. Unlike virtual machines, Crossover doesn’t require a full Windows installation, making it lightweight and convenient for Mac users.
Read: How To Type Hashtag On MacBook Neo
Install Windows Games via Crossover On Mac / MacBook
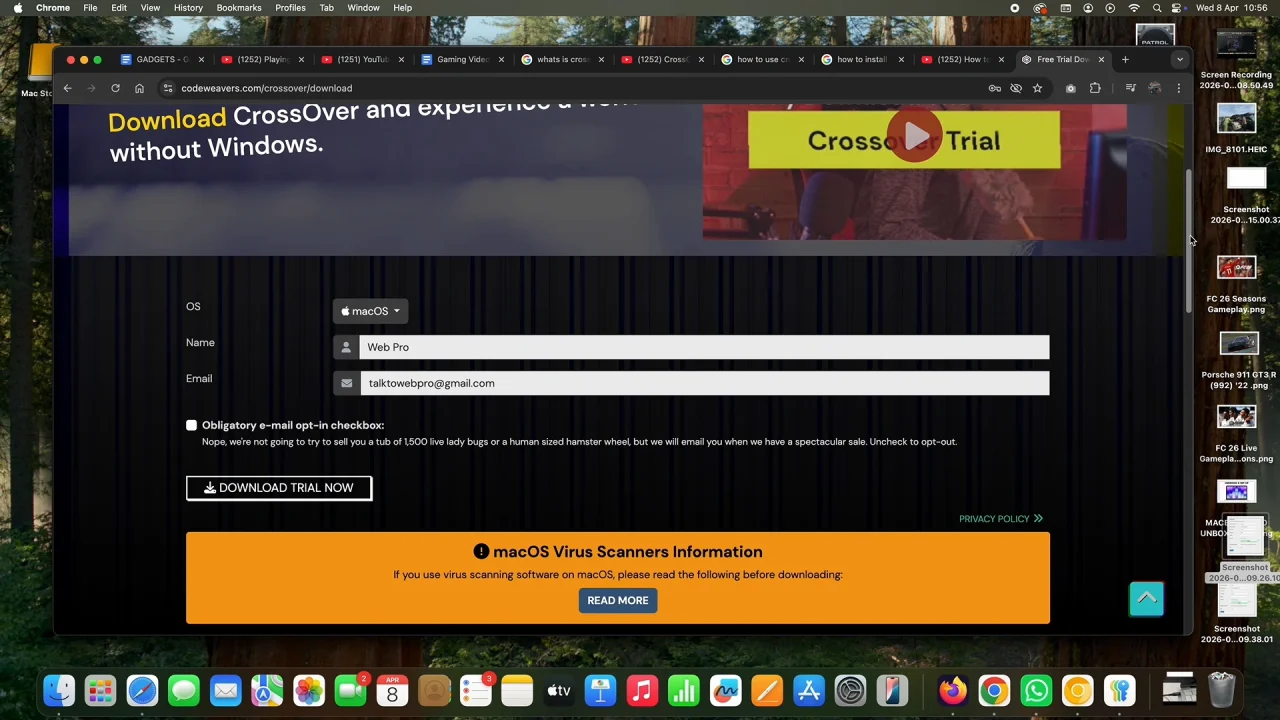
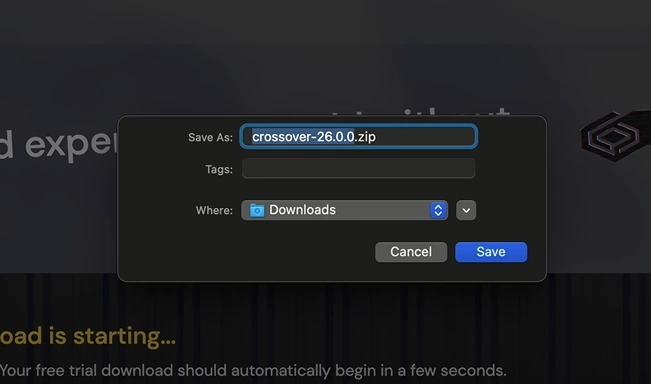
The first step is to download and install Crossover. Visit the official Codeweavers website and download the macOS version.
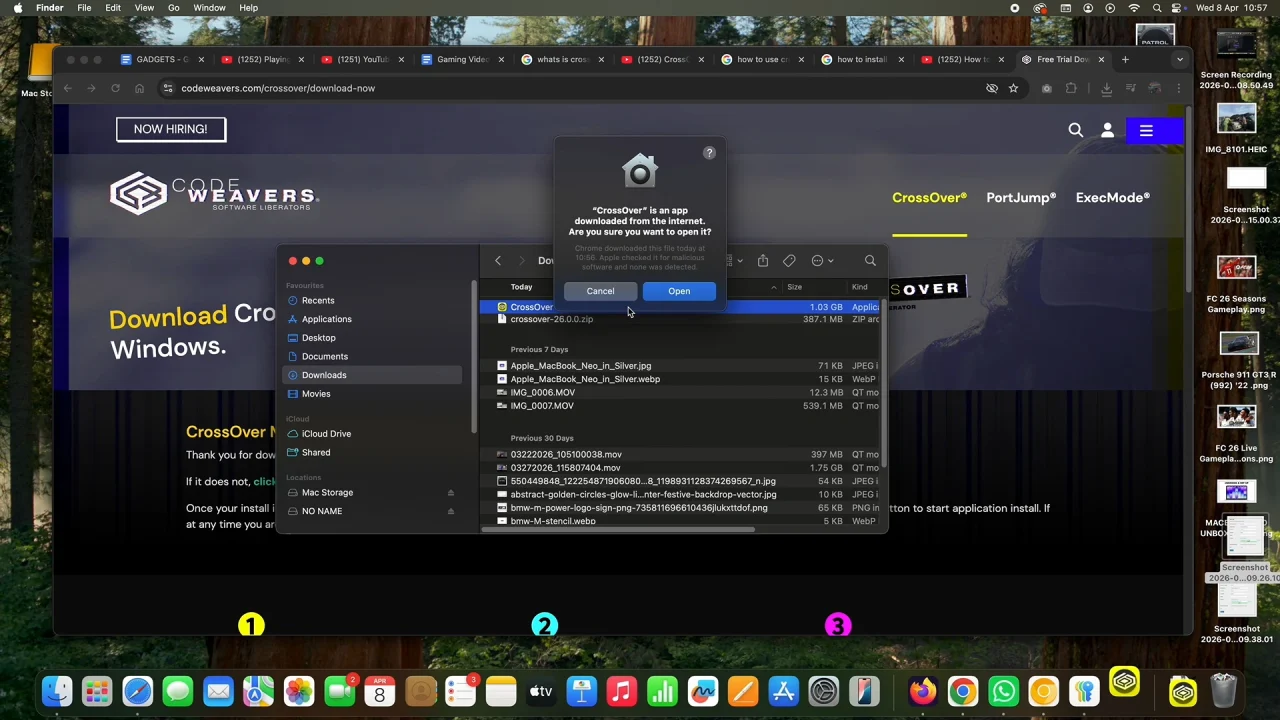
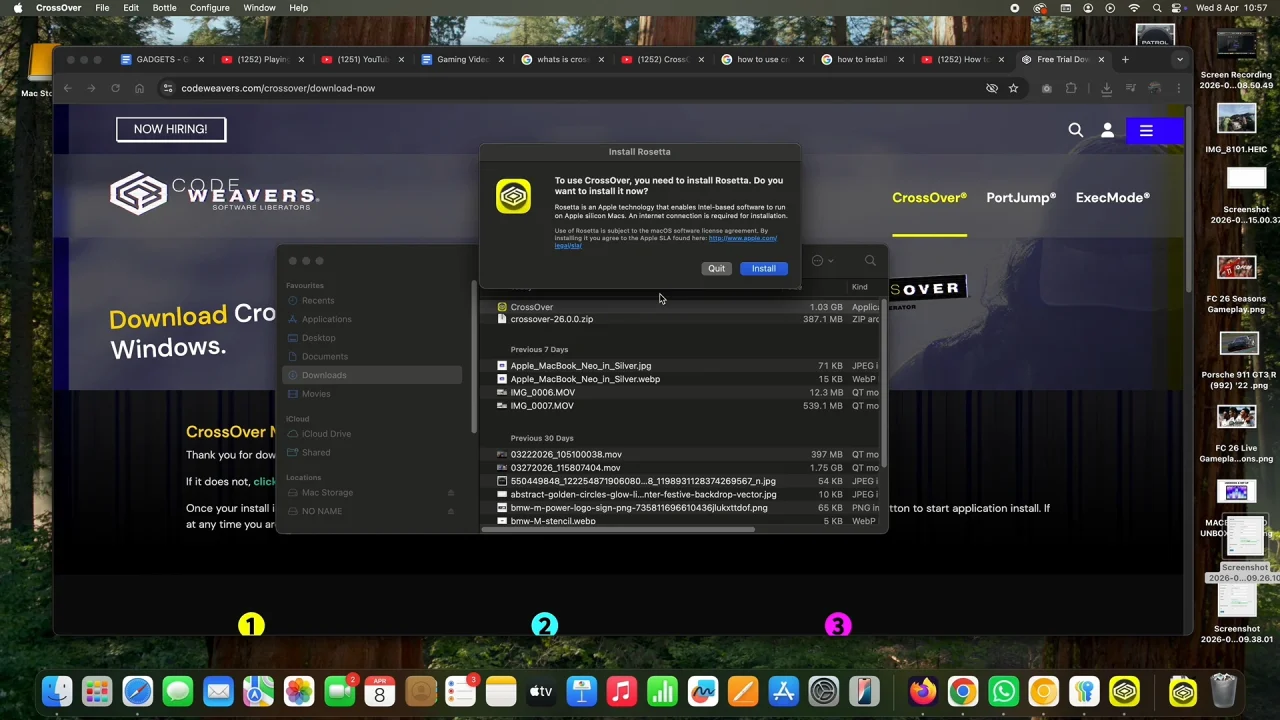
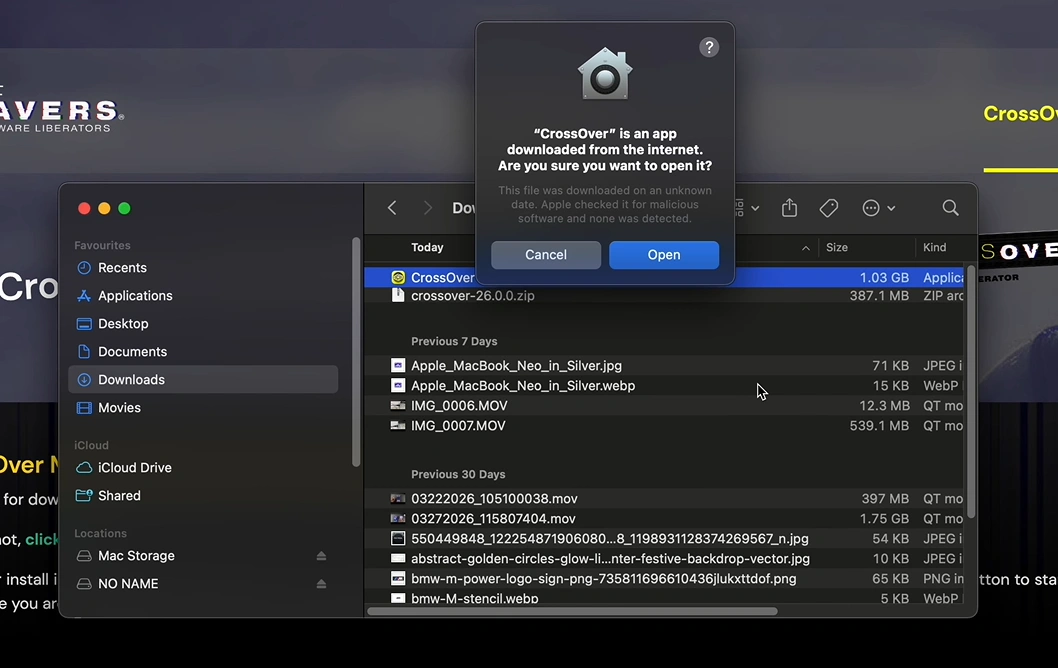
Open the Downloads folder and find the Crossover zip file. Double click the zip file to extract it, then double click on the app and select Open. Next, select Install to install Rosetta to your Mac or MacBook.
Rosetta enables the translation of Intel-based apps to M1, M2 or Silicon architecture. Once the installation is complete , click on Move to the Applications Folder.
Proceed to click on Open, then click on Check Automatically to get the latest updates. Make sure your macOS version is compatible with the latest Crossover release.
You may be prompted to buy the app if you haven’t. Select Try Now to proceed with the free version or enter the code if you’ve already bought it. Follow any additional on-screen instructions to complete the setup.
Set Up a Windows Environment
Now, you want to search for the Windows gaming client you want to install and prefer to use. Choose the EA App, Epic Games, Steam, Rockstar Games Launcher, Ubisoft Connect, Battle.net Desktop App, GOG Galaxy or even Quicken Classic.
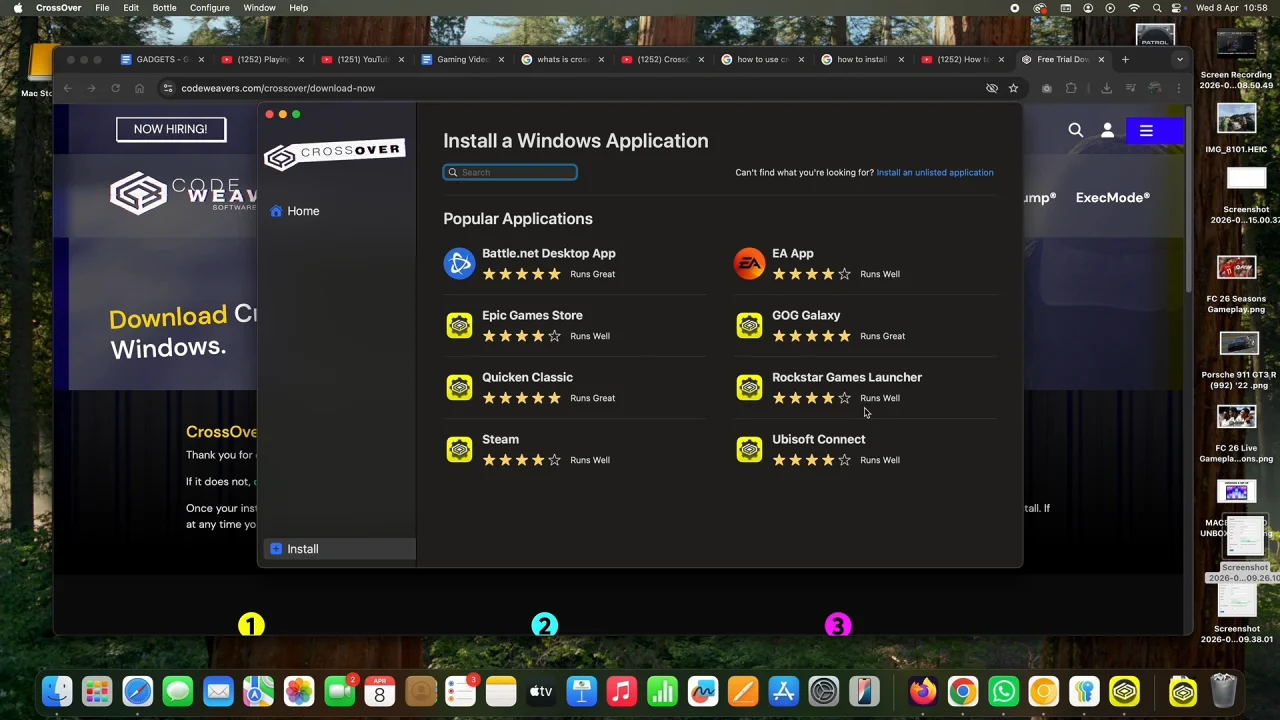
Once you select your client, click on Install to run it in Crossover, so that you can be able to install Windows games through that client.
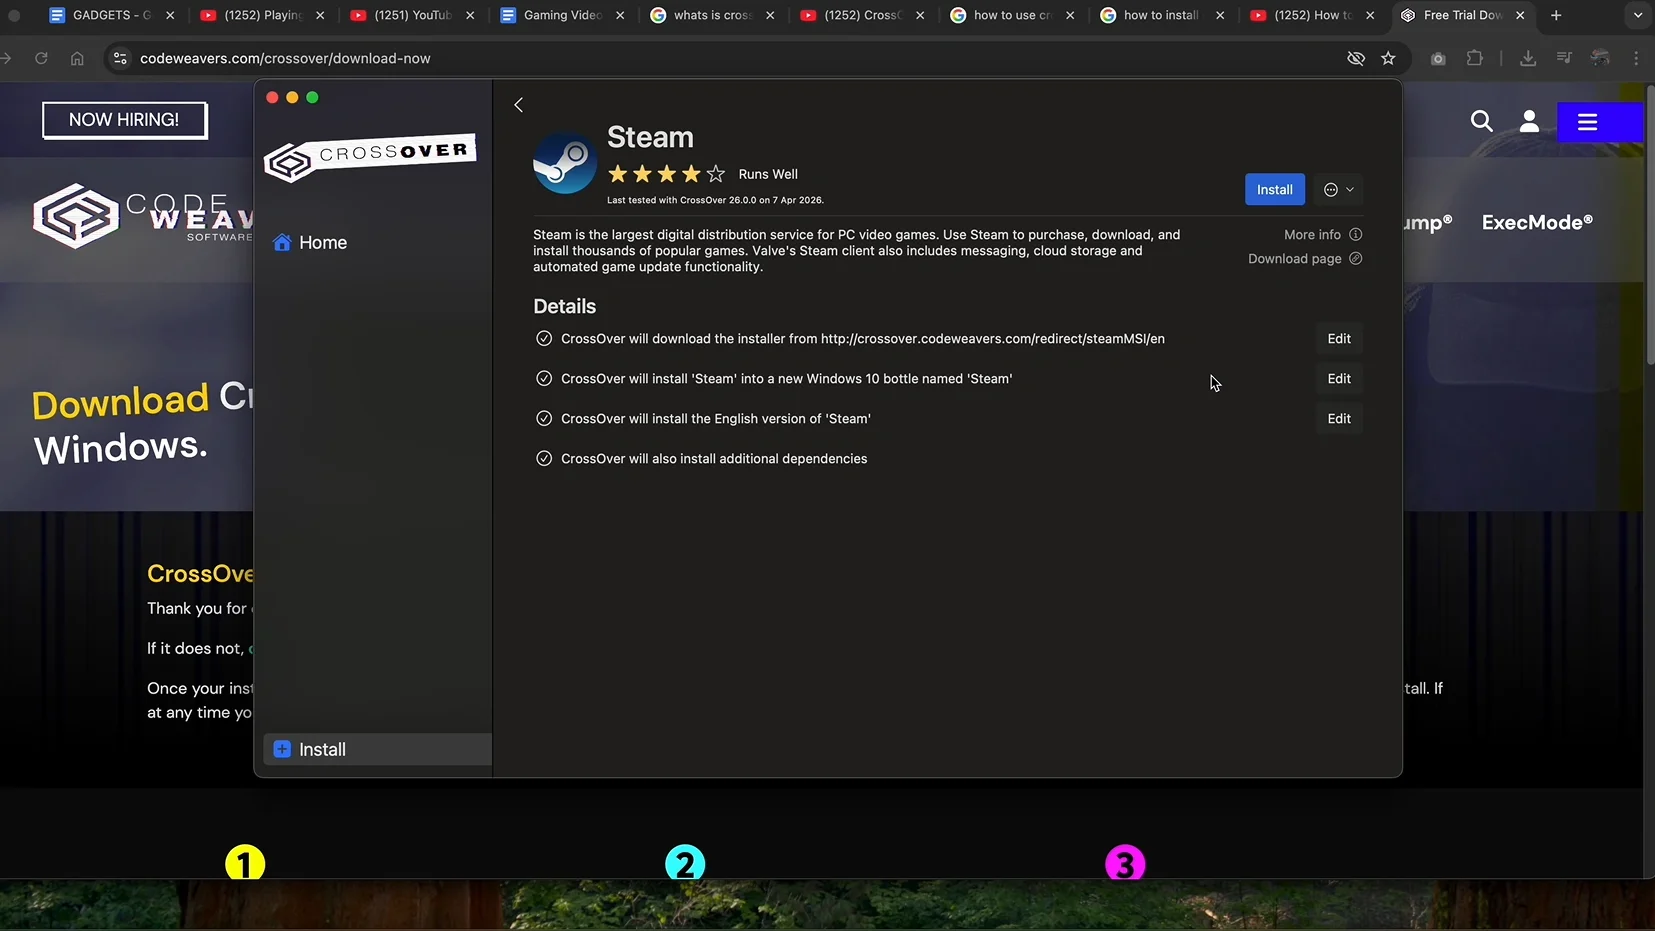
Follow the installation prompts just like you would on a Windows PC.
Some games may require additional Windows components like DirectX or Visual C++ Redistributable. Crossover will usually prompt you to install these automatically.
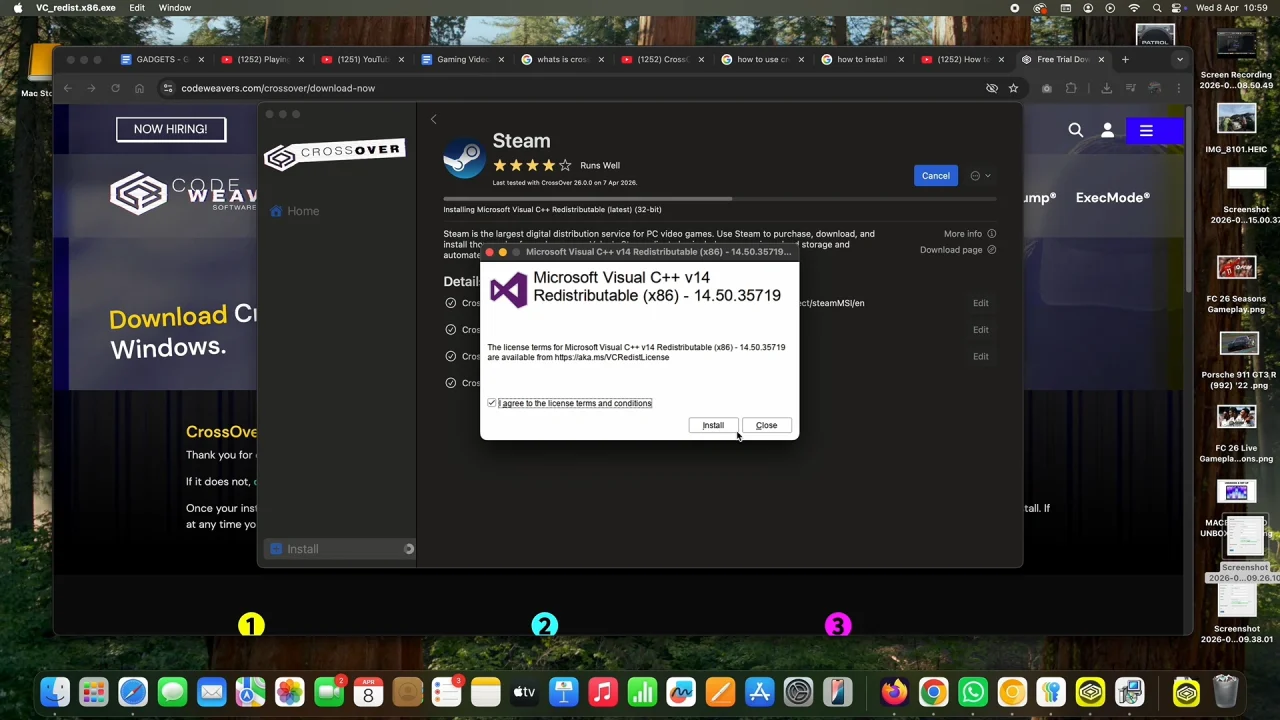
Once you install the necessary components, you’ll receive a set up wizard, like you would on Windows.

Simply check and select what you need to and click Next and/or Install on the prompts, until you get to the final stage. Here, select Finish.

Your Windows gaming client should now be updated to the latest version and launched via Crossover. Click on Allow to give permissions for Crossover to access files on a removable volume and also to find devices on local networks.
Run Your Games
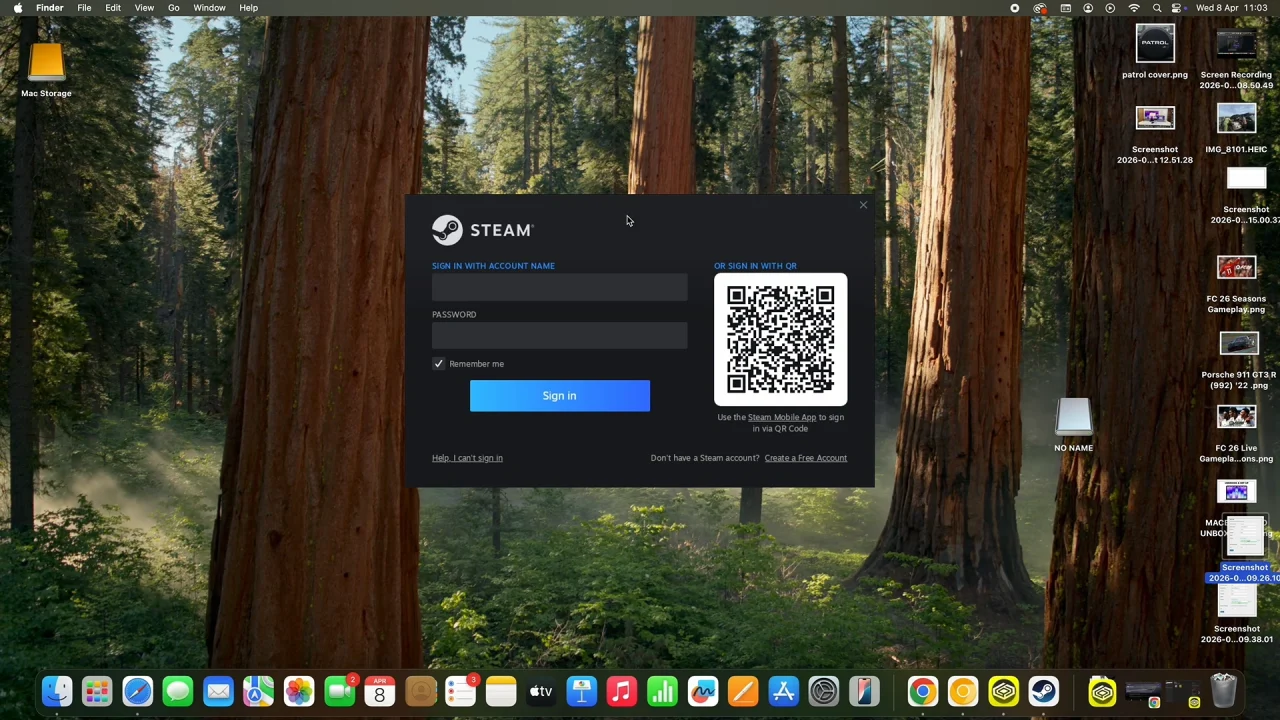
Now, you will receive the Login page for your Windows gaming client. Sign in to your account to get access to your account privileges. You should now see your normal Windows gaming client account with all your details and games.
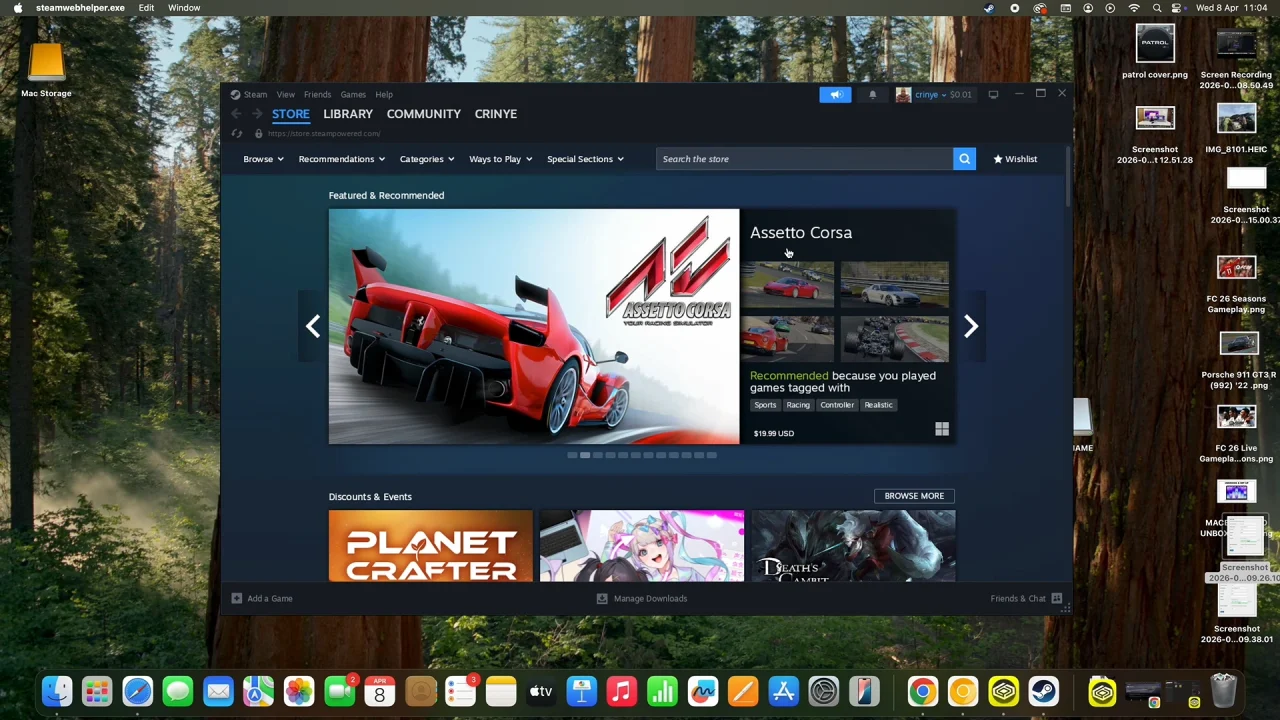
You can now select your game to run and play it on your Mac or MacBook via the Crossover platform. Adjust graphics settings as needed for optimal performance.
Tips for Better Performance
- Use the latest Crossover version: Updates often include performance improvements and compatibility fixes.
- Allocate sufficient resources: Some games may need more CPU or RAM.
- Check online compatibility: The Crossover database lists which games are fully supported and which may have minor issues.
- Consider game patches: Some older games may require patches to run smoothly on macOS.
Watch: Type Hashtag On MacBook Neo

