In the world of design, attention to detail can make all the difference. Whether you’re crafting a captivating flyer, a striking poster, or an eye-catching business card, one element that shouldn’t be overlooked is bleed. Bleed ensures that your design extends seamlessly to the edge of the page, preventing any unwanted white borders or cut-off elements after printing. While Canva offers an array of intuitive design tools, adding bleed might seem elusive to some users. Fear not, as in this comprehensive guide, we’ll walk you through the simple steps to incorporate bleed into your Canva projects, ensuring your designs are polished and print-ready.
Understanding the significance of bleed is paramount for any designer striving for professional-quality results. Without it, even the most meticulously crafted design can appear amateurish once printed. But fret not, for Canva, the popular online design platform, equips users with the tools necessary to achieve seamless bleed effortlessly. Whether you’re a seasoned graphic designer or a novice enthusiast, mastering the art of adding bleed in Canva will elevate your designs to new heights, ensuring they shine both on-screen and in print. Join us as we demystify the process and empower you to create stunning designs with confidence and precision.
Watch:How To Round Corners In Photos On Canva
Adding Bleed In Canva
Step 1: Open your project Begin by accessing your project in Canva. Whether you’re starting a new design or working on an existing one, navigate to Canva’s platform and locate the project you want to add bleed to.

Step 2: Select File, Settings, and Enable Print Bleed Once your project is open, look for the “File” menu located at the top-left corner of the Canva interface. Click on “File” to reveal a dropdown menu. From there, navigate to “Settings.” Within the settings menu, you should find an option labeled “Show print bleed.” Click on this option to enable it
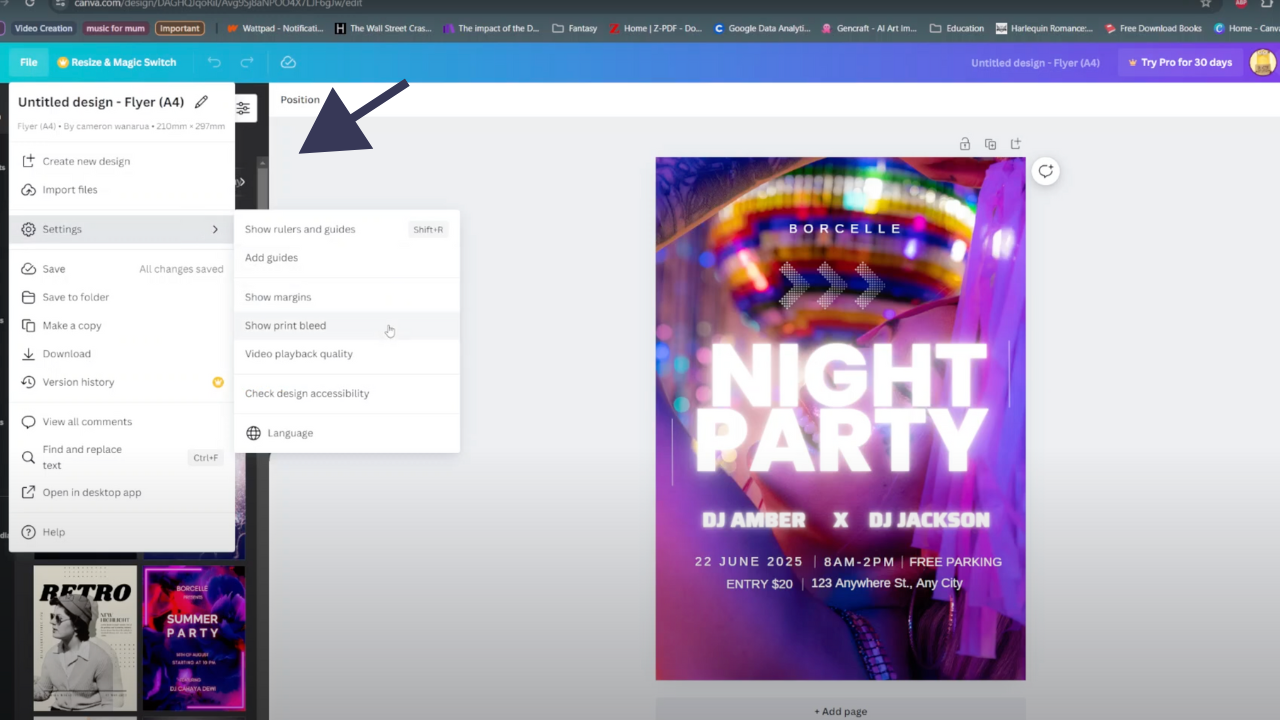
Enabling the “Show print bleed” option will reveal additional guidelines beyond the edges of your canvas, indicating where the bleed area extends. This ensures that any elements you place in your design extend all the way to the edge of the page, providing a buffer for trimming during the printing process.
Read:How To Round Corners In Photos On Canva
By following these simple steps, you can easily add bleed to your Canva projects, ensuring that your designs are print-ready and free from unwanted white borders. This feature is particularly useful when creating materials like business cards, flyers, or posters, where professional-quality printing is essential for a polished final product.

