If your computer is connected o different types of networks you might have a slight problem with the proxy settings. Sometimes your computer has internet connection but your Chrome browser doesn’t seem to be loading web pages.
If you use your PC or laptop in an institution like a campus or office complex, chances are, you are accessing the internet via proxy server.
A Proxy server is basically a server from which the Network Admin of an institution can control your activities on the internet. The browser is also configured to send and receive via the proxy server.
Then your go home, and connect to a dial up connection, a modem or your home router. These have no proxy server and requires no configuration. You will be required to set your Chrome browser to automatically detect the proxy settings.
To do this, launch chrome and navigate to Advanced settings. Under ‘Network’ click on ‘Change Proxy Settings’ button.
This will launch your computer’s Internet properties window. From this window, click on ‘LAN Settings’ button. Another smaller window will pop up.
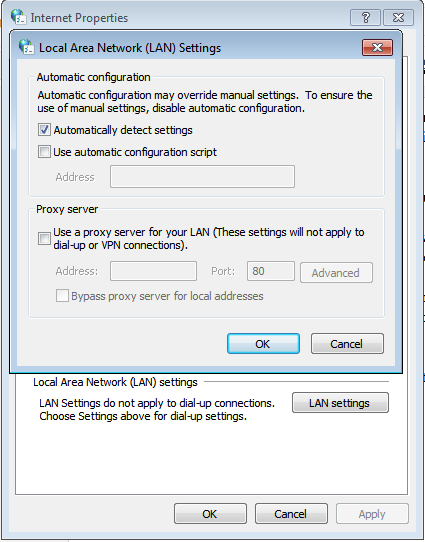
For your home network, dial up connection or modem, Make sure ‘Automatically detect Settings’ is checked.
For a network with a proxy server, check ‘Use a Proxy server for your LAN’. Enter the I.P. address of the proxy server and the pert number. You can get this ifo from the network Admin of the institution.
Google chrome automatically uses the LAN settings of the computer.