Imagine having quick access to your most-used functions, seamlessly arranged in a way that complements your daily routine.
The ability to tailor your device to suit your unique preferences is a hallmark of the Android platform, and ensures this flexibility with its intuitive Quick Settings customization options.
In this guide, we’ll walk you through the comprehensive step-by-step process on how to edit the quick settings panel on your Android phone (Google Pixel).
Also Read: How To Unmount SD Card From Android Phone (Samsung Galaxy)
How To Edit Quick Settings Panel On Android (Google Pixel)
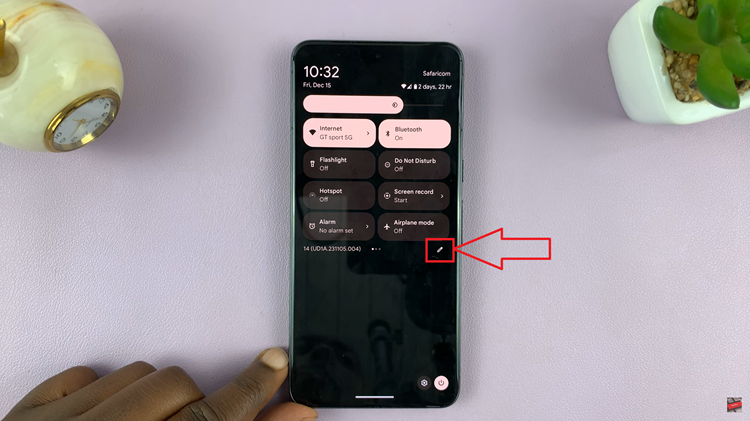
Simply swipe down from the top of your screen to reveal the Quick Settings panel. Once open, look for the edit icon, usually represented as a pencil or gear icon. Tap on it to start the customization process.

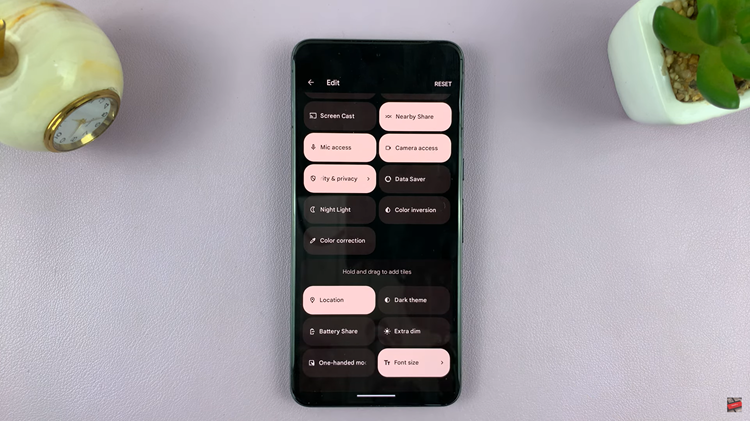
Upon tapping the edit icon, you’ll be presented with a view that showcases the tiles currently on your Quick Settings menu. Additionally, you’ll find a list of available options that you can choose to add.

To tailor your Quick Settings panel to your liking, press and hold on a selected panel. You’ll notice that the panel becomes draggable. Move it between the Quick Settings section and the additional tiles section based on whether you want to include or exclude it. Use this drag-and-drop functionality to rearrange the tiles into your preferred formation.
Once you’ve fine-tuned your Quick Settings panel, it’s time to save your changes. Simply press the back button, and your customized layout will be saved automatically. You’ll now have quick and convenient access to the features that matter most to you.
Watch: How To See Wi-Fi Network SSID On Android (Google Pixel)

