In today’s fast-paced digital world, video editing is no longer confined to desktop computers. With the rise of mobile creativity, professionals and casual users alike can now edit videos directly from their smartphones. Adobe has made this possible through its mobile-friendly video editing app — Adobe Premiere.
Designed for iPhone users, this app offers a seamless way to capture, edit, and share videos with professional quality, anytime and anywhere. In this guide, you’ll learn how to download and set up Adobe Premiere on your iPhone.
Also Read: How To Turn ‘Show Speaker Name In Subtitles’ ON / OFF In Battlefield 6
How To Download Adobe Premier On iPhone
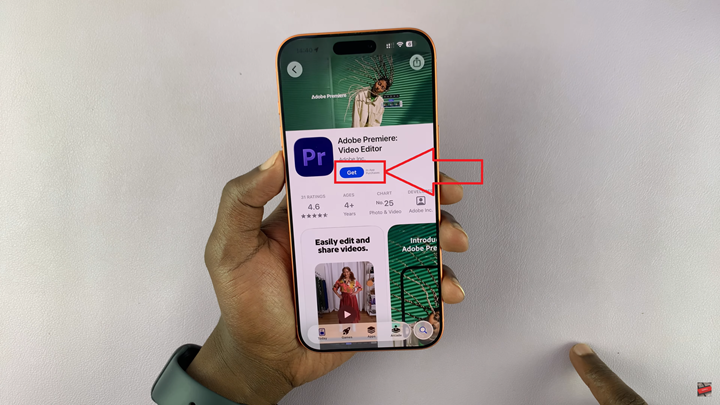
To begin, open the App Store on your iPhone and type “Adobe Premiere” into the search bar. Once you find Adobe Premiere Rush in the search results. Tap on Get, then confirm the installation using your Apple ID, Face ID, or Touch ID. The app will begin downloading and installing on your device automatically.
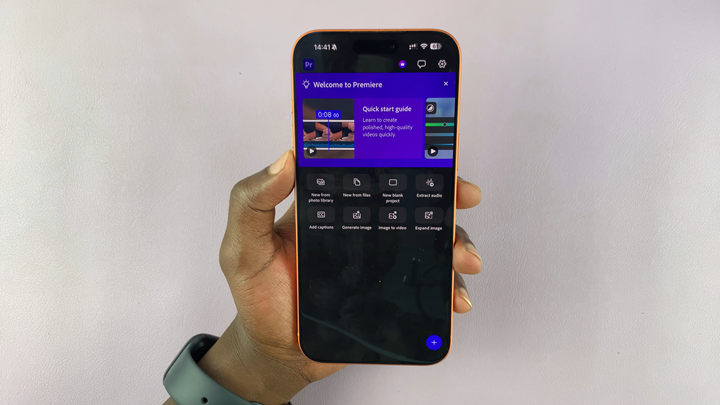
After installation is complete, open the app. You can now start creating and editing videos directly on your iPhone. The app allows you to trim clips, adjust audio, apply filters, and even add transitions with professional polish. Projects are automatically synced to Adobe Creative Cloud if you sign in with an Adobe account, making it easy to continue editing on a desktop later.
In just a few simple steps, you’ll have Adobe’s mobile video editing suite ready to use on your iPhone. Whether you’re producing quick social media clips or developing full-length creative projects, Adobe Premiere Rush delivers the flexibility and power you need—right from your pocket.

