Using an external display with your MacBook Neo is one of the best ways to boost productivity, improve multitasking, and enjoy a larger viewing experience. Whether you’re configuring a monitor, TV, or projector, the setup process is simple once you know the steps.
This guide will walk you through everything you need to connect and set up an external display on your MacBook Neo.
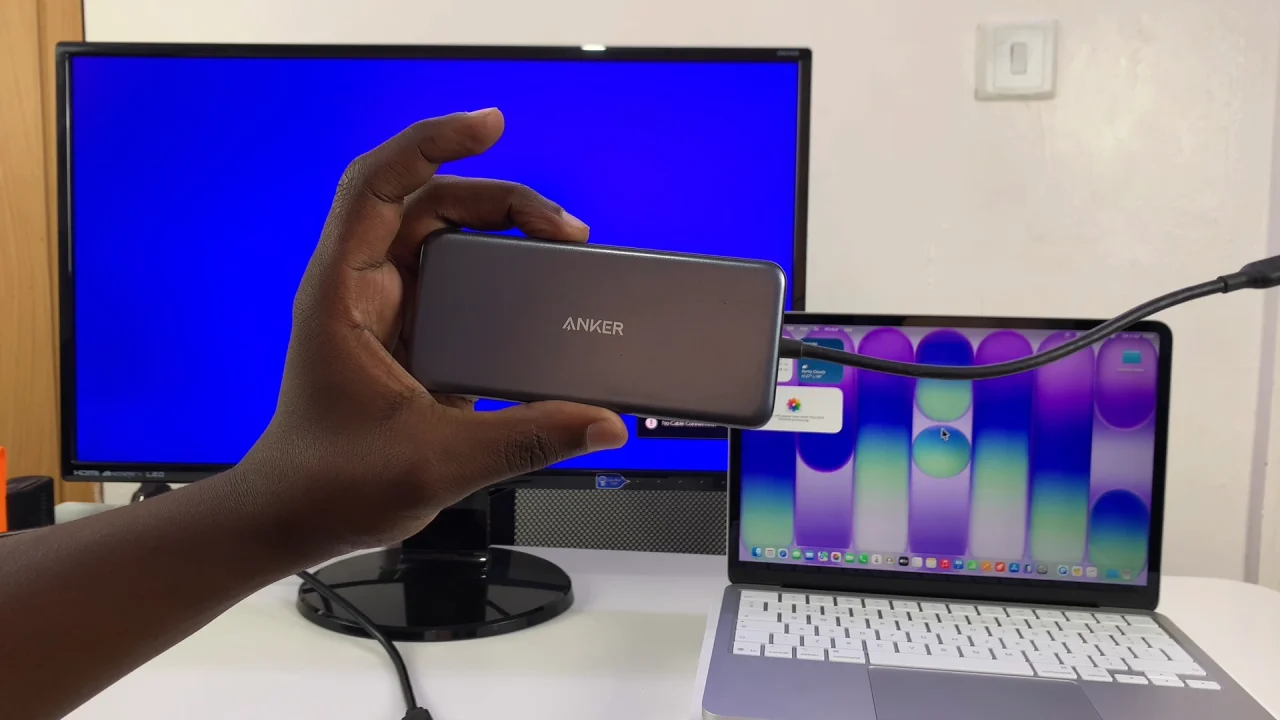
Before getting started, make sure you have the right equipment. A compatible external display (monitor, TV, or projector) and the correct cable (USB-C, HDMI, or DisplayPort) are required.
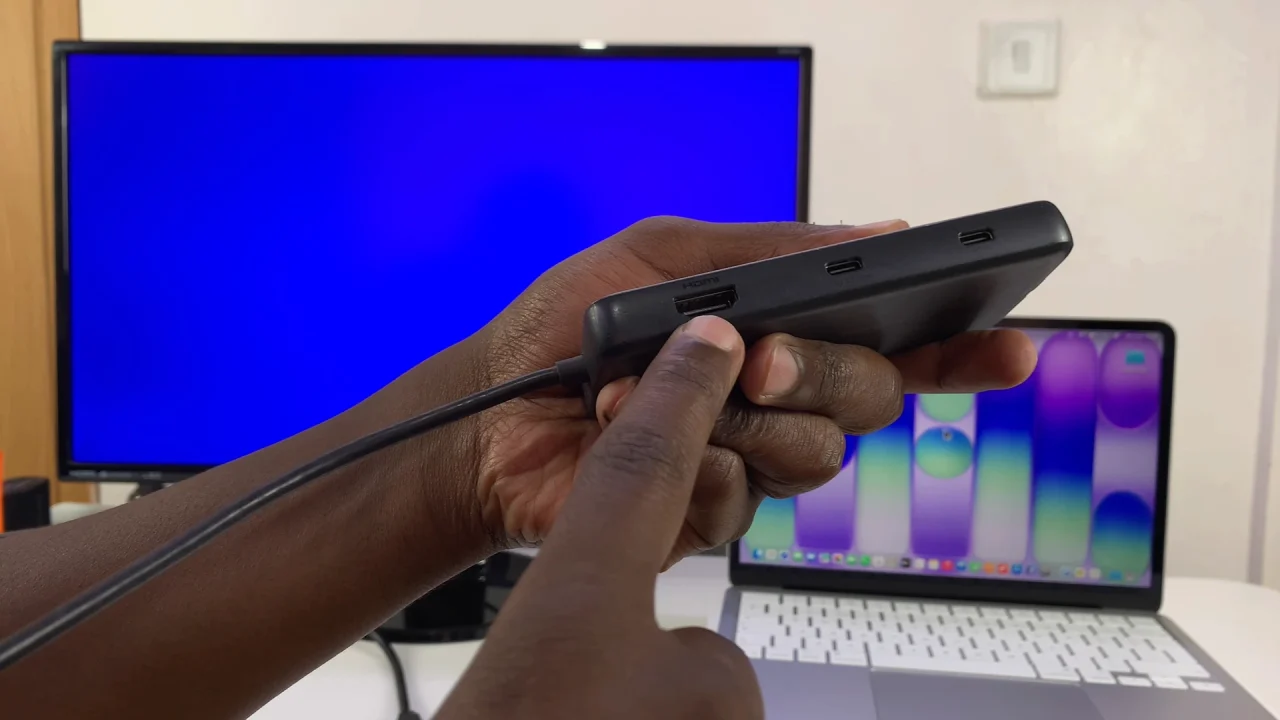
You’ll also require an adapter (if your MacBook Neo doesn’t have a matching port). Most modern MacBook Neo models use USB-C ports, so you may need a USB-C to HDMI or USB-C to DisplayPort adapter.
Read: How To Change Password On MacBook Neo
Connect & Set Up External Display On MacBook Neo
To begin, turn on your external monitor or TV. Plug one end of the cable into your display. Connect the other end to your MacBook Neo (or via an adapter).
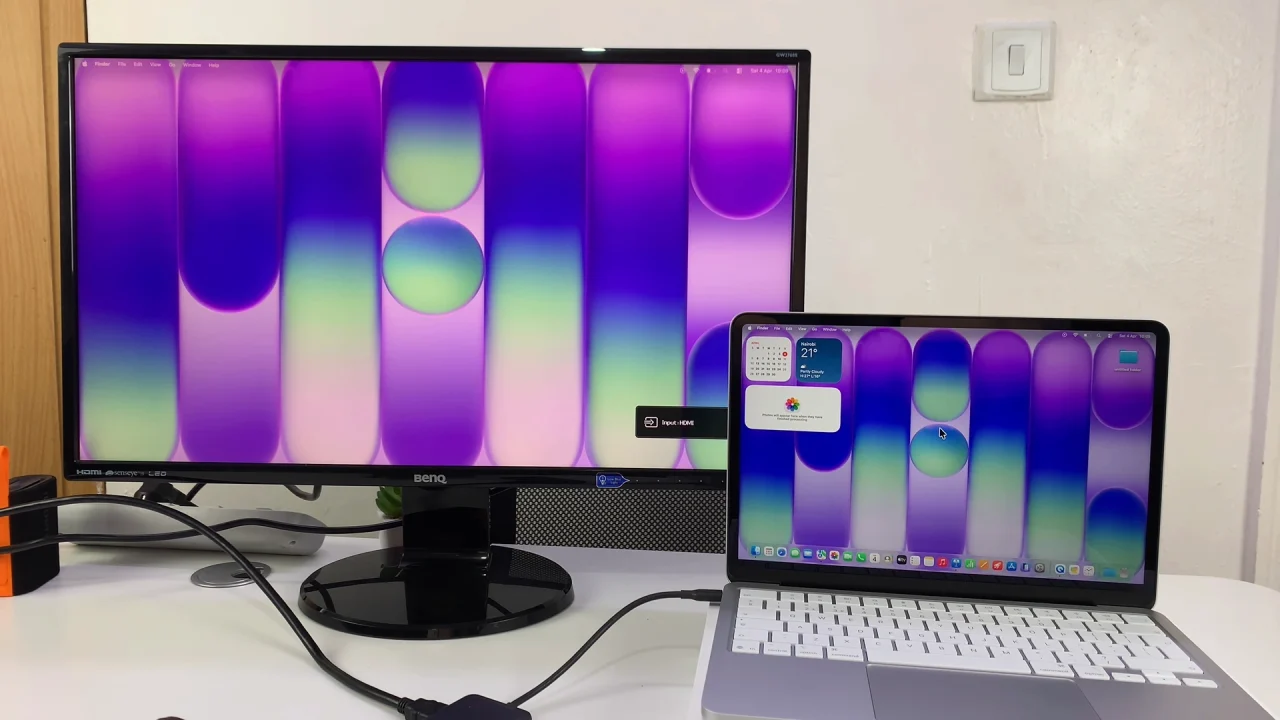
Once connected, your MacBook Neo should automatically detect the display.
Configure Display Settings
To customize how your external display works:
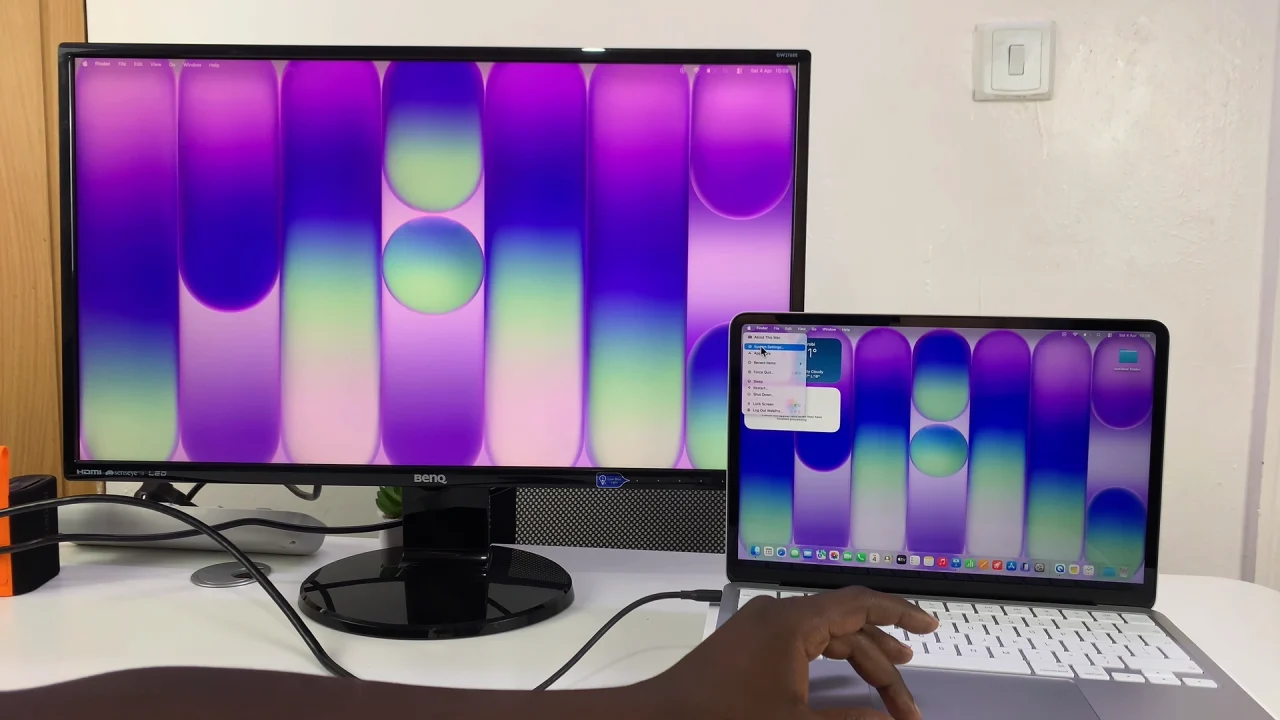
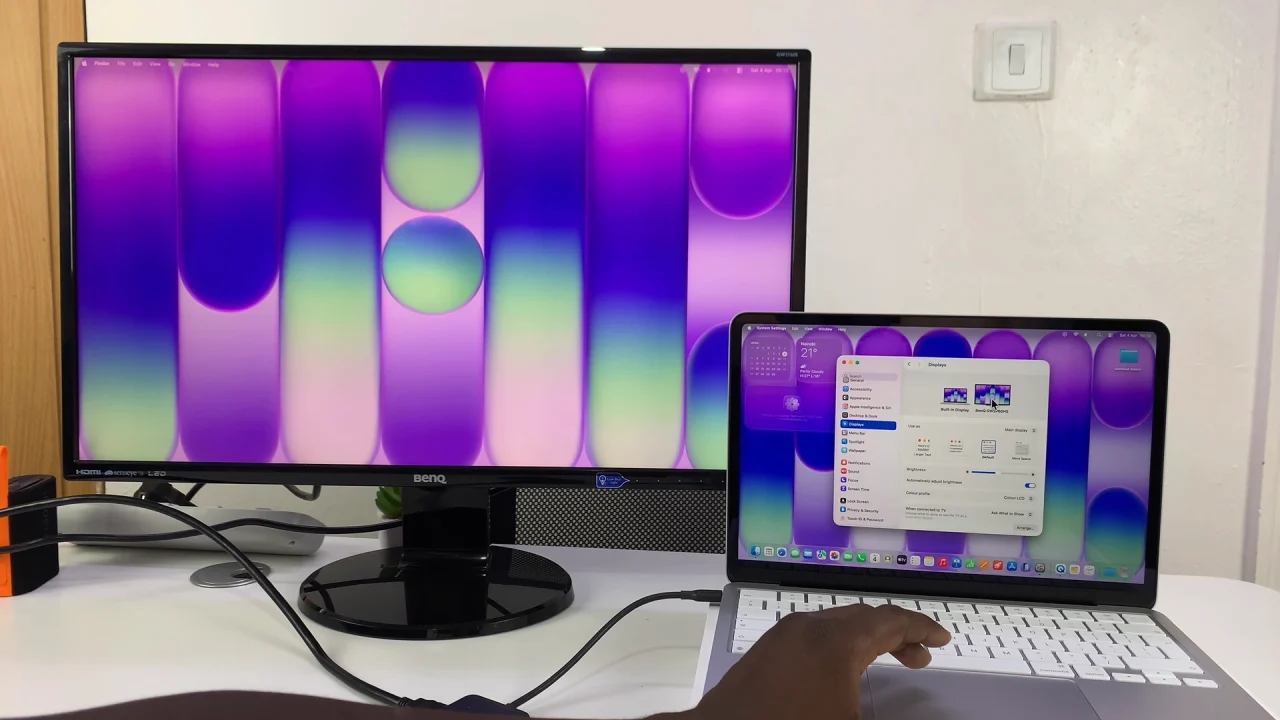
Click the Apple menu in the top-left corner and select System Settings.
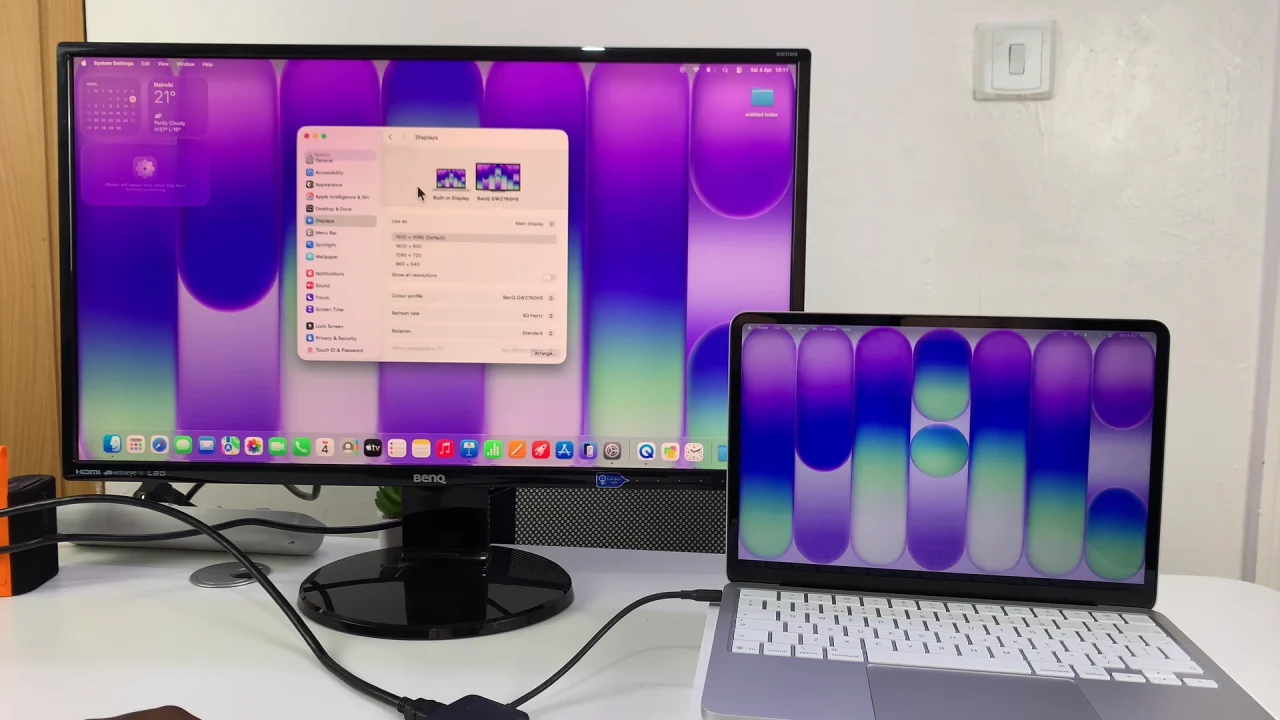
Select Displays in the left-hand side panel. Here, you’ll see both your MacBook screen and the external display.
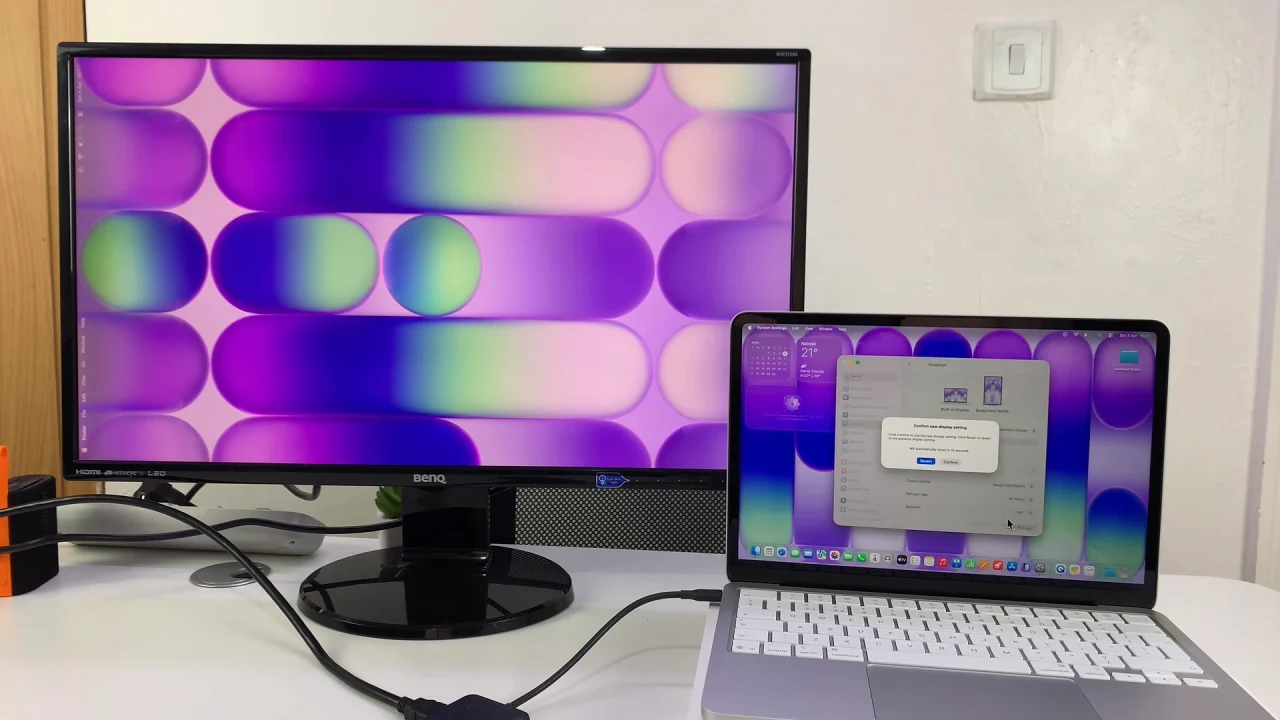
For the best visual experience, select your external display in settings. Then, choose Default or Scaled resolution, depending on the maximum resolution of your monitor or TV. You can also adjust the colour profile and refresh rate (if available).
Higher resolutions give sharper images, but may make items appear smaller.
It is also possible to change the rotation, as per the usage of the external display. Simply click the drop-down arrow and set it to Standard (default) or 90°, 180° or 270°.
Choose Display Mode (Extend or Mirror)
To switch modes, click on the drop-down menu next to Use as in the display settings. There are three main options for the display mode. You can use as the main display, mirror the display or extend the display.
To mirror the screen, simply select the Mirror For Built-in Display option. Mirroring the display shows the same content on both screens. This is great for presentations or watching videos.
Extended display on the other hand, turns your external monitor into extra workspace. It lets you drag apps between screens. Choose the Extended Display option.
Using the external display as the main display switches the current screen on the MacBook Neo to the larger display altogether. Simply choose the Main Display option.
Arrange Your Displays
To match your physical setup, under the Displays settings, look for the Arrange option and click on it.
You now want to drag the displays to position them (left, right, above, etc.) to match the physical set up. Tap on Done to save your changes.
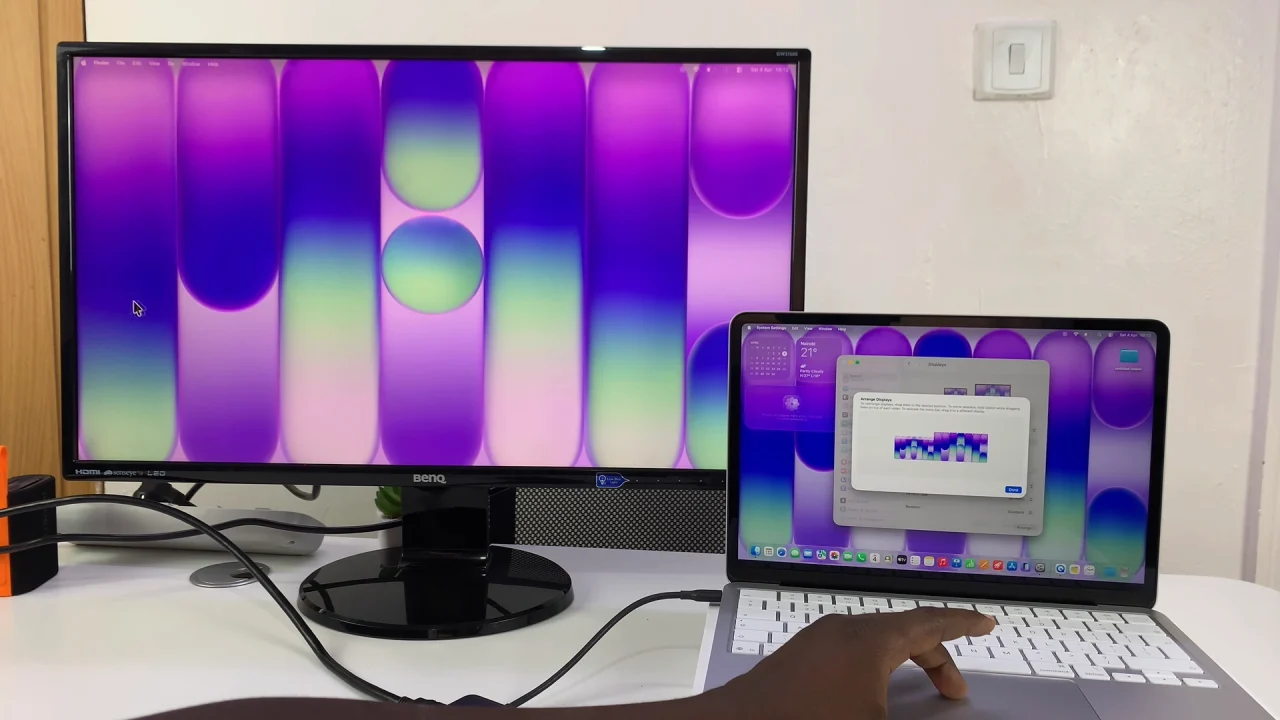
This ensures smooth cursor movement between screens.
Use Your External Display Efficiently
Once set up, you can drag apps between screens. You can also use one display for work and the other for browsing or media. Another possibility is going full-screen on one monitor while multitasking on the other.
Troubleshooting Tips
If your external display isn’t working:
- Check connections: Ensure cables and adapters are firmly plugged in
- Restart your MacBook Neo.
- Try a different cable or adapter.
- Detect displays manually in Display settings.
- Update macOS to the latest version.

