Wireless debugging is a handy feature for developers and advanced users who want to connect their Galaxy Z Fold 7 to a computer for debugging without a physical USB cable.
To make it more accessible, you can add it as a shortcut in your Quick Settings panel. Likewise, if you no longer need it, you can easily remove it.
Here’s how to manage the Wireless Debugging toggle. Learn how to add or remove the Wireless Debugging shortcut from the quick settings panel on your Samsung Galaxy Z Fold 7.
Watch: Re-arrange Apps On Galaxy Watch 8
Add Wireless Debugging Shortcut
First, enable Developer options. Simply go to Settings via the quick settings panel or app drawer. Scroll down and select About Phone. Select Software Information, find the Build Number and tap on it 7 times.
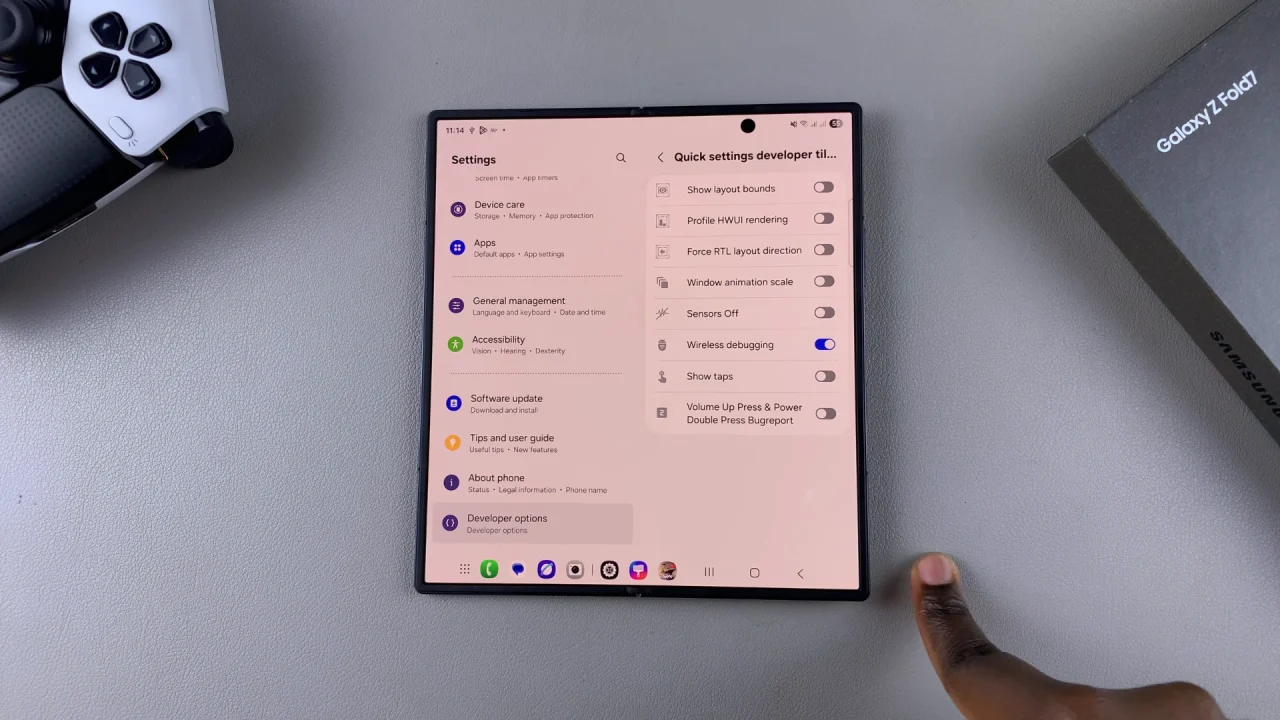
Go back to the Settings menu and select Developer Options. it should now be available below the About Phone option. Scroll through the developer options and find the option Quick Settings Developer Tiles.

Toggle the switch next to Wireless Debugging to enable the shortcut in the quick settings panel.
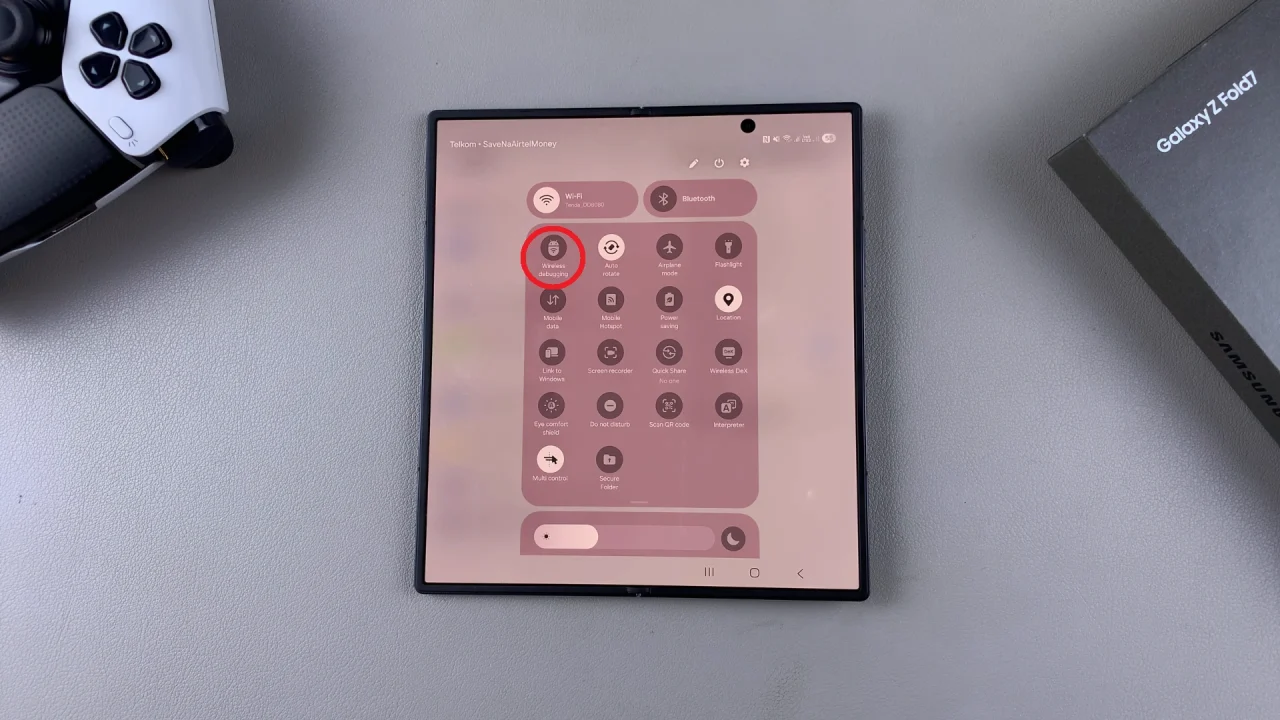
Swipe down twice from the top to reveal the Quick Settings tiles. Here, you’ll find the Wireless Debugging shortcut, which you can tap on to enable Wireless Debugging.
Remove Wireless Debugging Shortcut On Galaxy Z Fold 7
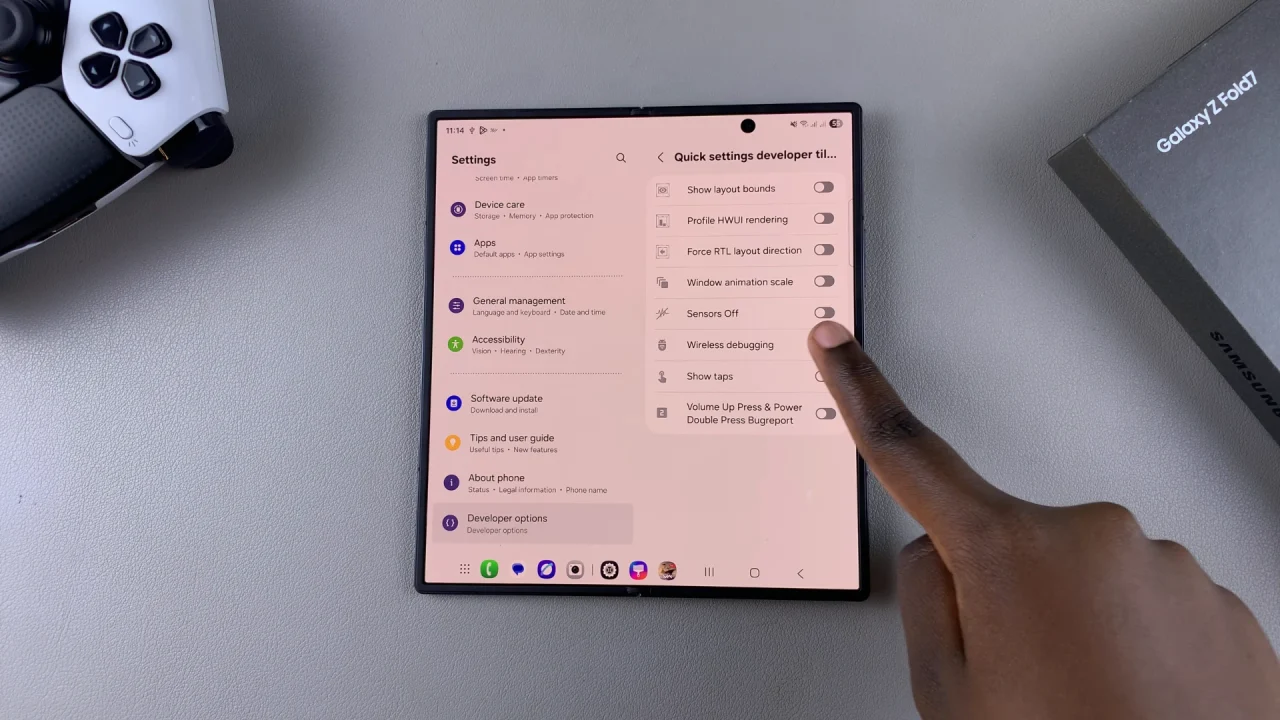
To remove the Wireless Debugging shortcut, toggle the switch next to Wireless Debugging to disable the shortcut in the quick settings panel.
Now, when you swipe down twice from the top to reveal the Quick Settings tiles, you’ll no longer find the Wireless Debugging shortcut.
Tips & Notes
Wireless debugging is found under Developer options in your settings. You must enable Developer mode first if you haven’t already.
Keeping the toggle in Quick Settings is useful if you frequently connect wirelessly for testing apps.
If you rarely use it, removing it will keep your Quick Settings panel uncluttered.

