In today’s fast-paced world, our smartphones have become an indispensable part of our lives, storing a wealth of personal and often sensitive information. Whether it’s for work, staying connected with loved ones, or managing our day-to-day activities, losing a smartphone can be distressing and inconvenient.
However, with the advanced features available on Samsung Galaxy devices running on the Android operating system, there are proactive steps you can take to increase the likelihood of a lost phone finding its way back to you. One such precautionary measure involves adding your contact information directly onto the lock screen of your Samsung Galaxy device.
This enables a helpful passerby or an individual who finds your lost phone to reach out to you promptly, ensuring the safe return of your device. In this detailed guide, we’ll walk you through the step-by-step process of how to add your contact information to the lock screen of your Samsung Galaxy Android smartphone.
Watch: How To Turn OFF Automatic Screen Brightness On Android Samsung Galaxy
To Add Contact Information On Android Lock Screen (Samsung Galaxy)
Firstly, open the “Settings” app on your Android device. You can usually find this app by swiping down from the top of the screen and tapping the gear-shaped icon or by finding it in your app drawer.
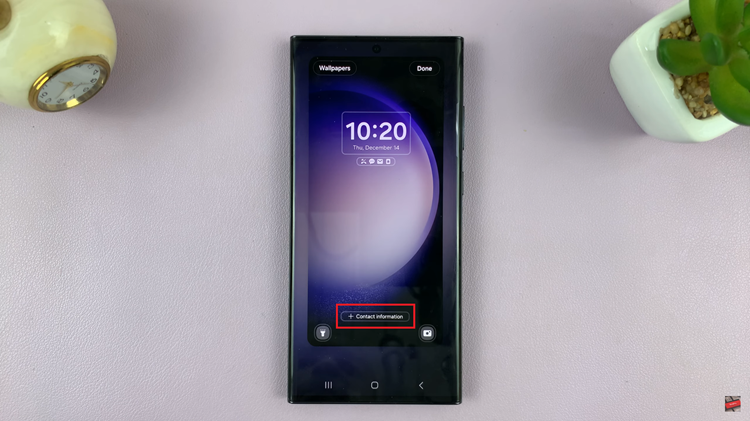
Following that, scroll down within the Settings menu and select “Lock Screen.” At this point, you should see all settings regarding your Samsung’s lock screen. At this moment, tap on the “Edit” option on the lock screen widget.

Subsequently, tap the “Contact Information” option. Now, type in your contact information in the provided text field. It might be your contact number, your email address, or home address. Once done, tap on “Done” to save the changes.
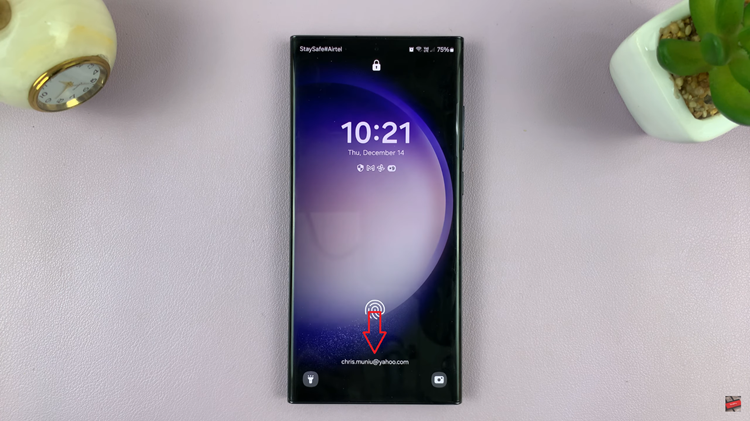
After saving the changes to your lock screen settings, it’s essential to verify whether the contact information appears as intended. Lock your device and wake it up to ensure the provided details are visible without requiring the phone to be unlocked.
In conclusion, adding contact information to your Android lock screen on a Samsung Galaxy device is a practical precautionary measure that can significantly increase the chances of your lost phone finding its way back to you. Always ensure the information displayed is accurate and includes a means for someone to contact you, such as an alternative phone number or email address.
Read: How To Turn ON Mobile Hotspot On Android 14 (Samsung Galaxy)

