If you have just bought a new MacBook Neo with the Apple Silicon chip (A18 Pro), you may encounter issues when launching some older software applications. The reason behind this is that most applications are built to function on Intel processors. As such, to enable the use of these programs on Apple Silicon, you need to install Rosetta 2.
Rosetta 2, developed by Apple ensures that any application designed to work on an Intel chip will work seamlessly on Apple Silicon. In other words, Rosetta 2 converts the instructions from the Intel-based software to those that work on your Mac computer.
Rather than asking all the developers of these applications to make changes to their apps, Rosetta 2 does everything for them. This article highlights how to install Rosetta 2 on MacBook Neo in simple steps.
Watch: How To Connect Magic Mouse To MacBook Neo
Install Rosetta 2 On MacBook Neo
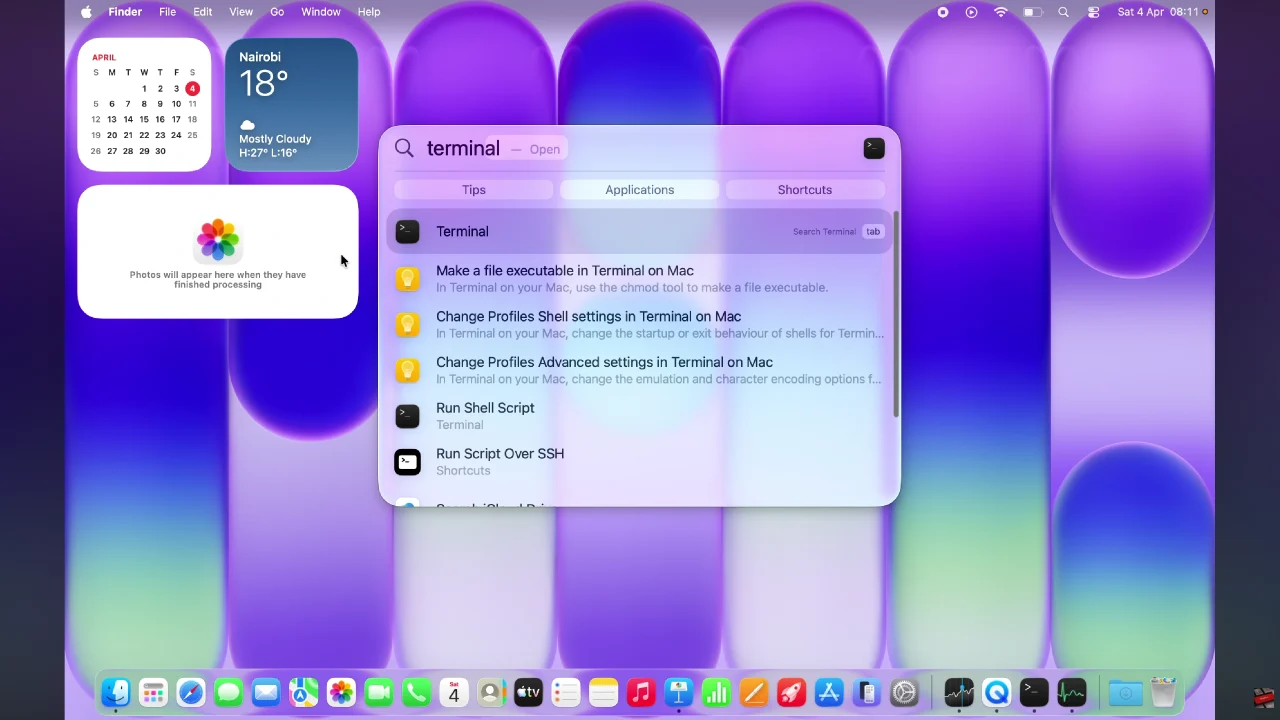
Begin by accessing the Spotlight feature on your MacBook Neo. Click on the Spotlight search icon in the top right corner and type in ‘Terminal‘ from the menu that appears.
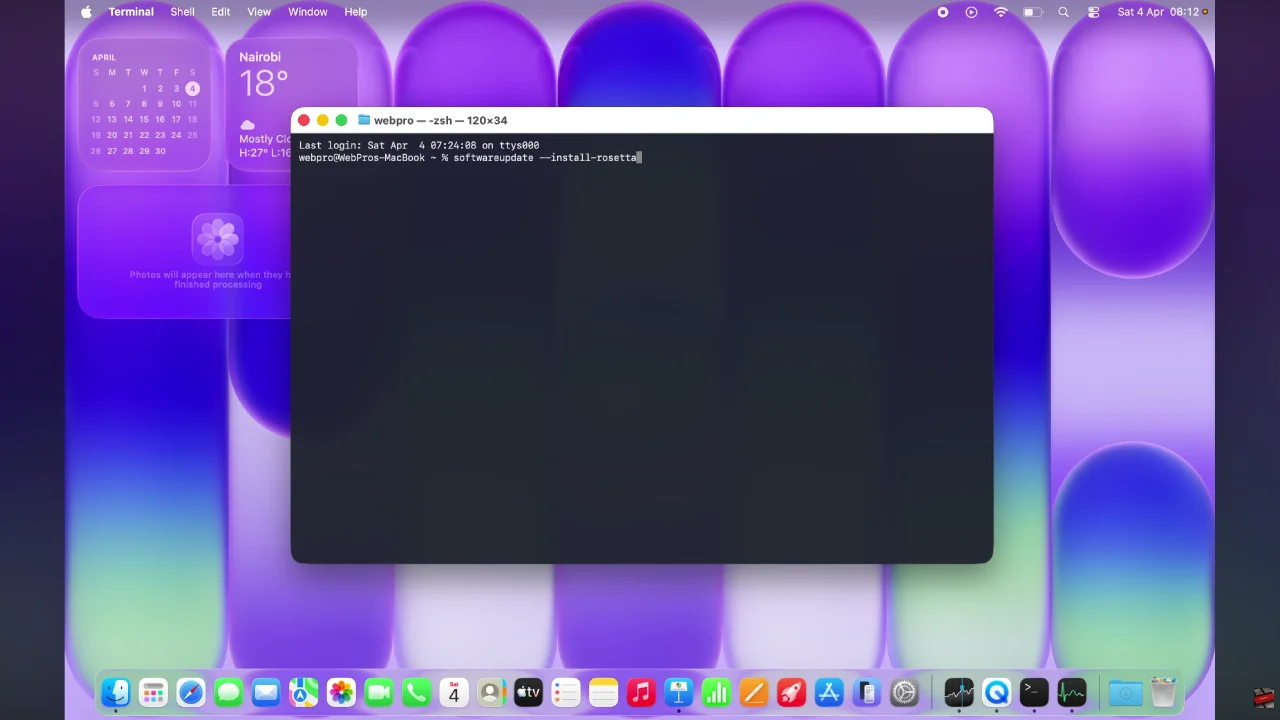
Following this, type in this command: softwareupdate –install-rosetta
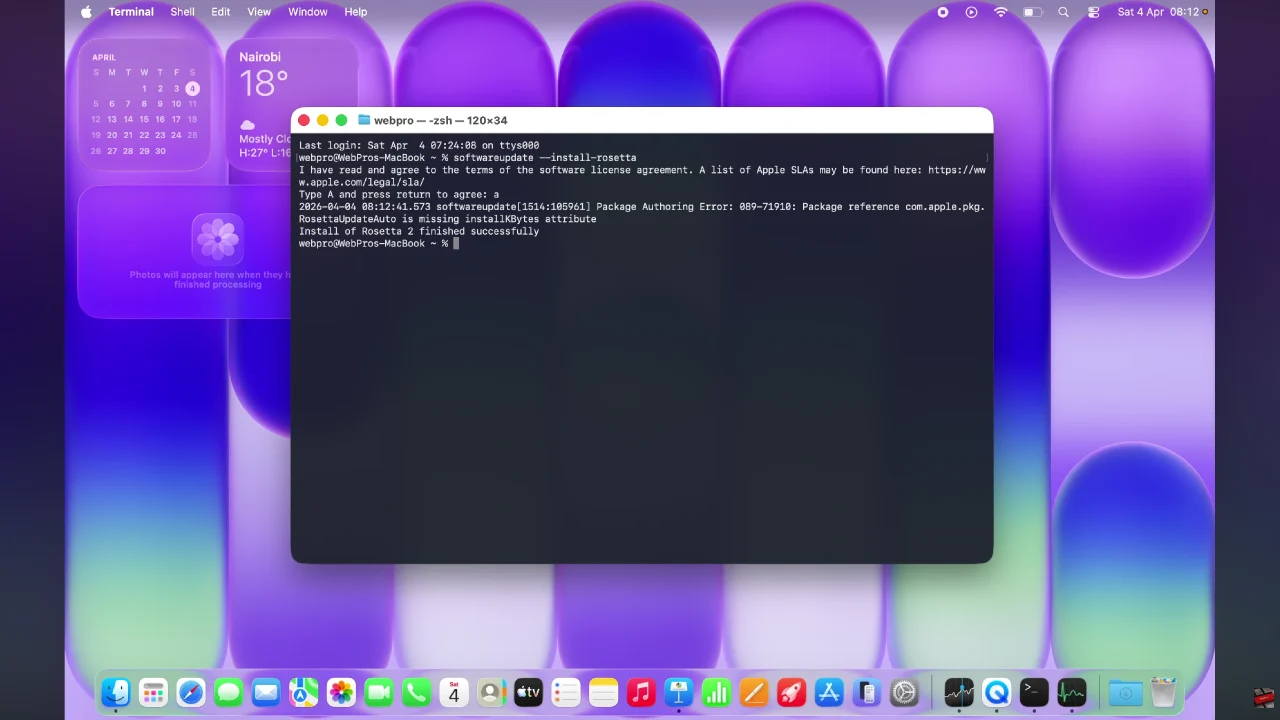
At this point, you’ll be prompted to confirm the process by reading the terms & conditions of the application. Simply type in letter ‘A‘ and press Enter (Return) to proceed.

Afterwards, allow the application to be installed on your MacBook Neo. Once done, you’ll see a notification informing you that the application has been installed. Now, you can easily this application on your MacBook.
By following the steps outlined in this guide, you can quickly install Rosetta 2 and enjoy a seamless experience when running apps that haven’t yet been optimized for Apple Silicon. Once installed, Rosetta 2 works automatically in the background, so you don’t have to worry about managing it manually.

