Typing on MacBook Neo does not necessarily require long hours of sitting behind your computer and typing. With voice typing (dictation), your voice will become the keyboard, thus increasing your productivity in a matter of seconds.
No matter whether you’re drafting an email message, working on a report or taking notes, MacBook Neo voice typing feature will help you type without even touching your keyboard. This article is aimed at explaining all the steps necessary for configuring and using voice typing on your MacBook Neo.
Here, we’ll discuss how to activate this feature, select your language preferences and make use of shortcut keys as well as some helpful hints about voice recognition.
Watch: How To Install Rosetta 2 On MacBook Neo
Use Voice Typing On MacBook Neo
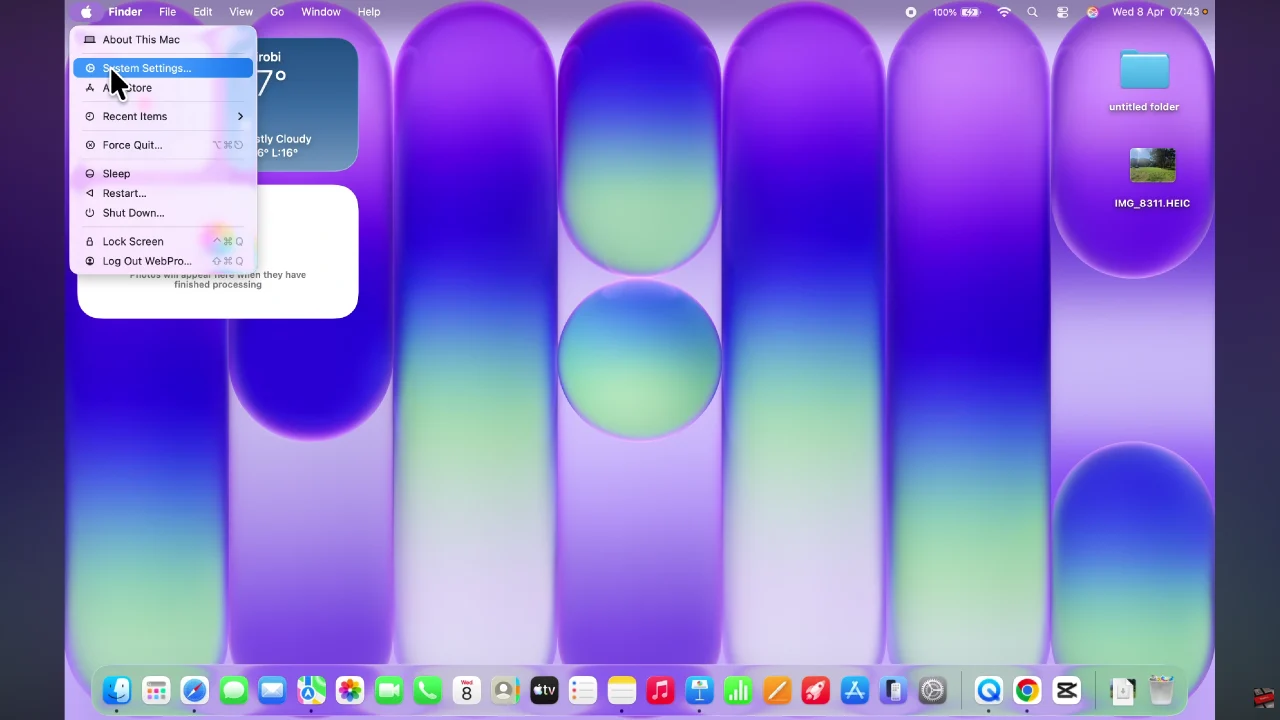
Begin by accessing the system settings on your MacBook Neo. Click on the Apple logo located in the top right corner and select ‘System Settings‘ from the menu that appears.
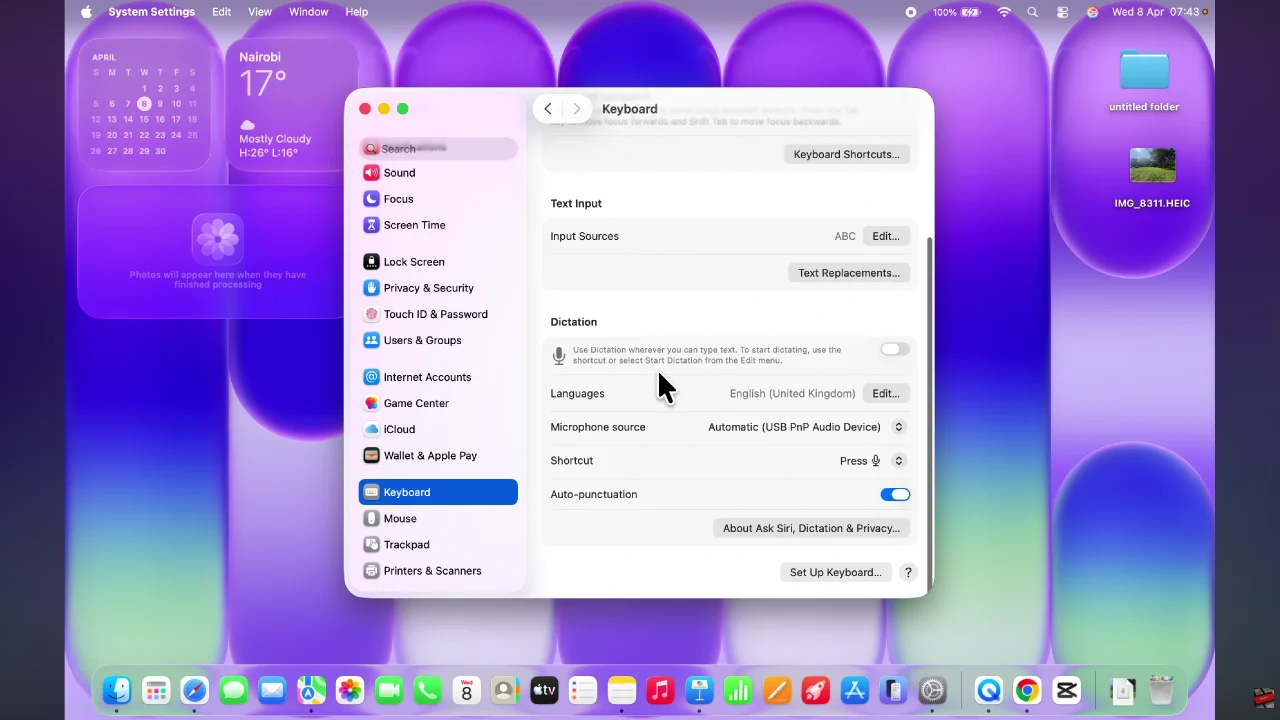
Following this, scroll through the settings and select ‘Keyboard‘. From here, scroll down, find the ‘Dictation‘ option and enable it. Click on ‘Enable‘ to confirm the changes.

Once enabled, you can customize the settings to suit your preferences. These might include; Languages, Microphone Input device, and much more.
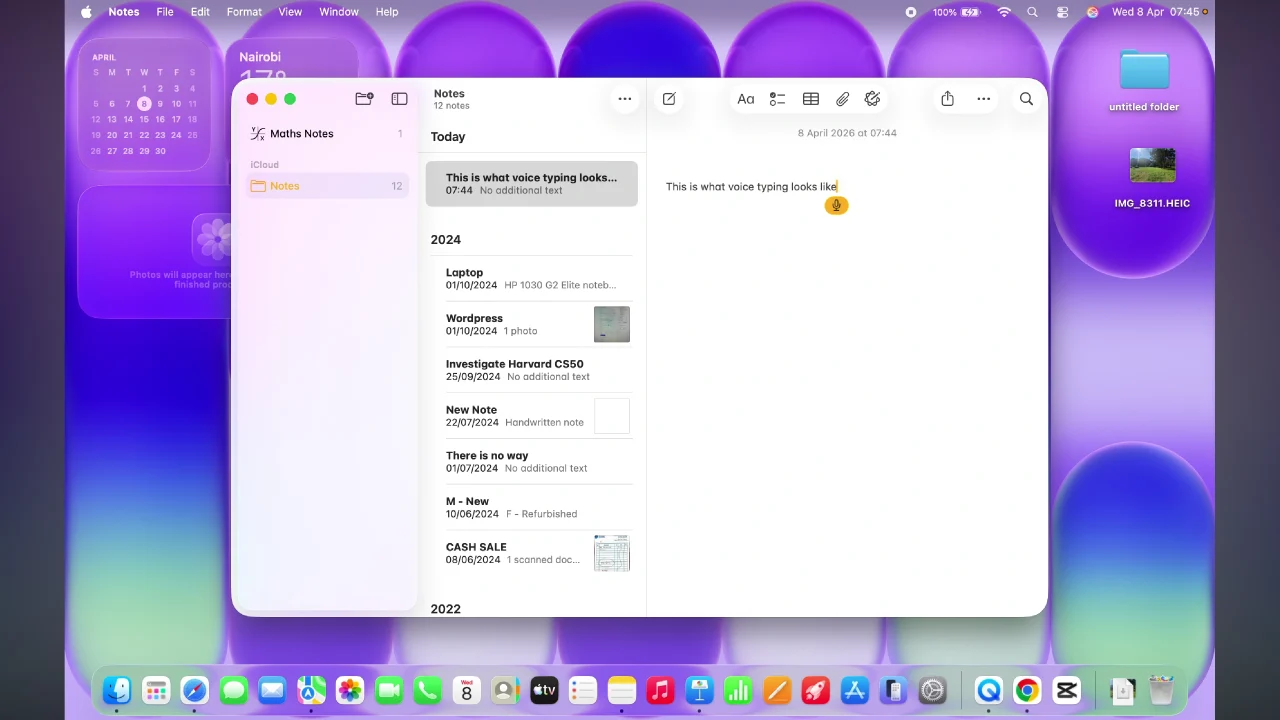
Afterwards, launch any application that requires voice typing and press the key that triggers voice typing. Now, speak into your microphone and whatever you say will be dictated on the text field.
In conclusion, voice typing on your MacBook Neo is a game-changer for anyone looking to save time and work more efficiently. By enabling dictation, customizing settings, and following a few simple tips, you can type hands-free, improve accuracy, and make your workflow smoother than ever.

