Video:AirPods Pro 3: How To Unpair From Windows PC / Laptop
Removing AirPods Pro 3 from a Windows PC or laptop helps keep your Bluetooth connections organized and ensures smoother performance when switching between devices. Many users connect their AirPods to Windows for meetings, music, or videos, but eventually need to unpair them for troubleshooting or privacy reasons. Managing this connection properly prevents pairing conflicts and maintains a clutter-free Bluetooth list on your computer.
This simple guide on how to unpair AirPods Pro 3 from Windows PC or laptop provides a clear introduction to what you need before disconnecting. Moreover, it highlights why proper unpairing supports better device performance and connectivity across platforms. Before moving to another device or resetting your AirPods, take a moment to understand how this process keeps your system efficient and your connections clean.
Watch:Samsung Galaxy A17 5G: How To Connect AirPods
Unpair AirPods Pro 3 From Windows PC / Laptop
Open Bluetooth Settings
Click on the Start menu and select Settings to open your computer’s main settings panel.
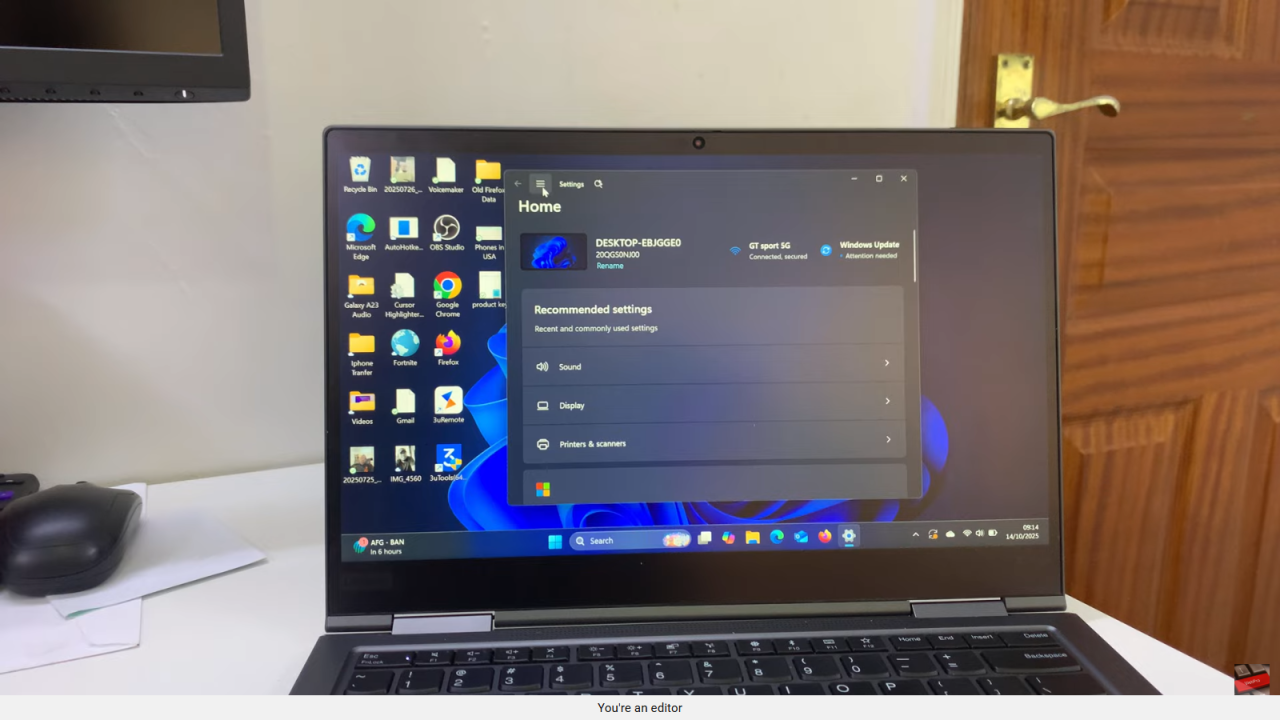
Access Bluetooth & Devices
In the Settings menu, choose Bluetooth & Devices to view all connected and paired Bluetooth devices.

View More Devices
If you don’t see your AirPods immediately, click View More Devices to expand the full list of paired items.

Locate AirPods Pro 3
Find your AirPods Pro 3 in the list of Bluetooth devices.
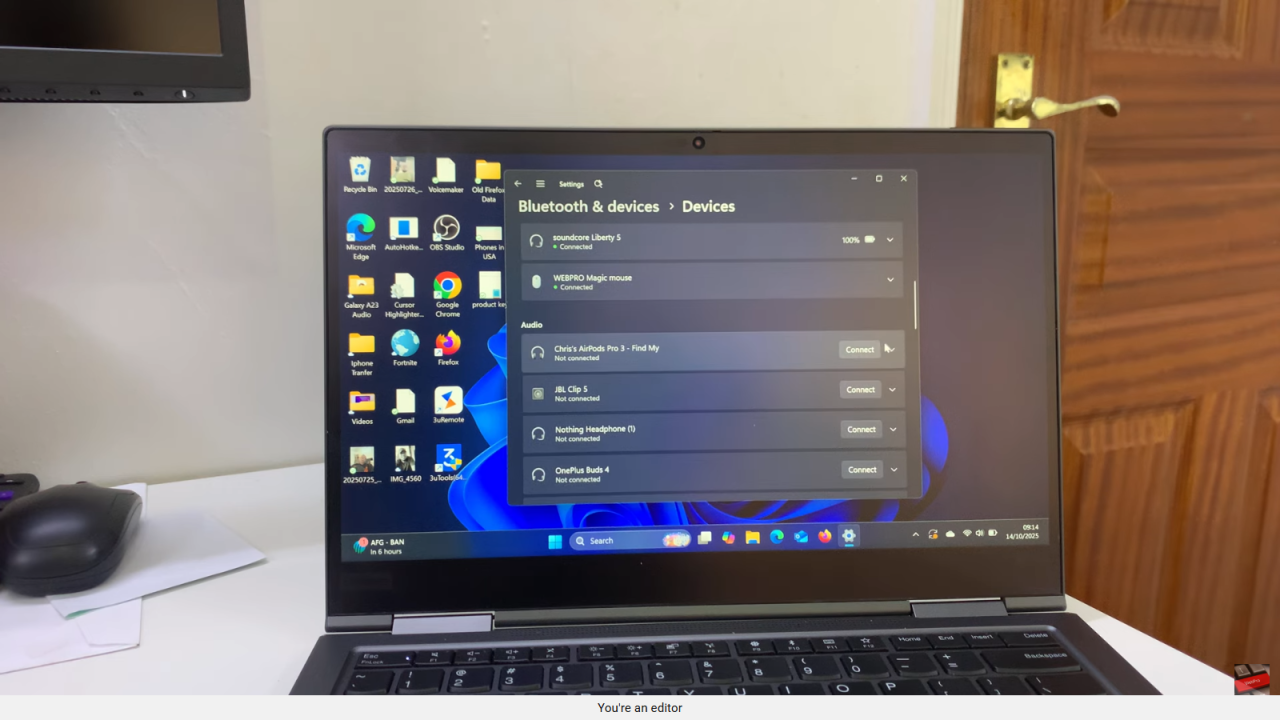
Remove the AirPods
Click the downward arrow next to the AirPods name, then select Remove to unpair them from your computer.

Confirm Removal
Wait a few moments while Windows removes the AirPods. Once done, they will be permanently unpaired.


