
Video:Airpods Pro 3: How To Turn Automatic Ear Detection ON / OFF
Managing Automatic Ear Detection on AirPods Pro 3 gives you full control over how your earbuds respond when placed in or removed from your ears. This small but impactful feature enhances your listening experience by pausing or resuming playback automatically, making your AirPods feel even more intuitive. As wireless audio technology advances, mastering this simple adjustment ensures your AirPods perform exactly how you prefer.
In addition, turning Automatic Ear Detection ON or OFF on AirPods Pro 3 allows you to personalize your experience for different situations. Whether you’re sharing one earbud, multitasking, or just prefer manual control, this setting gives you the flexibility to choose. Understanding and managing it ensures your AirPods always work in sync with your lifestyle and listening habits.
Watch:Airpods Pro 3: How To Rename
Turn Automatic Ear Detection ON / OFF On Airpods Pro 3
Connect Your AirPods Pro 3
Open the lid of your AirPods Pro 3 case to connect them to your iPhone. Ensure the connection is active before proceeding to the next part.
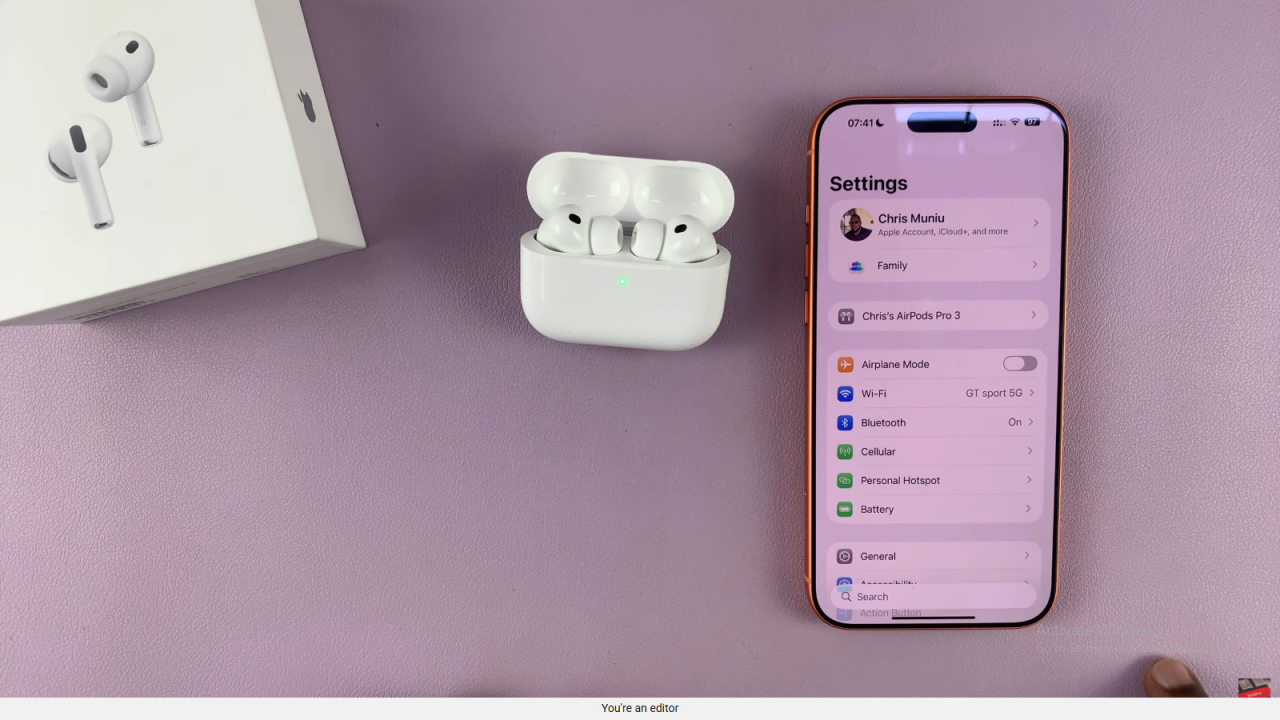
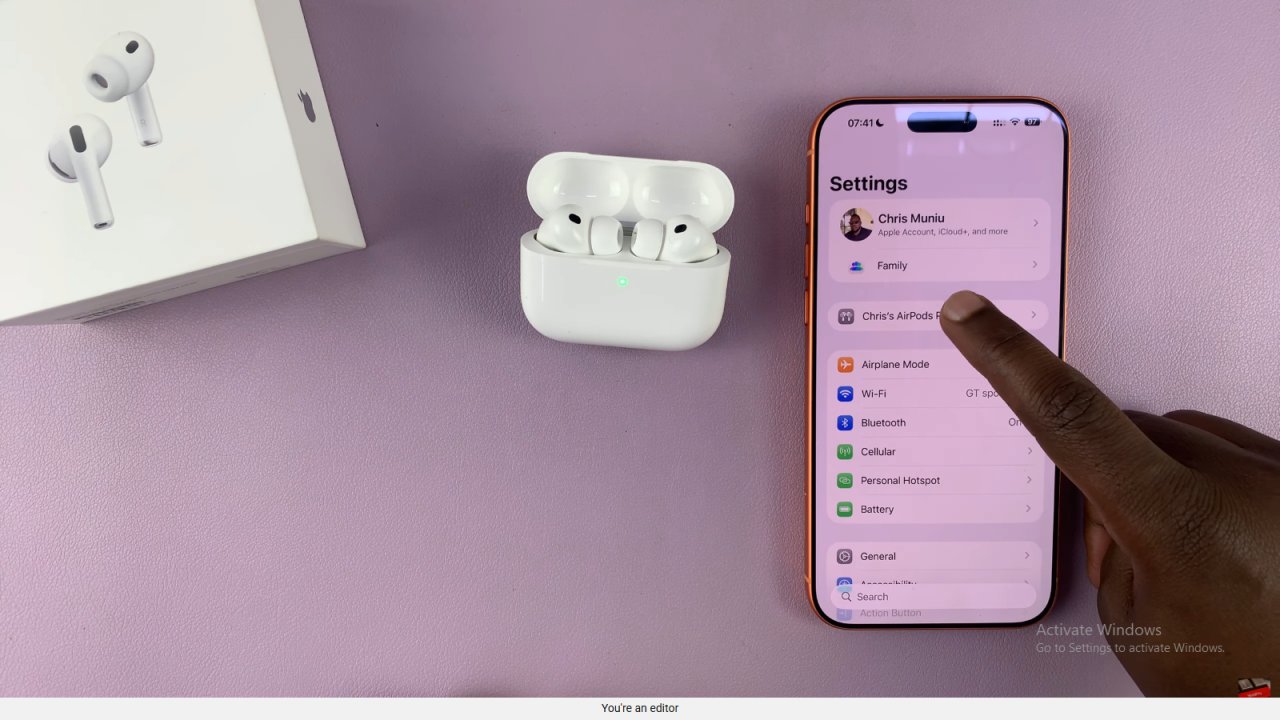
Access AirPods Settings
Go to the Settings app on your iPhone. Tap the name of your AirPods Pro 3 displayed near the top of the screen.
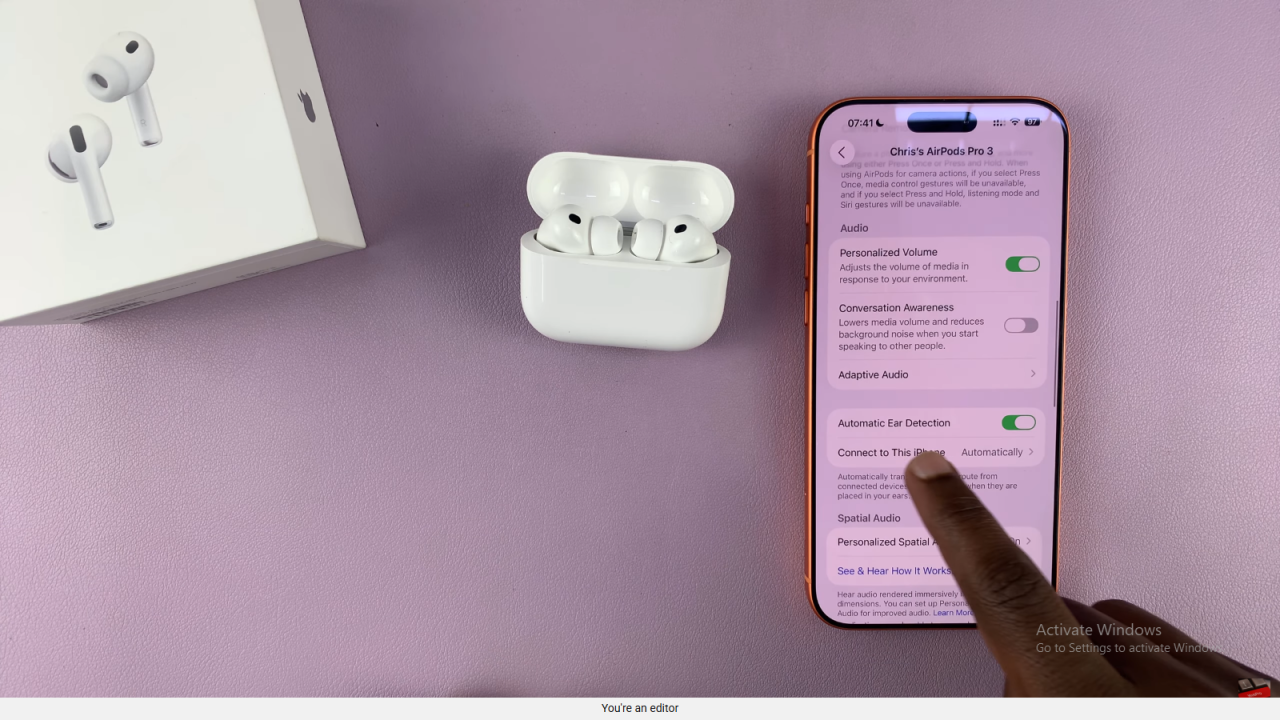
Locate Automatic Ear Detection
Scroll down within the AirPods settings until you find the option labeled “Automatic Ear Detection.”
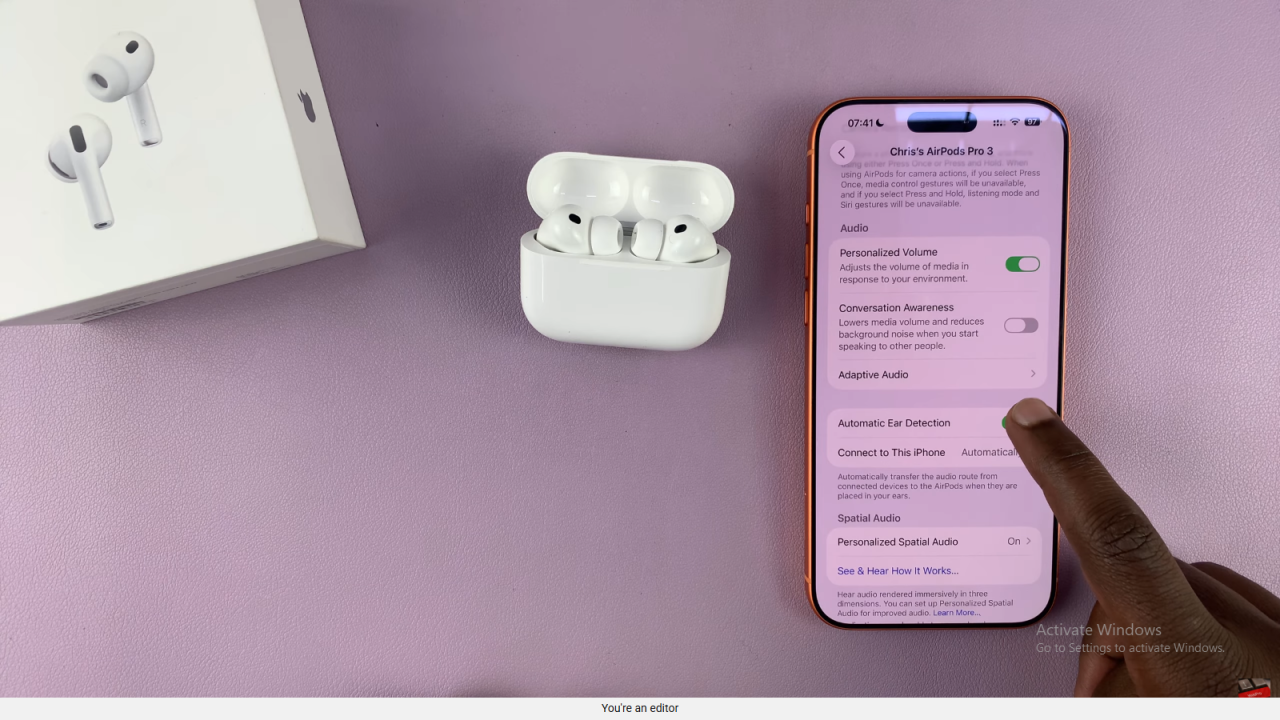
Turn the Feature On or Off
Use the toggle switch to enable or disable Automatic Ear Detection. Turning it on allows your AirPods to pause playback when removed and resume when worn again.
Confirm Your Changes
Once you’ve made your choice, your AirPods will immediately respond according to your selected setting. You can test it by removing and reinserting one earbud.

