Airdrop revolutionizes how you share files between Apple devices, offering a seamless, wireless solution that bypasses the need for cables or third-party apps. Whether you’re transferring photos, documents, or other content, mastering Airdrop on your iPad enhances productivity and convenience.
Airdrop leverages Bluetooth and Wi-Fi technology to create a direct, secure connection between nearby Apple devices. This direct connection ensures fast file transfers while maintaining your privacy through encryption.
This guide will walk you through the steps to effectively enable and disable Airdrop on your iPad, empowering you to control file-sharing settings with ease.
Watch: How To Enable Message Notifications On iPad
Turn ON & OFF Airdrop On iPad
Control Center
To manage Airdrop settings on your iPad, start by accessing the Control Center. Depending on your iPad model, you may swipe down from the top right corner or swipe up from the bottom of the screen. Look for the Airdrop icon within the Control Center, which is represented by concentric blue circles.
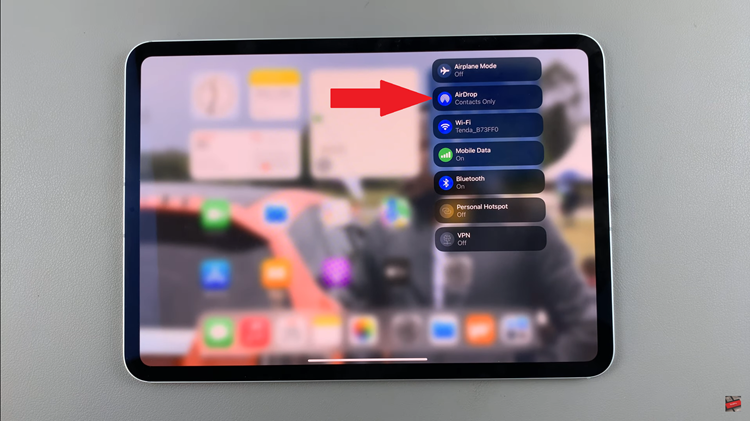
Once you’ve located the Airdrop icon, tap on it to access its settings. Here, you have several options to choose from, including “Receiving Off,” “Contacts Only,” and “Everyone.” These settings determine who can see your device and send you files via Airdrop. Select the option that suits your current preference or privacy needs.
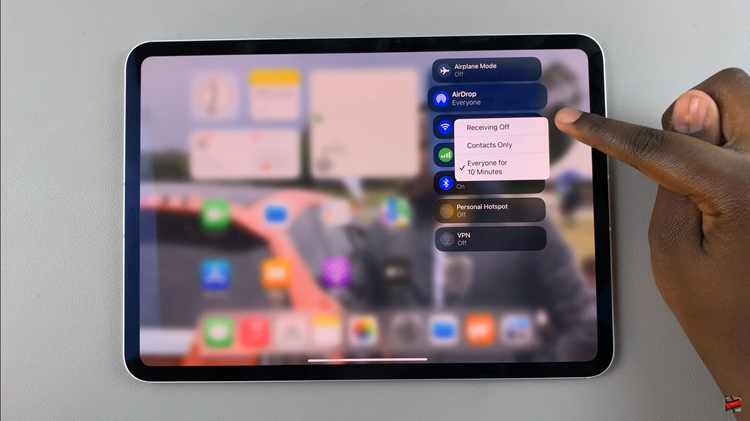
After choosing your preferred Airdrop setting, you can tap on the Airdrop icon again to apply and enable Airdrop for the selected option. If you decide to disable Airdrop completely, simply tap on the Airdrop icon once more and choose “Receiving Off.” This will turn off Airdrop until you choose to enable it again using the same steps.
Using Settings
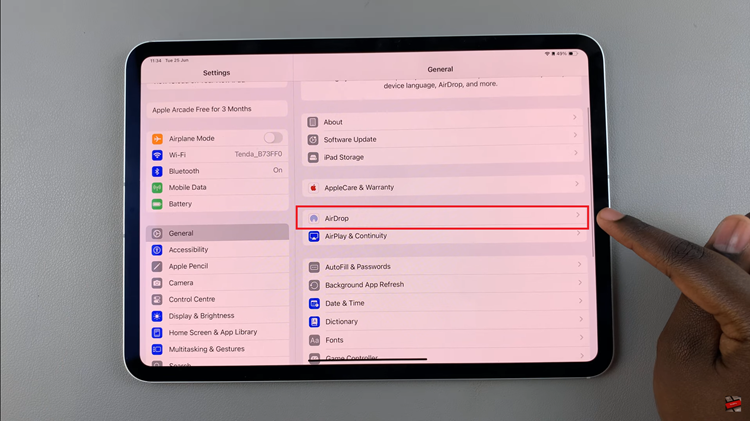
First, navigate to the home screen of your iPad and tap on the Settings icon. Then, scroll down the left-hand menu until you find the General option. Tap on it to proceed. Within the General settings, locate and tap on “Airdrop”.
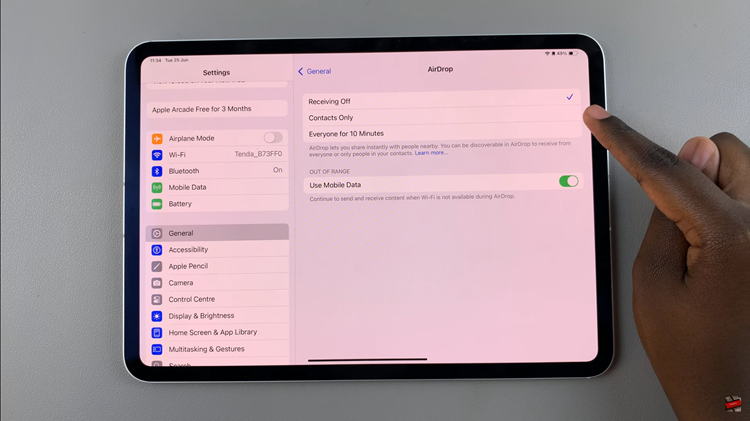
At this point, you’ll see options like “Receiving Off,” “Contacts Only,” and “Everyone.” Tap on your preferred setting (“Contacts Only” or “Everyone”) to activate Airdrop. Your choice will be immediately applied.
By following these steps and tips, you can effectively manage Airdrop settings on your iPad, ensuring seamless and secure file sharing whenever you need it.

